Restoring a WWII Vintage Lee-Enfield Rifle – Part 3 (Bayonet)
March 29, 2014 5 Comments
I bought this WWII vintage Enfield Bayonet to go with the rifle, because… well… who doesn’t want a bayonet? This one is date stamped 1943, so it was made three years after the rifle, but it’s period correct and close enough. Besides, it was never used and still caked in 70 year old cosmoline. As you can see below, while the bayonet was in pristine condition, the scabbard looked pretty rough.
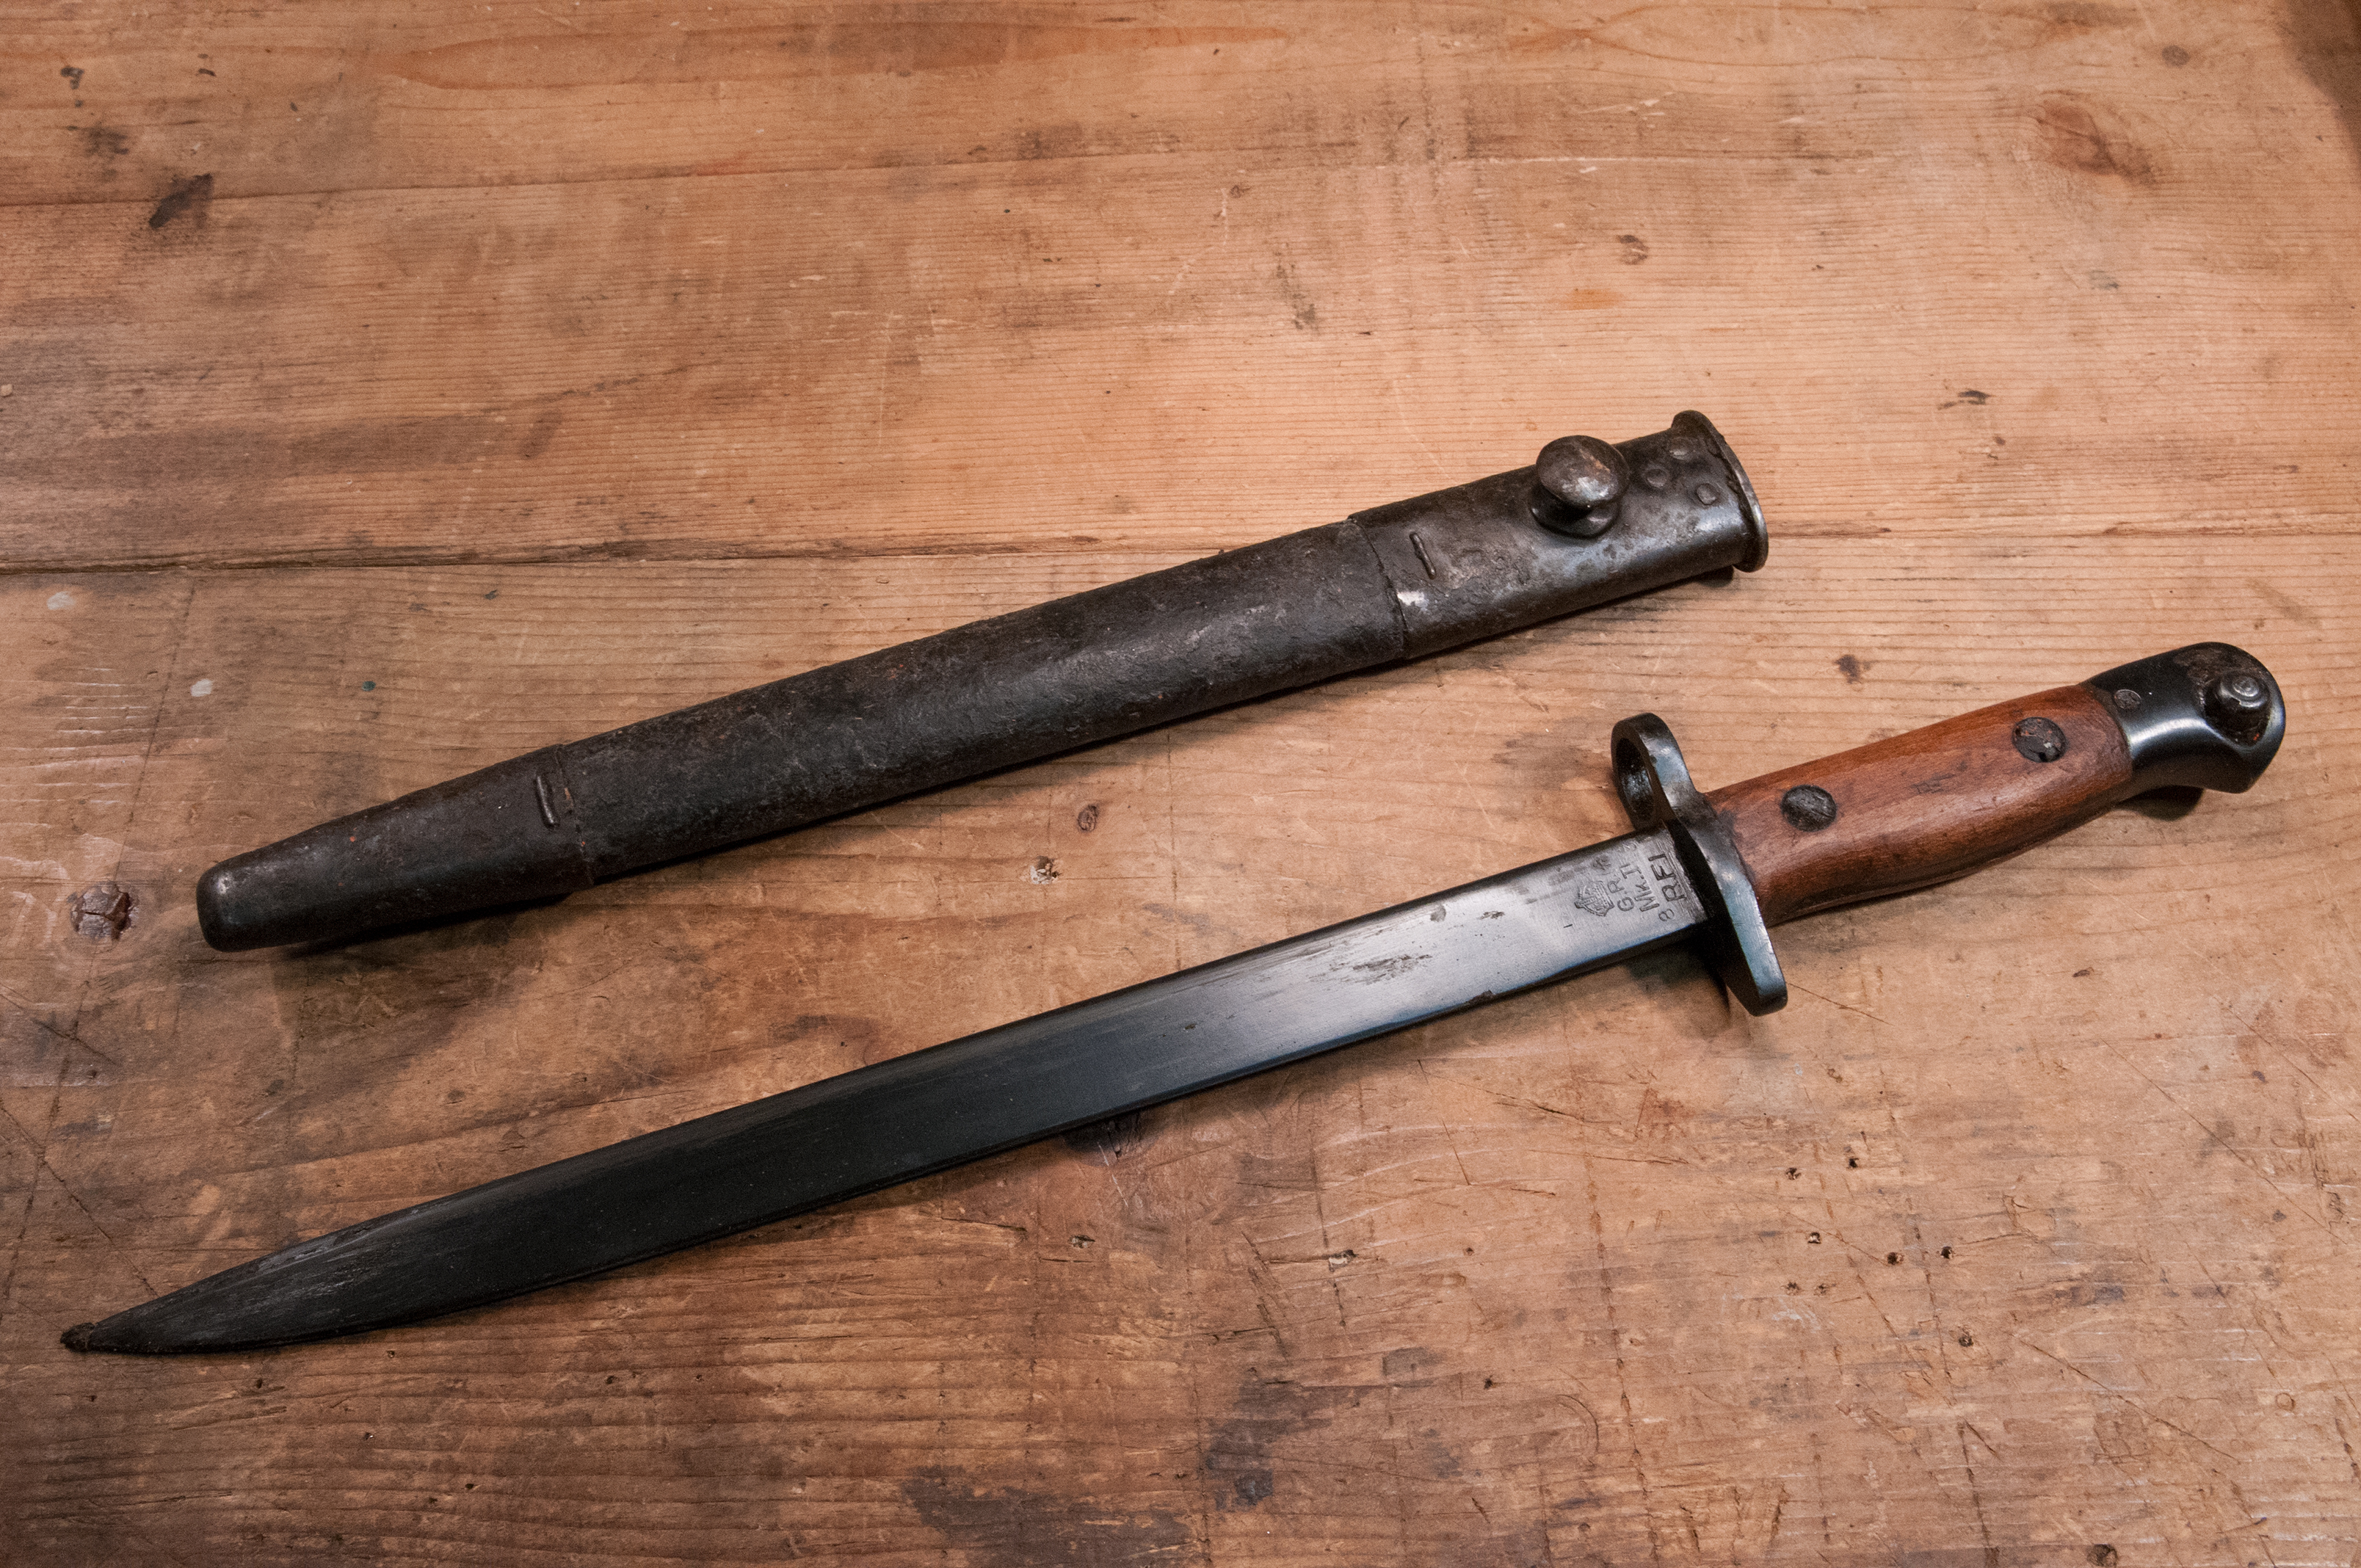
Enfield Bayonet, c. 1943 ~ Before cleaning
As I’m prone to do, I researched how best to clean leather scabbards, and of course came up with a whole lot of opinions that varied considerably. In the end, I decided to use saddle soap. The scabbard is 70 years old and will never again see a hard life, so I don’t think saddle soap is going to do it much harm.
Starting with the bayonet itself, I used mineral spirits with a cotton rag and toothbrush to clean the cosmoline off the metal surfaces. Using a non-abrasive brush ensured I didn’t scratch the bluing, which is absolutely perfect. The cosmoline melted right away and I was quickly rewarded with a stunning mint condition WWII vintage bayonet. If the wooden scales ever had any finish on them, it was long gone, so after everything was dry and wiped clean, I rubbed them down with some of the linseed oil finish I’ve been using on the stock. The rest of the metal surfaces got a wipe with Kramer’s Best, which is a linseed oil, turpentine, and vinegar based solution that is an outstanding wood and metal conditioner.

After cleaning and conditioning
The scabbard required some additional care since most of it is comprised of hard leather. I cleaned the metal surfaces first, removing the cosmoline and leaving the natural patina of the metal. Then I went to work on the leather surface itself using the saddle soap. It was a very slow process with little apparent progress at first. After a half dozen or so cycles of applying it, wiping it off, buffing it out, I felt like I had reached a point of diminishing returns. At this point the leather was sufficiently clean, but very dull in appearance. So I went out on a limb and rubbed it down with shoe crème (not shoe polish). The shoe crème has always been recommended to me by the place that sells Allen Edmonds. It’s basically a leather conditioner with some black dye. It has no wax so it lends itself well to subsequent treatment. I also doesn’t shine like wax, which is perfect in this case.
The result, which you can see in the image above as well as below, is pretty remarkable. It’s hard to see in the photos, but the leather looks like it’s brand new. Yours truly is a happy camper, and I’m looking forward to seeing my boys’ reaction to the transformation.
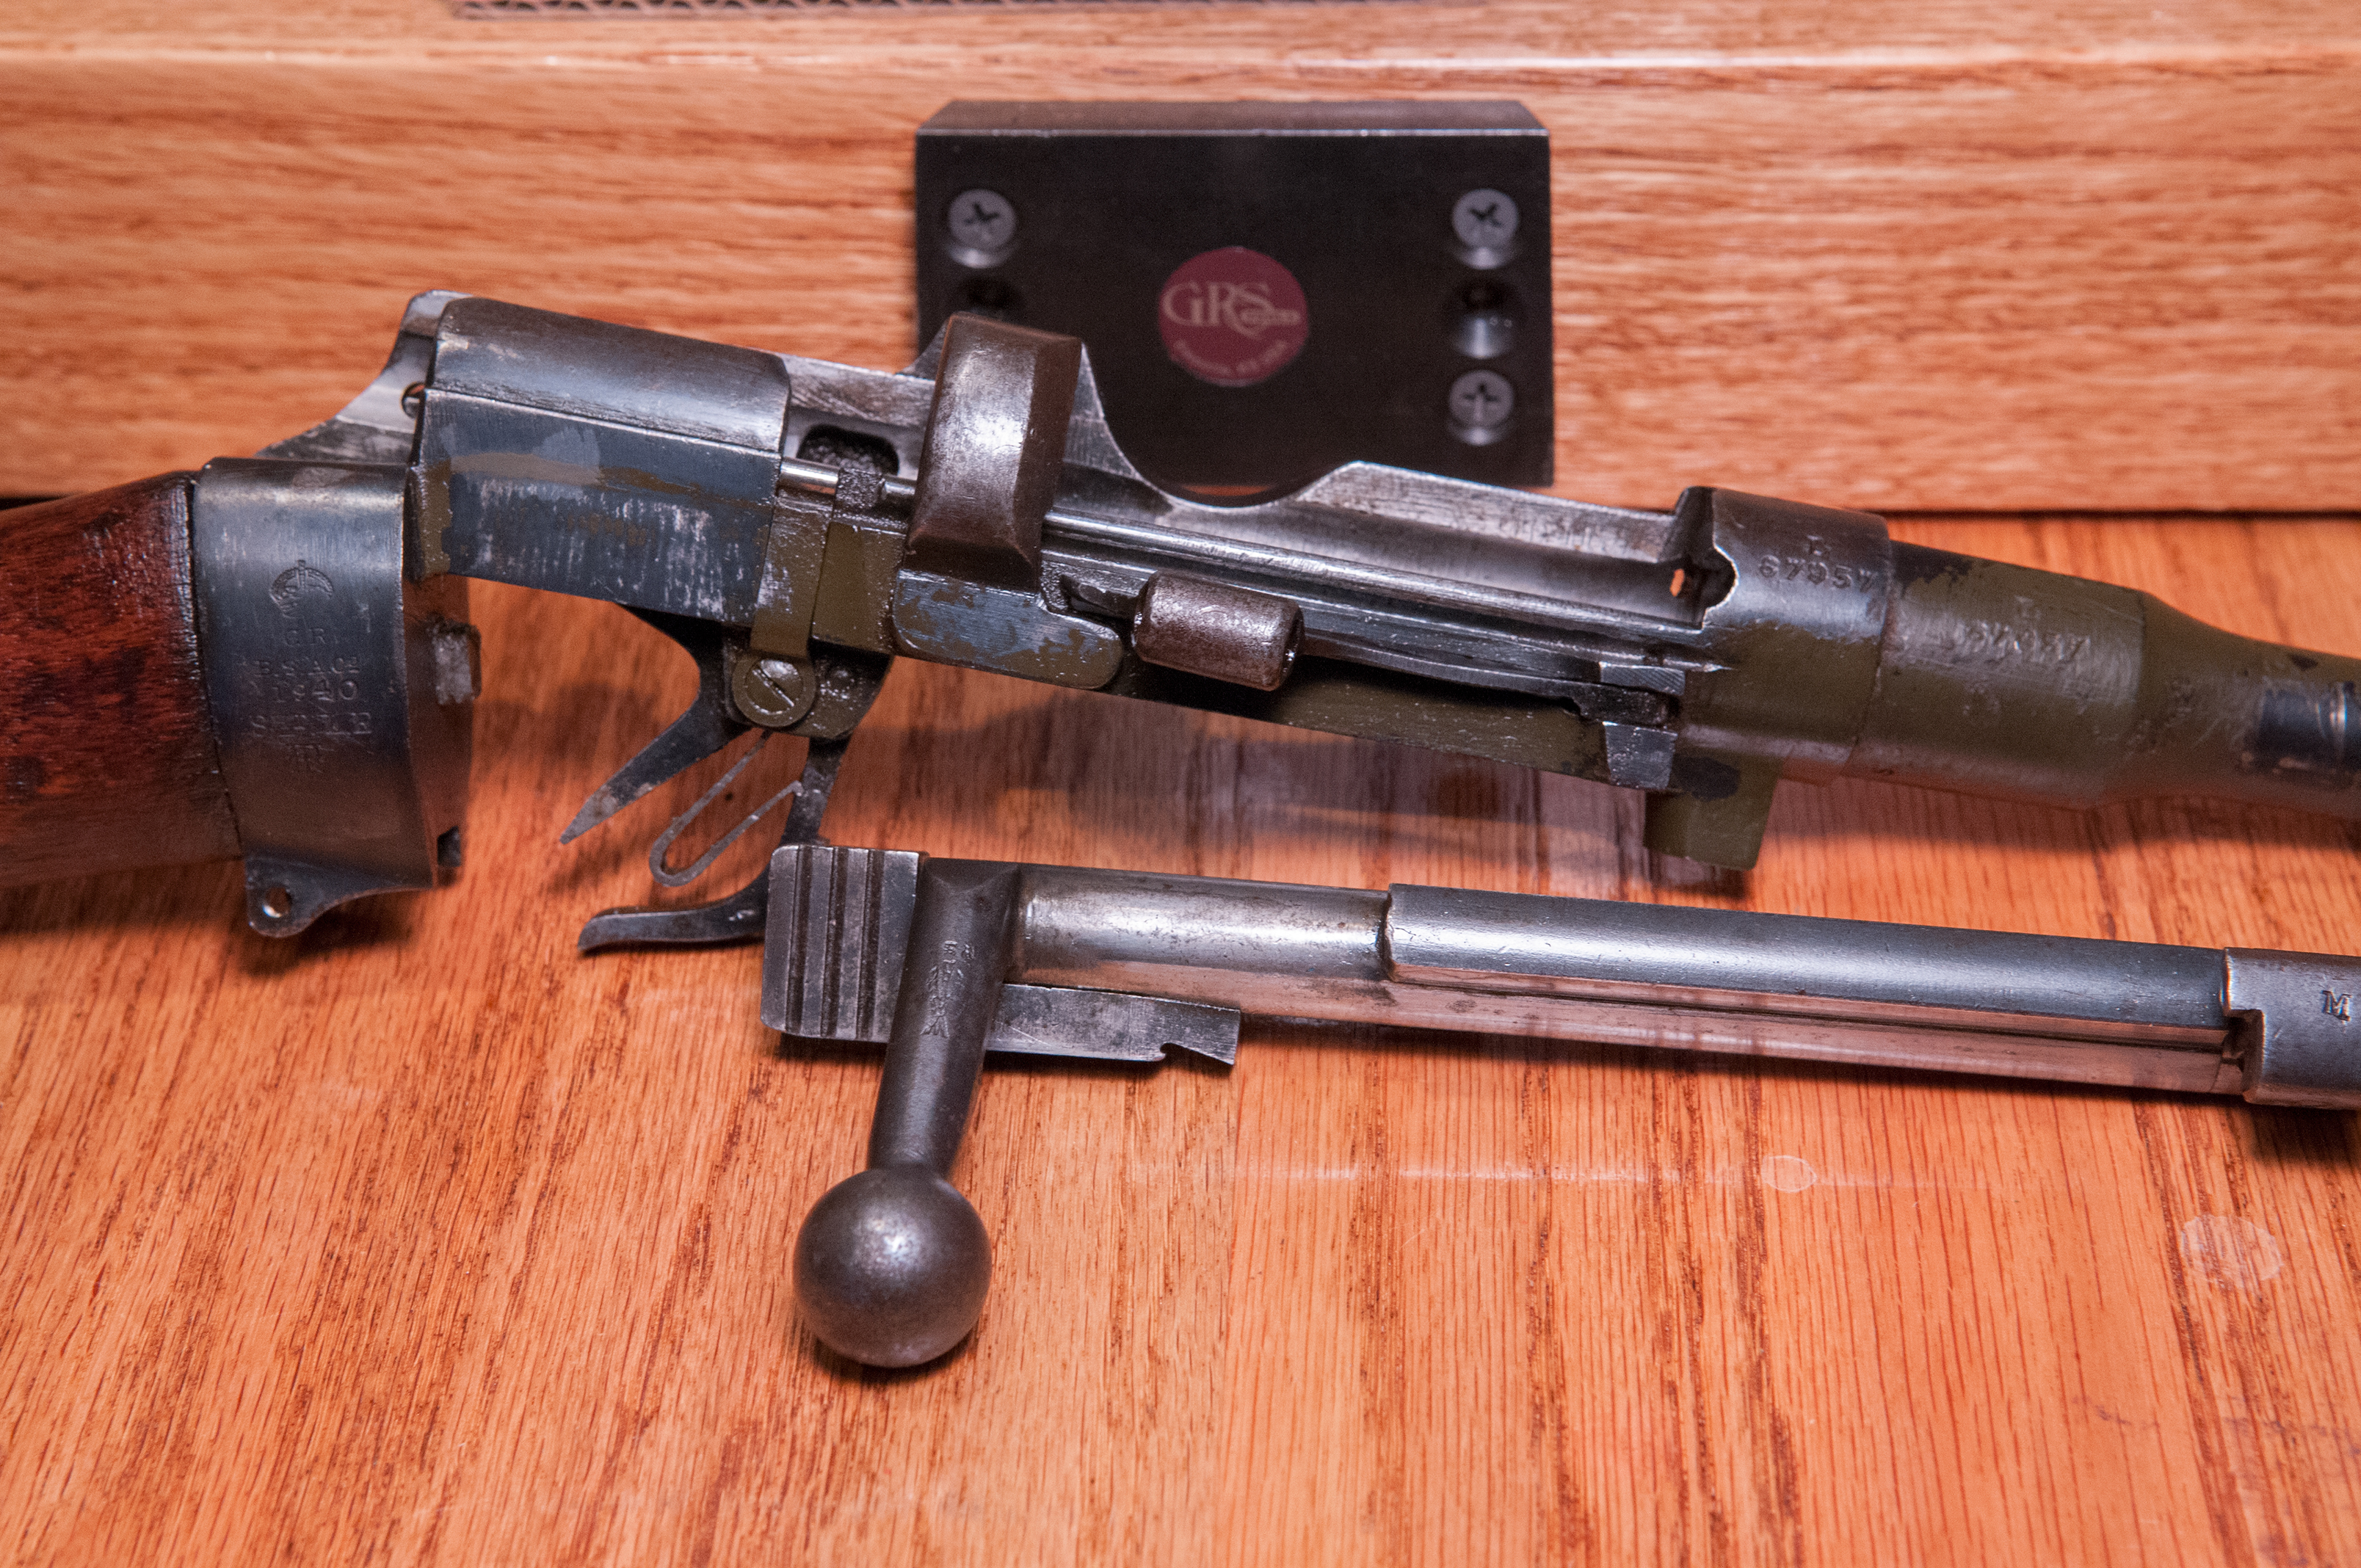
I’m cycling through the daily application of oil on the rest of the rifle’s furniture, and in fact think today is probably the last one. I may just go ahead and reassemble the whole thing tomorrow and make sure everything fits properly. I only wish I’d done a better job of labeling all those parts on my work table.
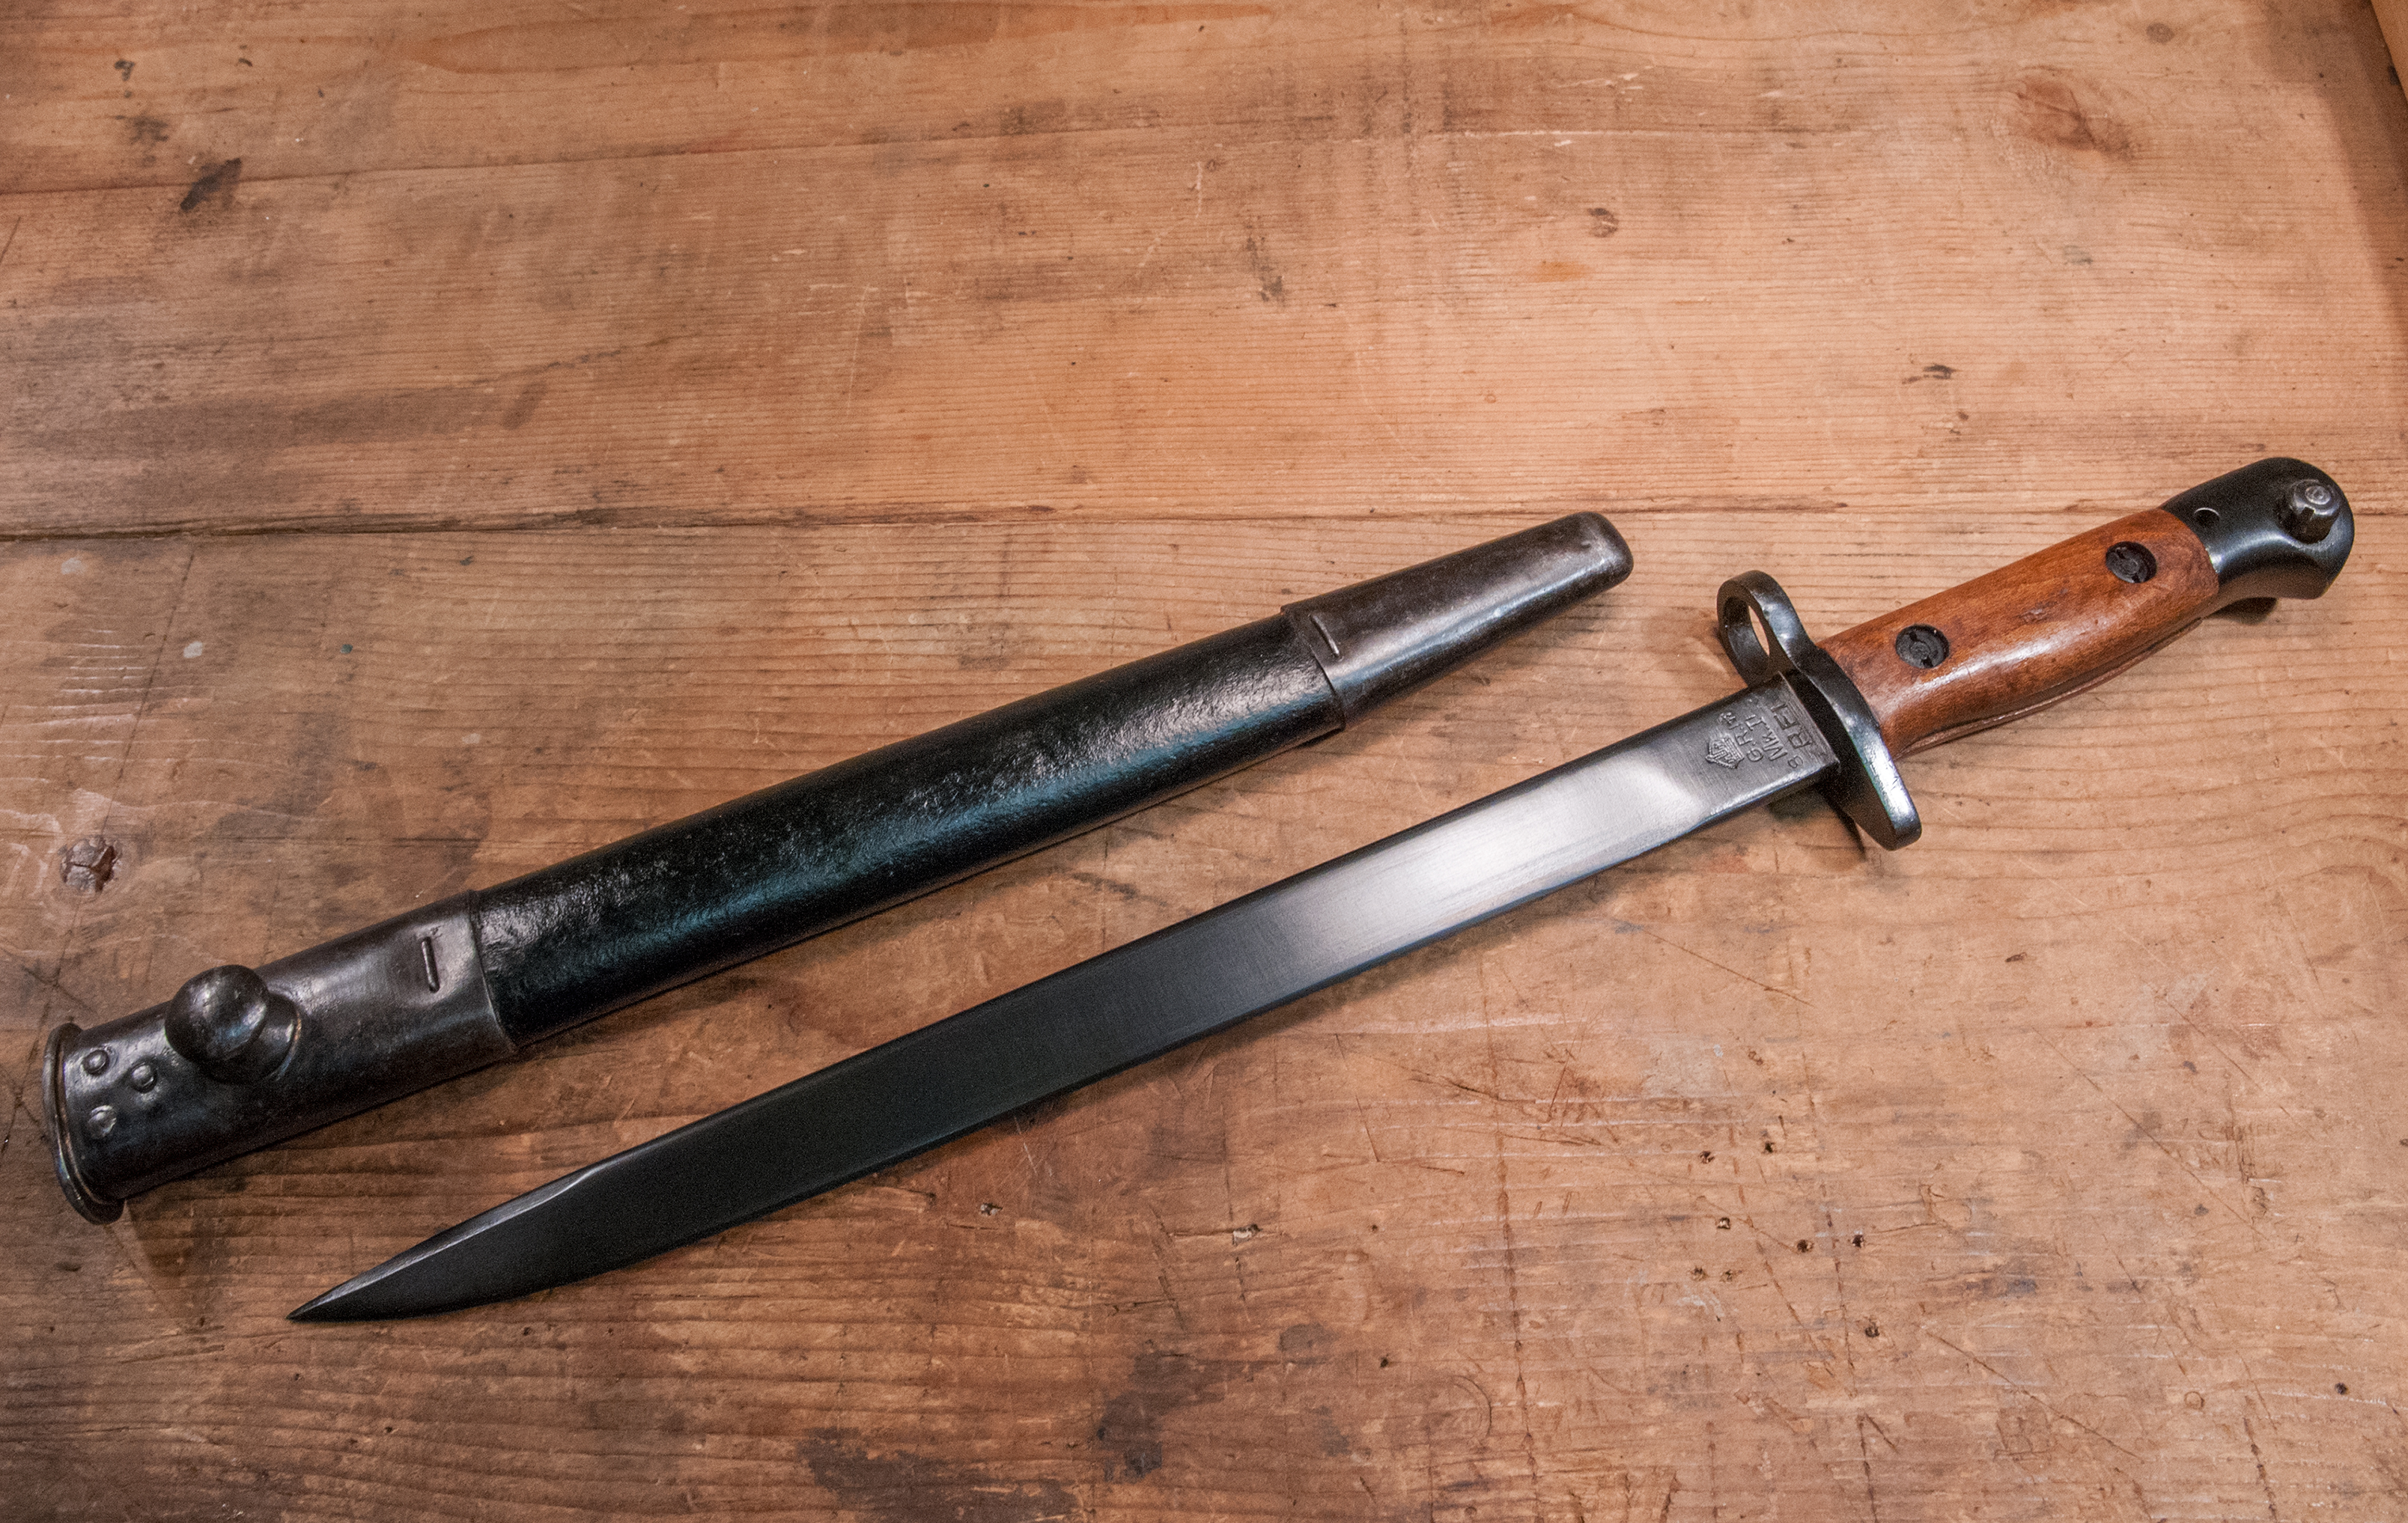
Bayonet and Scabbard completed
***