Rev-O-Noc Renewal

Rev-O-Noc 5C in pretty rough condition

I can count on one hand the number of planes I’ve refinished (vs. restored) over the years, but this Rev-O-Noc 5C jack plane had some issues that made an anti-rust dip and repainting the best course of action.

Disassembled for assessment

The entire body was a rustbucket with very little japanning remaining. The lever cap fortunately looked worse than it actually was, and while the cap iron was salvageable, the Rev-O-Noc iron had some pretty deep pitting on the business end. While I was able to sharpen through that, there was something off with the temper of the blade that I didn’t like, so I added a Vaughan & Bushnell iron I had on hand that’s better suited for use. The break in the tote was clean, so I epoxied it back together and then spent the better part of a week refinishing it to match the knob. The repair turned out really nice and is completely invisible.

Repaired Tote came out incredibly nice

HSB Rev-O-Noc was a store brand from Hibbard, Spencer, Bartlett & Co., a Chicago hardware dealership that formed in 1882, but whose origin dates back to at least 1855 in the form of Tuttle, Hibbard & Co. In 1932, the company introduced a new line of hand tools under the brand name “True Value” and by 1948, Hibbard’s annual sales reached nearly $30 million. Business slowed and profits shrunk, however, as new hardware cooperatives began to bypass traditional wholesalers. In 1962, the company’s owners sold both the hardware operations and the “True Value” brand to John Cotter for $2.5 million. Yes, that’s the True Value brand we know today.

Also interesting, the name Revonoc is the reverse spelling of Conover. Conover was the name of an officer of the company, and apparently had a separate hardware company prior to joining Hibbard, Spencer, Bartlett & Co. They used this backwards spelling of his name for their brand of planes sold by HS&B from about 1920-1940. They were made at times by both Stanley and Sargent, but this one is clearly Stanley made based on the casting, frog, and hardware.

As far as I can tell, this plane likely falls somewhere closer to 1920 given the short knob and small adjustment nut. Of course, it’s also possible it’s an earlier plane and the Revonoc blade was a later replacement. I just don’t know.

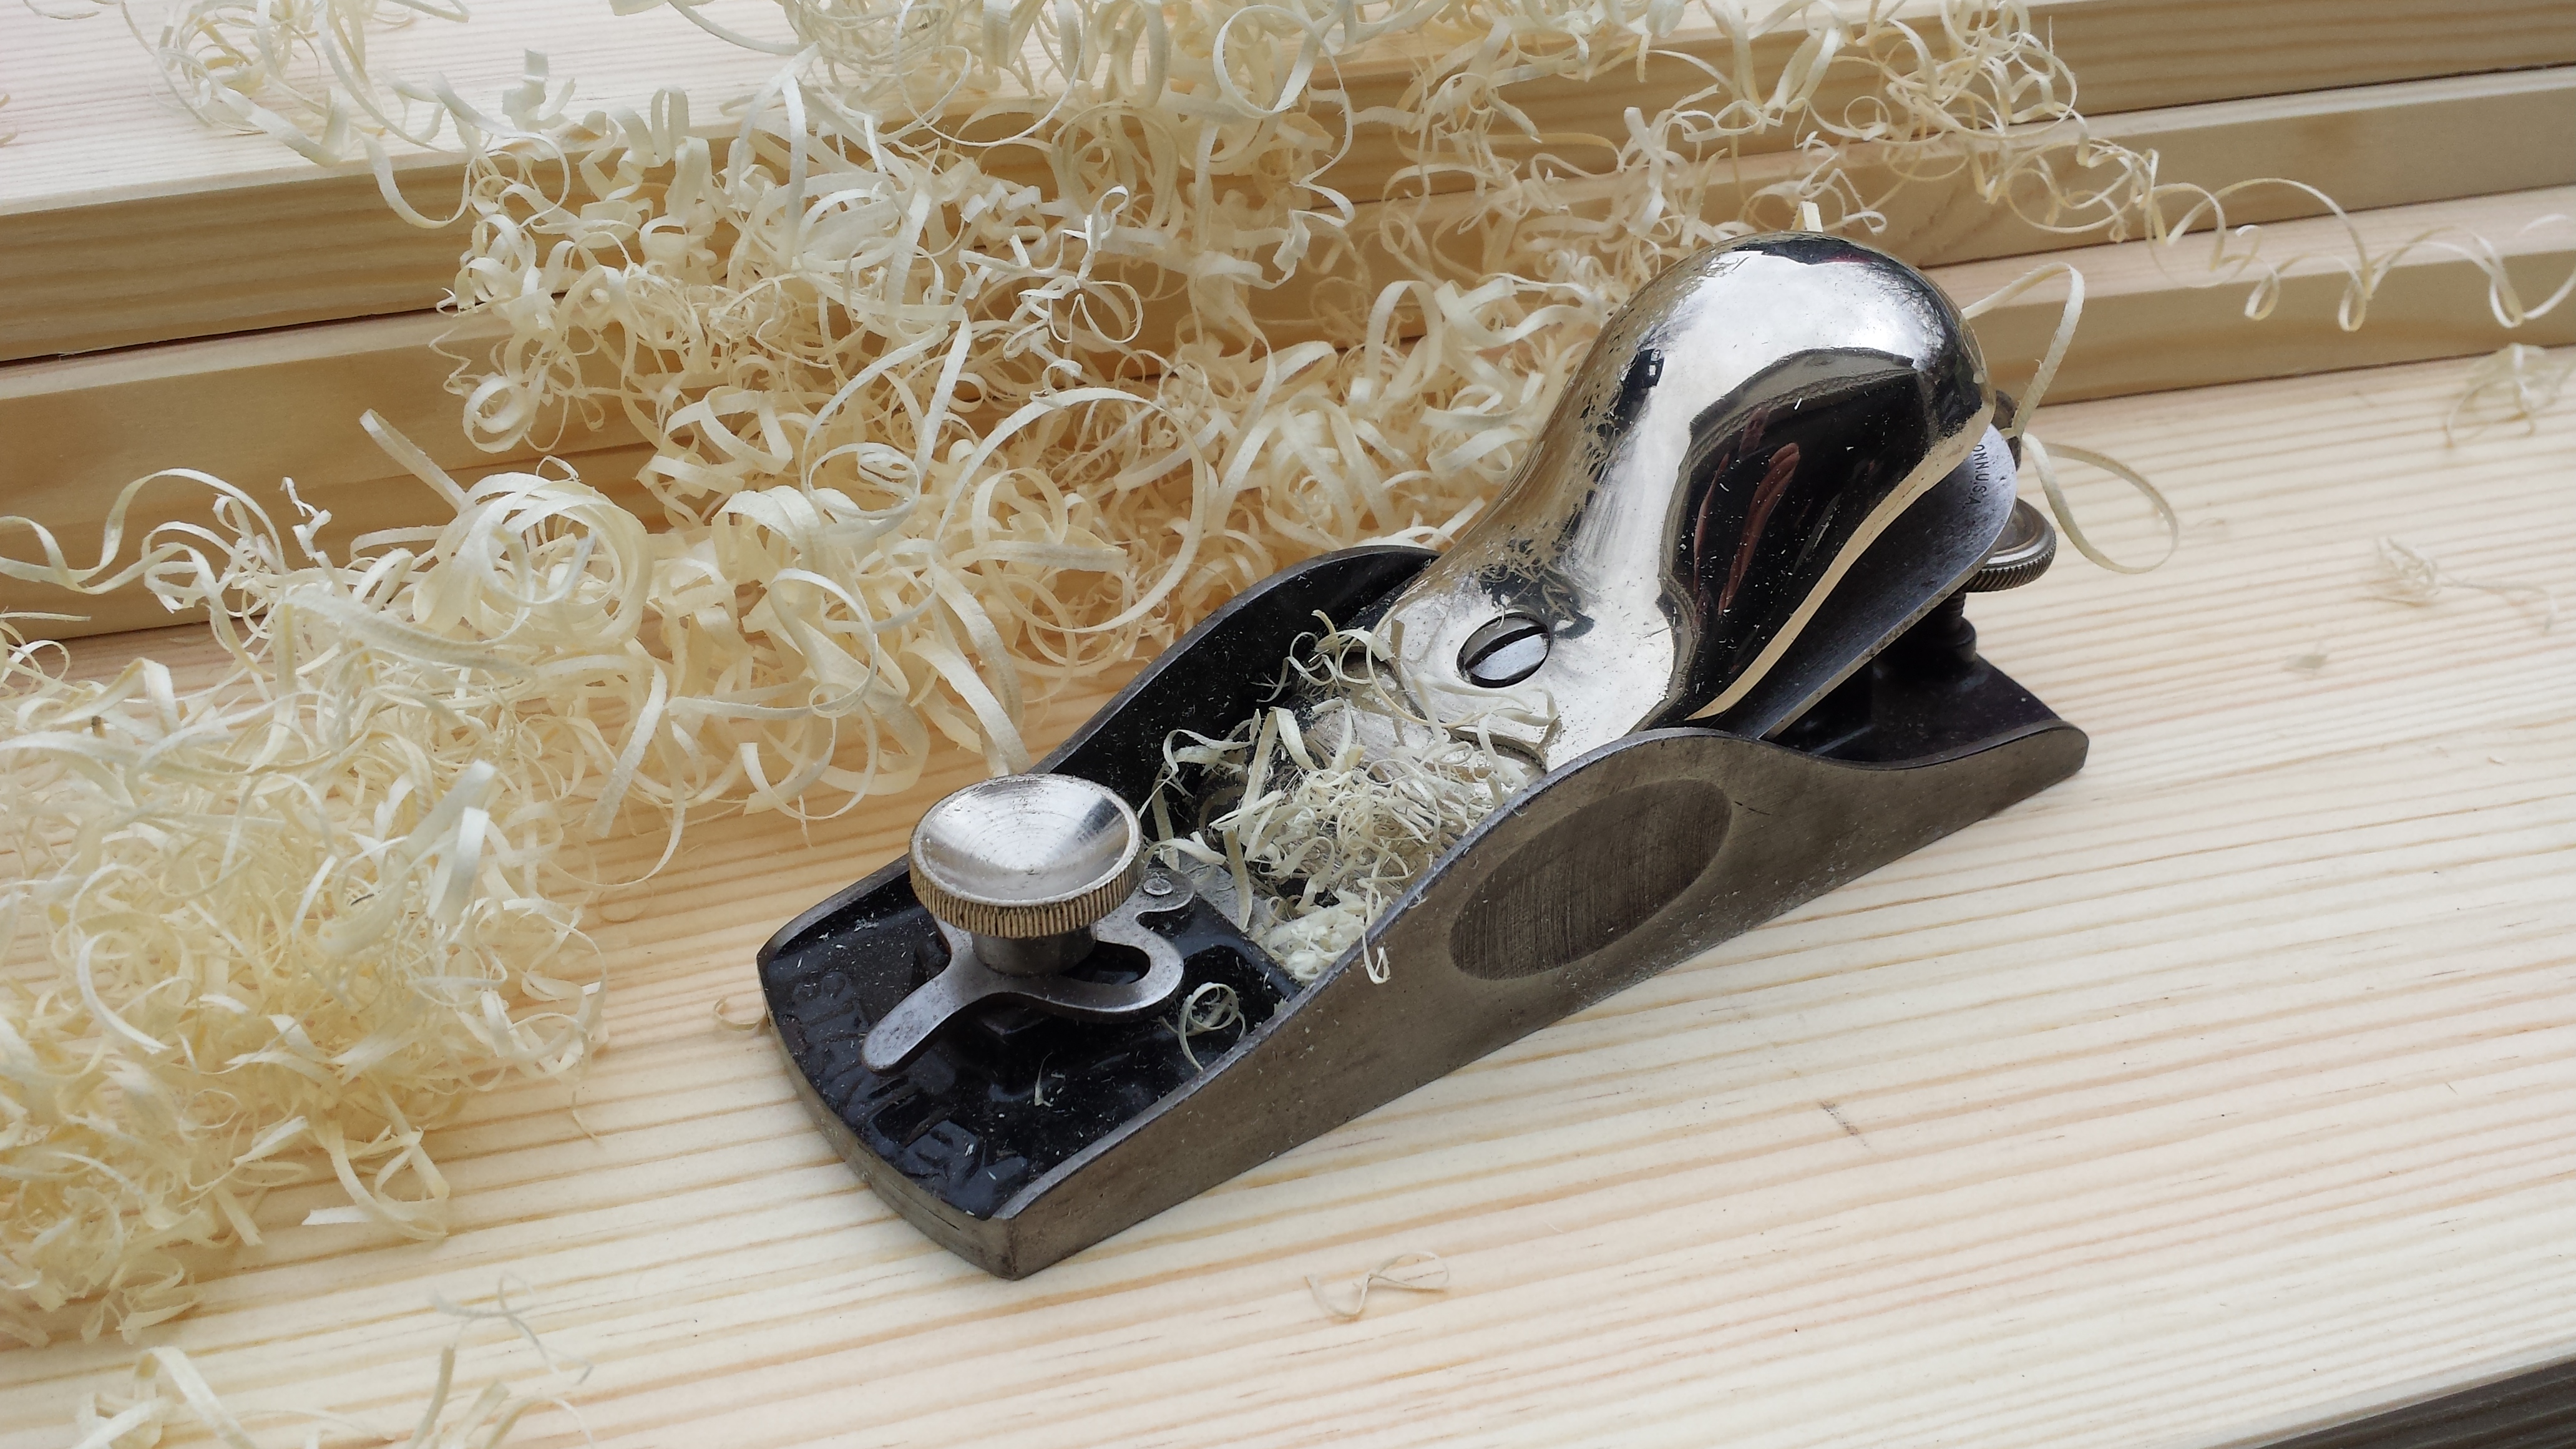
Despite a gnarly looking rust damaged sole, the mouth area was in decent shape and the plane functioned true to Stanley’s level of excellence. Once everything was cleaned up, oiled, reassembled, and tuned, this old plane shaved wood like a champ, producing some wispy thin shavings with no effort at all.

(Disclosure: This article contains paid links that help support the site)

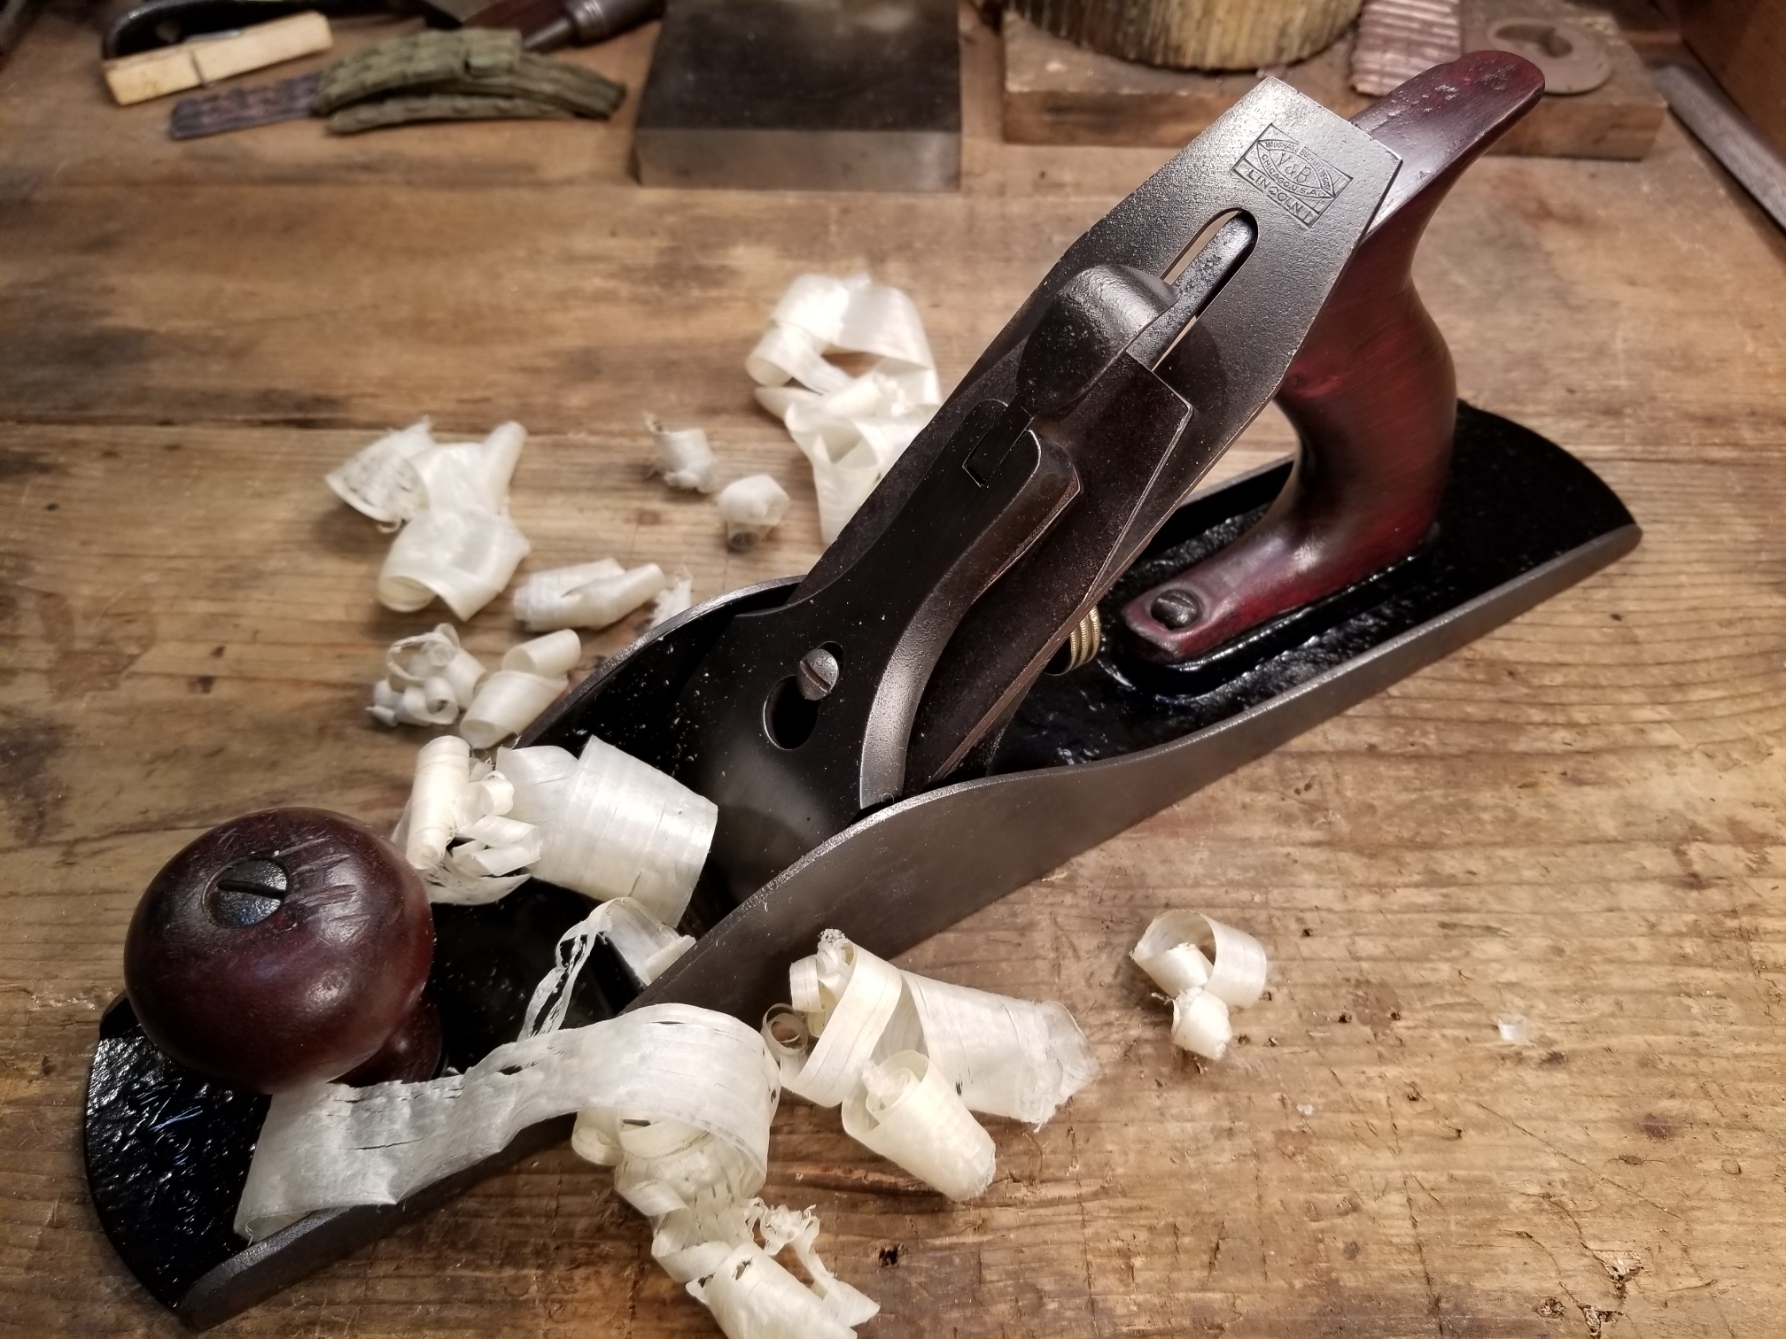
Restoration completed, sharpened and tuned for use again

The Myth of Sole Flatness

I’ve never understood the obsession some people have over sole flatness. Somewhere along the way, a lot of folks got the impression that enough of the millions of vintage planes out in the wild are warped or distorted enough to warrant suspicion when buying. Worse, some even insist that for a vintage plane to be viable for use, it’s sole must be flattened.

Lie Nielsen states that their modern manufacture plane soles are ‘ground flat and square to .0015″ or better, regardless of length.’ Veritas planes have similar tolerances. Don’t get me wrong, I have nothing against either of these two companies. Heck, I own products from both of them. Certainly, if you’re spending $325 for a LN No. 5 Jack Plane made in 2020, you expect it to be dead flat. But is this a reasonable expectation in a plane that was made in 1920, and more important, is it even necessary?

In my opinion, sole flatness is a myth driven by modern day influences and perspective. We’ve been conditioned to believe that a couple hundredths or thousandths of an inch will somehow make or break the functional viability of the tool. But it’s silly to apply expectations of tolerances we get from computer driven milling equipment to mass produced hand tools made +/- 100 years ago. This is misguided at best, and completely unnecessary.

I suspect those who obsess over sole flatness fundamentally misunderstand how hand tools were originally used and likely have some pretty big misconceptions about 18th and 19th century furniture construction and finish. Hand planes were never intended to be precision instruments, at least not in the same way we think about precision instruments today. In today’s world, we tend to rely almost solely on the tolerance of our tools to produce precise results. 100 years ago, that was simply not the case.

Craftsmen and journeymen of the 18th, 19th, and early 20th century mastered the tools they had available and learned to compensate for any imperfections and limitations. Sure, some of them produced very precise pieces of furniture and cabinetry, but it was due to their skill and mastery, not the precision of their tools. And to be honest, most of the handmade furniture made during that period was anything but precise. Look closely inside and behind and underneath period pieces. The beauty and craftsmanship doesn’t lie in precision as we think of precision today. On the contrary, it lies in the subtle imperfections that reflect the hands of the maker and mark of his tools. That, in my opinion, is what makes it beautiful.

I’ve owned and restored many hundreds of vintage hand planes over the years dating from the 1870s to the 1980s. Some were in near mint condition, while others were closer to landfill fodder. Most fell somewhere in between, but the point is I’ve never seen one that was warped or cupped significantly enough that its usability was affected. All of them needed some degree of tuning and refining, but none required flattening. In fact, the only two planes I’ve ever “flattened” were two of my own block planes, and that wasn’t so much because they weren’t already flat, but because I wanted completely clean metal.

I’m frequently asked what kind of camera and lighting I use for my photos. I always respond that the secret to good photos doesn’t lie in better equipment or tools, but in mastering the equipment you have, learning to leverage its capabilities and overcome its limitations. Creativity isn’t stifled by constraint. On the contrary, constraints fuel creativity, innovation, and invention.

I think the same holds true for most other pursuits, as well. It’s certainly true for woodworking. Could I take even better photographs with a newer camera and broader selection of lenses? Sure. But that’s not the point. That’s not what makes me a better photographer, just as flatter plane soles won’t make me a better woodworker.

Don’t Strip or Dip! Scrape That Rust Away!

I read so many posts and articles online from guys doing absolutely heinous things to old tools. From chemical strippers to electrolysis, sanding to anti-rust dips, everyone has their own ideas about how best to remove rust. While any or all of these methods work, they’re all destructive on some level. I suppose that’s fine if your objective is to refinish the tool for use, but in my opinion it strips away all the character and beauty of the tool. Certainly some tools are so far gone there’s no other viable choice, but in many cases, there is a better way.

When I started collecting and restoring tools, I spent almost a year researching everything I could find on archival restoration and preservation, the techniques museums use. I didn’t want to simply refinish tools to make them appear new, I wanted to restore them to functional use while maintaining the aesthetic character that only decades of use and age can impart. My goal was (and remains) to bring them back to a point where they look and function as if they had been properly cared for over the years.

Like anyone else, my learning process came through trial and error. I quickly discovered that the anti-rust dips, while working well, left the metal with a dull and lifeless grey phosphate coating that I found unnatural and unappealing. Likewise, vinegar, citric acid, electrolysis, wire brushing, and sanding all do the job, but at the cost of all the color, character, and charm that makes old tools so appealing. What I really wanted to accomplish was to remove the rust while leaving (at least most of) the patina intact – that lovely brownish gray darkening of the metal that only comes from age and use.

Stanley no. 4C base, as found with considerable surface rust

I found that on many tools, specifically those that haven’t been exposed to overtly wet conditions, the rust is really only on the surface and in many cases hasn’t yet eaten into the metal, causing the cancerous pitting that we all despise. It has been my experience that often times a really gnarly looking rusty crust will come right off, leaving relatively undamaged metal that still retains that desirable patina below.

By using a 3 or 4 inch glass scraper with a very sharp blade, held at a fairly high angle, I slowly and carefully begin scraping the rust off the surface of the plane body. This does require a sharp undamaged blade. Once it gets knicks in the edge, it will start leaving light scratches in the underlying patina, which you don’t want.

It’s a slow and methodical process, but the payoff is worth the effort. As you can hopefully see in the photos above, there’s a distinct line where the rust is removed. You can also begin to see the underlying patina on the metal surface, and thankfully in this case, no pitting.

Scraping using the glass scraper

Once all the rust is removed, the metal surface will be dusty and dirty, and you may well see some micro-scratches from the scraper. I’ll take care of those in the next step.

Using a cleaner/degreaser, gently buff the surface with very fine steel wool (000 or 0000). You want to clean the metal, smoothing out and blending in any scratches in the patina without removing it. Careful here, as that patina is fragile. Go slow. Follow up with the cleaner/degreaser on a paper towel or rag until it’s completely clean.

Once clean and dry, I usually wipe it down with something to help protect and preserve it with Kramer’s Best Antique Improver. Howard’s Feed-n-Wax, Camellia oil, or Renaissance Wax, etc. will also work. Camellia oil, by the way, is really good stuff for protecting tools and knives, and is food safe. What you should be left with now is a clean surface free of rust, but retaining that beautiful patina.

The stanley plane body after cleaning, degreasing, and a wipe down with Kramer’s Best

With all the rust removed from the surface, you can see the underlying patina is still very much intact. Once the rest of the parts are cleaned and the plane reassembled, its beauty really shines through. I find this method of restoration produces superior results to any other I’ve found thus far. Mind you, it’s a workout! But that’s okay, too.

(Disclosure: This article contains paid links that help support the site)

Working Wood by Hand

I like working with hand tools much more than power tools whenever I can. Aside from the fact that they’re infinitely safer – no spinning blades, etc. to slice through flesh – they’re also quiet. And rather than making sawdust, which is unpleasant to breathe, non-powered tools make shavings, so a mask isn’t necessary. But more than that, hand tools bring me into physical contact with the wood, in exactly the same way that intaglio printmaking requires physical contact with the plates and paper.

I enjoy the way a tool feels in my hand, the way it responds to my direction, and the way it interacts with the surface of the wood. Using hand tools is similar to playing a musical instrument. When well tuned and skillfully employed, they literally sing as they cut, shave, and shape the surface of the wood, achieving the desired effect.

Fantastic Sargent Plane Identification Guide

I just received my copy of Don Wilwol’s book, The Sargent Hand Plane Reference Guide for Collectors and Woodworkers. Don runs timetestedtools.net and is an expert in vintage tools. Both his site and his new book are great references. I’m proud to say Virginia Toolworks was a small contributor.

Congrats to Don on this thorough reference book! Get yours here before they’re all gone!

Here’s to the Blood of Patriots

Freedom isn’t a gift. It’s not given. Freedom is earned. Our freedom was bought and paid for by the blood of patriots who believed in something bigger than themselves, an ideal more important than their very lives. Over the years, that same freedom has been defended against tyranny across the globe, tyranny which has, on occasion, attacked American soil and taken American lives. Again and again, men and women died to preserve the way of life you enjoy and so easily take for granted. You can love, you can tolerate, you can pray for peace, but if not for those willing to take a stand, to defend against tyranny wherever it extends its insidious tentacles of corruption, you would know no freedom.

The Millers Falls No.42 coping saw

working by hand

Finding a good vintage coping saw can be challenging. A few years ago Christopher Schwarz wrote about the Millers Falls No.42 coping saw on his blog. Shortly afterwards trying to get ahold of a No.42 became very challenging. I searched for a few years, and as luck would have it ended up with three saws last year. What’s interesting is that the three don’t look the same – for quite a while I thought one of them was missing a part of the adjustment mechanism – but things aren’t always what they seem. This required further investigation. Fig.1 shows the catalog entry from 1938. This version of the No.42 is the one most often seen, and sports the adjustment knob at the end of the saw, which wasn’t specified in the original patent.

mf42_cat1938 Fig 1: Millers Falls catalog entry for No.42 coping saw (1938)

The patent for the No.42 appeared…

View original post 629 more words

Five Confusion-Busting Facts About Type Studies

dsc02972

Five important confusion-busting facts about Type Studies:

    1. Type Studies are modern-day timelines used to identify the age of a tool by referencing important changes in its design, manufacture, and physical characteristics.  Different ‘Types’ within a Type Study refers to a particular period of manufacture in which a particular feature or set of features was unique.
    2. Manufacturers didn’t adhere to Type Studies because Type Studies did not exist at the time.  They simply manufactured tools and made periodic changes to design and manufacturing processes, just like manufacturers today.  We identify those periodic changes in the Type Study, and subsequently assign ‘Types’ based on the time period in which they were made.
    3. Type Studies are not interchangeable.   They only apply to a specific model or series of tools.  Different tools and different lines will have different Type Studies.  For example, Stanley’s Bailey line of bench planes have a completely different Type Study from the Bed Rock series.   Some tools, like the no. 71 router plane, have their own individual Type Study.  Many tools have never been studied in depth and don’t have a Type Study at all.
    4. Type Studies are approximations.  The manufacturing timeline was constantly evolving.  Even when design changes were made, existing (old) stock parts were used until their supply was depleted before moving to new parts.  Therefore, the changeover of features sometimes took months or even years, resulting in multiple variations of the same product being released at the same time.  While Type Studies imply that these changes were aligned with a specific date or year, collectors need to understand that the transitions were more evolutionary than revolutionary.
    5. Type Studies are not all-inclusive.  With some manufacturers and some tools, and some tools made during certain periods, features and materials varied quite a bit.  A good example of this is Stanley’s offering of Bailey bench planes made during World War II.  Brass was in short supply, and subsequently, the so-called Type 17 planes made during the war years have a variety of inconsistencies.  Some had brass hardware, where others have steel.  Some have rosewood knobs and totes, while others have painted hardwood.  Some have frog adjustment mechanisms while others don’t.   All made during this period, however, are considered Type 17, regardless of features.

Sometimes You Just Have To Work Out of the Bed of Your Truck

I love this little Stanley no. 18. It’s my first go-to for anything a block plane might be able to handle. It dates from the 1910s (V Logo), and is as close to mint condition as a 100 year old plane can be. The nickel plating on the cap is p e r f e c t, and the japanning 100%. Aside from a little patina on the cheeks, it looks like it just came out of the box.

20170129_142259

20170129_141928

Justus Traut’s Early Adjustable #110 Block Planes | Early American Industries Association

As I told you in my last post, Stanley Rule & Level Company introduced the #110 non-adjustable block plane sometime in 1874.  The plane was derived from Justus Traut’s patent No. 159,865 grante…

Source: Justus Traut’s Early Adjustable #110 Block Planes | Early American Industries Association