Rev-O-Noc Renewal

Rev-O-Noc 5C in pretty rough condition

I can count on one hand the number of planes I’ve refinished (vs. restored) over the years, but this Rev-O-Noc 5C jack plane had some issues that made an anti-rust dip and repainting the best course of action.

Disassembled for assessment

The entire body was a rustbucket with very little japanning remaining. The lever cap fortunately looked worse than it actually was, and while the cap iron was salvageable, the Rev-O-Noc iron had some pretty deep pitting on the business end. While I was able to sharpen through that, there was something off with the temper of the blade that I didn’t like, so I added a Vaughan & Bushnell iron I had on hand that’s better suited for use. The break in the tote was clean, so I epoxied it back together and then spent the better part of a week refinishing it to match the knob. The repair turned out really nice and is completely invisible.

Repaired Tote came out incredibly nice

HSB Rev-O-Noc was a store brand from Hibbard, Spencer, Bartlett & Co., a Chicago hardware dealership that formed in 1882, but whose origin dates back to at least 1855 in the form of Tuttle, Hibbard & Co. In 1932, the company introduced a new line of hand tools under the brand name “True Value” and by 1948, Hibbard’s annual sales reached nearly $30 million. Business slowed and profits shrunk, however, as new hardware cooperatives began to bypass traditional wholesalers. In 1962, the company’s owners sold both the hardware operations and the “True Value” brand to John Cotter for $2.5 million. Yes, that’s the True Value brand we know today.

Also interesting, the name Revonoc is the reverse spelling of Conover. Conover was the name of an officer of the company, and apparently had a separate hardware company prior to joining Hibbard, Spencer, Bartlett & Co. They used this backwards spelling of his name for their brand of planes sold by HS&B from about 1920-1940. They were made at times by both Stanley and Sargent, but this one is clearly Stanley made based on the casting, frog, and hardware.

As far as I can tell, this plane likely falls somewhere closer to 1920 given the short knob and small adjustment nut. Of course, it’s also possible it’s an earlier plane and the Revonoc blade was a later replacement. I just don’t know.

Despite a gnarly looking rust damaged sole, the mouth area was in decent shape and the plane functioned true to Stanley’s level of excellence. Once everything was cleaned up, oiled, reassembled, and tuned, this old plane shaved wood like a champ, producing some wispy thin shavings with no effort at all.

(Disclosure: This article contains paid links that help support the site)

Restoration completed, sharpened and tuned for use again

Don’t Strip or Dip! Scrape That Rust Away!

I read so many posts and articles online from guys doing absolutely heinous things to old tools. From chemical strippers to electrolysis, sanding to anti-rust dips, everyone has their own ideas about how best to remove rust. While any or all of these methods work, they’re all destructive on some level. I suppose that’s fine if your objective is to refinish the tool for use, but in my opinion it strips away all the character and beauty of the tool. Certainly some tools are so far gone there’s no other viable choice, but in many cases, there is a better way.

When I started collecting and restoring tools, I spent almost a year researching everything I could find on archival restoration and preservation, the techniques museums use. I didn’t want to simply refinish tools to make them appear new, I wanted to restore them to functional use while maintaining the aesthetic character that only decades of use and age can impart. My goal was (and remains) to bring them back to a point where they look and function as if they had been properly cared for over the years.

Like anyone else, my learning process came through trial and error. I quickly discovered that the anti-rust dips, while working well, left the metal with a dull and lifeless grey phosphate coating that I found unnatural and unappealing. Likewise, vinegar, citric acid, electrolysis, wire brushing, and sanding all do the job, but at the cost of all the color, character, and charm that makes old tools so appealing. What I really wanted to accomplish was to remove the rust while leaving (at least most of) the patina intact – that lovely brownish gray darkening of the metal that only comes from age and use.

Stanley no. 4C base, as found with considerable surface rust

I found that on many tools, specifically those that haven’t been exposed to overtly wet conditions, the rust is really only on the surface and in many cases hasn’t yet eaten into the metal, causing the cancerous pitting that we all despise. It has been my experience that often times a really gnarly looking rusty crust will come right off, leaving relatively undamaged metal that still retains that desirable patina below.

By using a 3 or 4 inch glass scraper with a very sharp blade, held at a fairly high angle, I slowly and carefully begin scraping the rust off the surface of the plane body. This does require a sharp undamaged blade. Once it gets knicks in the edge, it will start leaving light scratches in the underlying patina, which you don’t want.

It’s a slow and methodical process, but the payoff is worth the effort. As you can hopefully see in the photos above, there’s a distinct line where the rust is removed. You can also begin to see the underlying patina on the metal surface, and thankfully in this case, no pitting.

Scraping using the glass scraper

Once all the rust is removed, the metal surface will be dusty and dirty, and you may well see some micro-scratches from the scraper. I’ll take care of those in the next step.

Using a cleaner/degreaser, gently buff the surface with very fine steel wool (000 or 0000). You want to clean the metal, smoothing out and blending in any scratches in the patina without removing it. Careful here, as that patina is fragile. Go slow. Follow up with the cleaner/degreaser on a paper towel or rag until it’s completely clean.

Once clean and dry, I usually wipe it down with something to help protect and preserve it with Kramer’s Best Antique Improver. Howard’s Feed-n-Wax, Camellia oil, or Renaissance Wax, etc. will also work. Camellia oil, by the way, is really good stuff for protecting tools and knives, and is food safe. What you should be left with now is a clean surface free of rust, but retaining that beautiful patina.

The stanley plane body after cleaning, degreasing, and a wipe down with Kramer’s Best

With all the rust removed from the surface, you can see the underlying patina is still very much intact. Once the rest of the parts are cleaned and the plane reassembled, its beauty really shines through. I find this method of restoration produces superior results to any other I’ve found thus far. Mind you, it’s a workout! But that’s okay, too.

(Disclosure: This article contains paid links that help support the site)

Working Wood by Hand

I like working with hand tools much more than power tools whenever I can. Aside from the fact that they’re infinitely safer – no spinning blades, etc. to slice through flesh – they’re also quiet. And rather than making sawdust, which is unpleasant to breathe, non-powered tools make shavings, so a mask isn’t necessary. But more than that, hand tools bring me into physical contact with the wood, in exactly the same way that intaglio printmaking requires physical contact with the plates and paper.

I enjoy the way a tool feels in my hand, the way it responds to my direction, and the way it interacts with the surface of the wood. Using hand tools is similar to playing a musical instrument. When well tuned and skillfully employed, they literally sing as they cut, shave, and shape the surface of the wood, achieving the desired effect.

New Planes vs. Vintage Planes

Stanley-Bailey-5.5C-Type-14One of the first questions many people contemplating their first  plane purchase ask is “Should I buy a new plane or vintage plane?” Indeed, this was the first question I asked before my first purchase many years ago. There is no simple single right or wrong answer. It depends on a few different factors:

  • What is your budget?
  • What is the plane’s intended use?
  • Are you willing to invest a little time setting it up and tuning it for use?

Virtually any plane you buy, new or vintage, is going to need some degree tuning and sharpening. The modern hardware store planes will require virtually the same tuning process as a 100 year old Stanley or competitor. Even a brand new Lie Nielsen or Veritas (both of which I am a huge fan) will need a final honing, if nothing else. The quality of hand tools today is generally abysmal. The demand and quality for hand tools fell sharply after WWII as electrically powered tools took off and the era of self-sufficiency evolved into one where paid tradesmen were hired for jobs around the home.  It’s only in the last decade or two that niche companies like Lie Nielsen and Veritas have again produced hand planes that are of acceptable quality for fine woodworking. These, however, come at a cost.

Lie Nielsen Smoothing Plane

Lie Nielsen Smoothing Plane

If you’re a professional or serious woodworker, investing $200 to $400 in a precision plane is arguably justifiable. Both companies mentioned above manufacture extremely high quality tools. On the other hand, the planes found at local hardware stores, big box retailers, and even some specialty shops – those generally under $150 – are simply not in the same class.  Quality of materials, manufacture, fit and finish are often quite poor. And it’s important to note that these brand new sub-$150 planes will undoubtedly require at least a couple hours worth of tuning and sharpening to make them function correctly.

By contrast, the vintage planes made by companies like Stanley, Sargent, Union, and others, especially from about 1910 to 1940, were of excellent quality, and are generally superior to most of the planes made today, especially those under the $100 to $150 price point.  These planes can be found in antique shops, yard sales, tool swaps, and eBay, often for as little as $10 and rarely (depending on the model and rarity) over $100. The caveat with vintage tools is that they will almost always need some degree of restoration and tuning.  Like the cheaper new store bought planes, the sole may need lapping, the frog face flattened, rough surfaces smoothed, and the iron sharpened and honed. However, for the same investment in time and effort, you will likely end up with a far superior plane for less money than you would have spent at your local big box hardware store.

Stanley Bailey no. 2, Type 8

Stanley Bailey no. 2, Type 8

If you have a couple hundred dollars to spend and want the best CNC machined plane money can buy, a Lie Nielsen is a good investment. However, if you’re like most people just starting out, pick up one (or even two) vintage Stanley planes and give them a try. The knowledge gained by disassembling, tuning, and sharpening it will actually aid in your understanding of its mechanics and function. Here are a few resources from the Virginia Toolworks site that might help:

***

Goldsmith, Silversmith, & Jewelry Tools, Old and New

Years ago after graduating from college, I wanted to pursue a career that would allow me to do something creative, something hands-on. There were a lot of directions I could have taken, but I had a unique opportunity through a family connection to apprentice with a 3rd generation Greek goldsmith who had recently immigrated to the United States.  It was a small family business, and they specialized in designing and fabricating custom jewelry entirely by hand.  I knew nothing about jewelry or metal work, but after my first day I was completely hooked.

My apprenticeship lasted 2 years and 3 months before I moved on to a new opportunity.  That’s not a lot of time considering it easily takes 8 to 10 years or longer to become truly proficient as a bench jeweler.  As it turned out, my career path led me away from jewelry bench-work as a daily profession.  However, I never completely gave it up, and some years later was able to outfit a small shop with the tools and equipment needed to make enough jewelry to keep the female members of my family content.

Jewelers Bench Tools
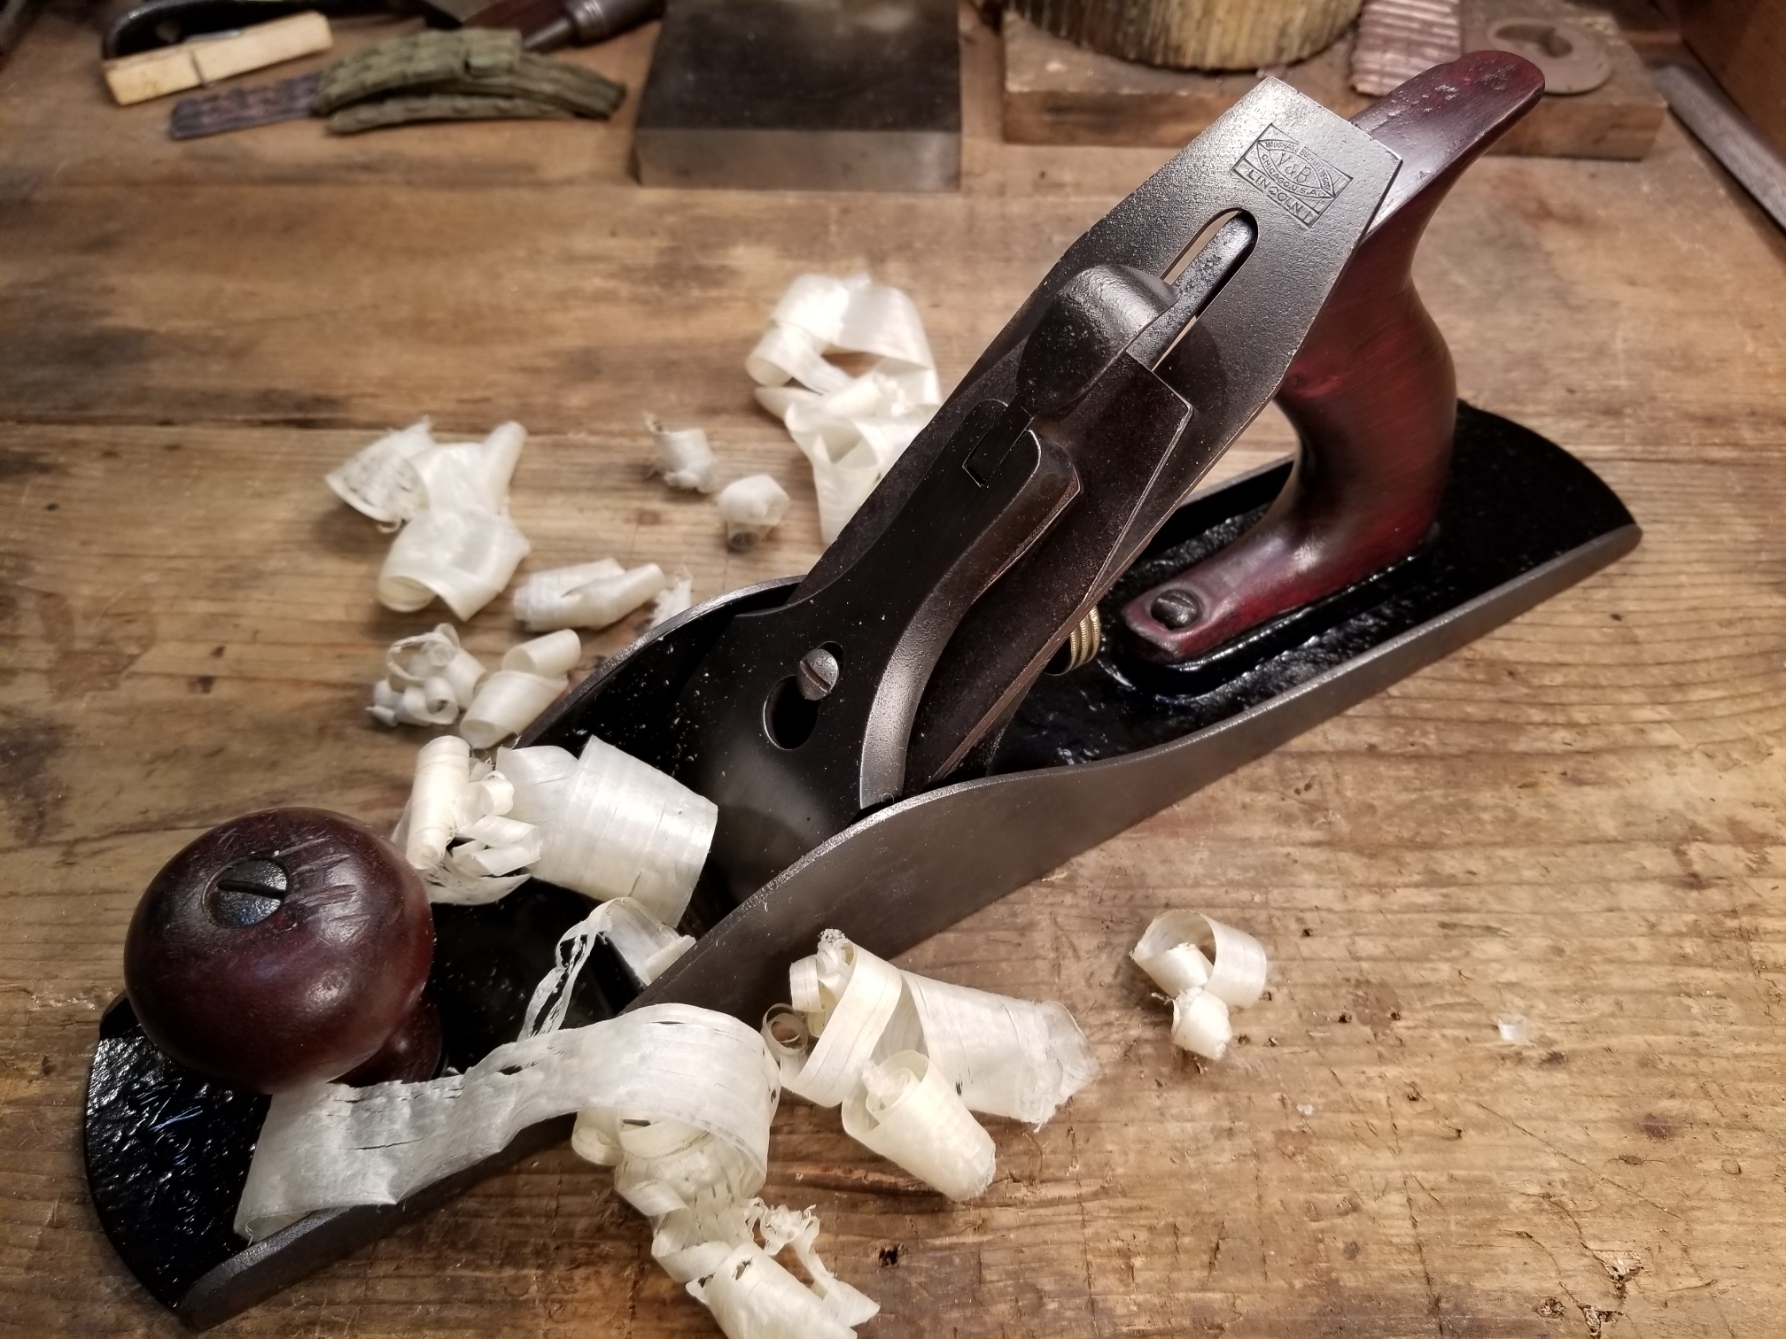
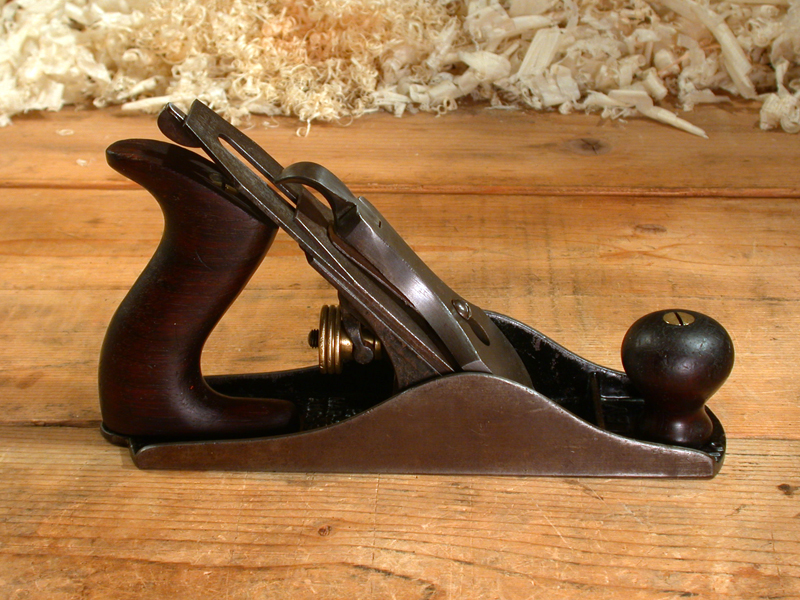
The vast majority of the vintage tool market focuses on tools for woodworking.  Yet while many modern woodworkers use power tools more or less exclusively, silversmiths and goldsmiths still use hand tools for most of their work.  While electricity has added considerable convenience, many of the hand tools used by gold and silversmiths today haven’t changed substantially in a couple hundred years or longer.  For tool junkies like you and me, that opens up a whole wealth of fascinating and elegant tools for us to appreciate.

The Work Bench

Jeweler's BenchNot at all unlike a woodworkers bench, a goldsmith’s, silversmith’s, or engraver’s bench is the centerpiece of his work space. It is my understanding (through my training) that the craftsman traditionally constructed his own bench.  I honestly don’t know if this is true or not, but given the typical complexity of such benches and the fact that they are so uniquely and uncommonly personal to the  individual, it would not at all surprise me.  Commercially made benches are available today through jewelry tool distributors like Gesswein and Rio Grande, but they tend to be too lightweight and of mediocre construction for anything more than occasional use.

My Bench
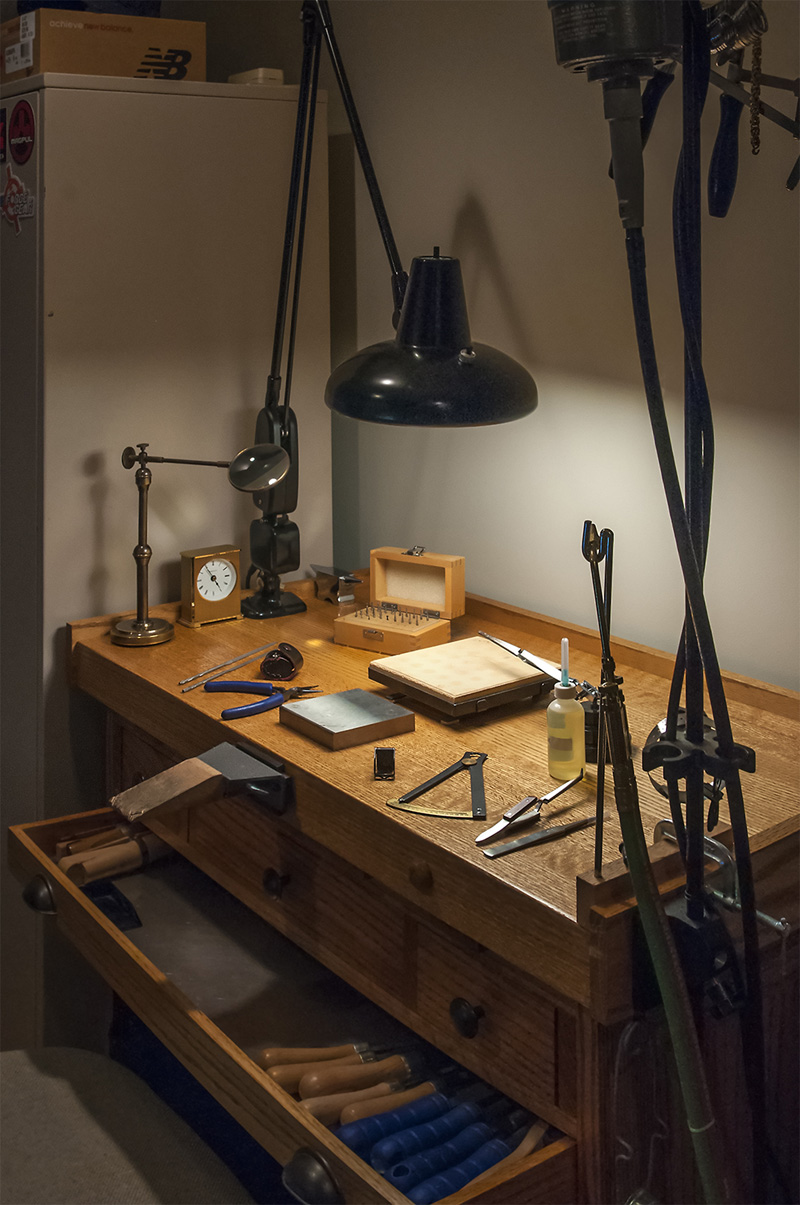
I built my bench about 10 years ago (shown at the right).  I designed it specifically for my height and work style, with a 3-1/2″ thick butcher block top of solid oak.  Weight is important in these benches – heavier is better.  You can see in the photo there are three tool/supply drawers, and below them two very wide and shallow drawers.  These are lap drawers that catch the metal filings as they fall, extremely important when working with precious metals.  The filings and scraps are all collected and sent to a refinery for reclamation.  Even old sandpaper is saved.  I built my bench with two lap drawers for convenience and practicality, as I often work on more than one project at a time and sometimes work with both precious and non-precious metals.  It’s better to keep the two separated.  Naturally, if I had it to do over I would do several things differently.  The drawer face on the far left doesn’t match the other two very well, and it bugs me.  I also made some stupid mistakes with some of the framework, but all aesthetic.  I was so consumed with the functional aspects that I didn’t give enough thought to how it would all look.

Common Bench Tools

Silversmith HammersIn terms of breadth and depth of assortment, woodworkers would be hard pressed to compete with the average goldsmith or silversmith for quantity of tools.  In addition to files of various shapes and sizes, there are any number of pliers, hammers, saw blades, hundreds of rotary tool bits, polishing wheels, bench blocks, mandrels, staking tools, torches, tweezers, magnifiers… the list goes on and on.  Further, like blacksmiths, goldsmiths and silversmiths must make many of the tools they use.

Metal colour samples-2Fundamental to virtually every bench is a wooden bench pin, steel bench block, jeweler’s saws, pliers, hammers and files.  The bench pin is a wedge-shaped block that protrudes from the front of the bench and serves as a support for filing and sawing, as well as a leverage point for everything else.  Steel bench blocks sit on top of the bench, are dead flat, and serve as all-purpose platforms for flattening and shaping softer precious metals.  Jeweler’s saws come in a variety of depths.  The interchangeable saw blades are positioned with the teeth pointing toward the handle, so they cut on the down (or pull) stroke.

Because they are used for precise work, jeweler’s tools tend to be precision tools.  Measurements are typically in tenths or thousandths of a millimeter, and when working with metals that cost almost $2,000 and ounce, material efficiency and waste reduction is an obsession.  Every precious metal dust particle is quite literally considered and every effort is made to recover as much as possible.

Heavier Shop Equipment

Rolling MillSmiths also use a variety of heavy shop equipment depending on the manufacturing techniques they employ.  Rolling mills like the one shown here roll out sheet stock and wire to be used in fabrication.  It is a slow and laborious process.  Some jewelers use casting equipment to cast wax models into gold, silver, or platinum.  The wax model is encased in plaster with an attached sprue.  The wax is melted out leaving a cavity in which the liquid metal is injected through either a vacuum or centrifugal force. Production shops use CAD computers, computerized crucibles and casting machines, and laser soldering devices costing tens of thousands of dollars.

Alongside every goldsmith bench is a small torch.  Since my bench is in my home, large propane and oxygen tanks were not an option, so I constructed a portable tote for the small disposable tanks available at hardware stores.  This works fine for soldering jewelry, but for melting metal or larger jobs, a standard size setup is necessary.

Every metal worker needs a polishing machine, and mine is typical of those found in smaller shops.  It is a floor standing model with hoods and a powerful dust collection unit.  This not only keeps the work space cleaner, but captures most of the particulates, which are comprised of a surprisingly high percentage of fine metal material.  This too is sent for refining and metal reclamation.

Stone Setter’s and Engraver’s Tools

An engraver’s bench is virtually identical to a jeweler’s bench.  However, an engraver will have a special ball vise that rotates 360º as he works.  His tools, called gravers, have profiles of different shapes and thicknesses, much like wood carving or turning tools.  Before he begins cutting metal, the engraver typically applies china white, a chalk-like substance that let’s him draw on the metal.  The intended design or inscription is very carefully hand drawn, and the engraver then follows the lines with the gravers, removing thin metal curls.  Some gravers are used for letters, others for outlines, and others still for removing or defining the background.  Like goldsmiths and silversmiths, engravers spend many years, even decades, mastering their craft.  It is a beautiful and dying art.

EngravingToolsYou might be surprised to learn that many of the tools used by engravers are also used by stone setters.  As mentioned above, gravers are used to remove metal.  In certain setting styles they can also be used to create beads that form prongs for gemstones.  Pavé settings start with a drilled hole that is then tapered with a small bur shaped much like a counter-sink bit.  “Prongs” are then engraved up from the surrounding metal to form a tiny bead that covers the edge of the stone.  Now, if you think that sounds complicated, consider this… because Pavé settings feature many stones in extremely close proximity, each bead is formed to cover the bezel of not one or two, but three adjacent gemstones.  This type of setting is extremely precise and requires extraordinary skill.

Watchmaker’s Tools

Watchmakers are an entirely different breed; the level of precision required of a true watch maker is unparalleled.  The market today is dominated by disposable quartz movements, so old-fashioned watchmaking is a dwindling profession. There are only a handful of companies at the very highest end that even still make mechanical movements.  Sadly, fewer and fewer young people are willing to invest the time it takes to become proficient to work on mechanical watches.  While the earning potential for the highest skill levels is significant, entry-level workers are not highly compensated.

Watchmakers employ a dizzying array of tools, parts, and devices.  The traditional centerpiece to the watchmaker’s bench is the lathe (shown in the photo above).  Employing many of the same skills and techniques of the goldsmith, watchmakers demonstrate proficiency in the fine jewelry arts as well as the mechanical skills required to build and repair watches.  It’s not surprising that so many individual jewelry proprietors of the last century were generalists in this regard, working on both jewelry and watches as a service to customers.

wathcmakers benchWatchmaker’s benches typically differ from jeweler’s benches in both function and design.  Generally forgoing the lap drawer, watchmaker’s benches are easily identified by the plentiful small drawers and cabinets for storing parts and tools. Earlier benches often had a foot treadle for powering the watchmaker’s lathe built right in. These were often magnificent pieces of furniture, with a charm and character unique to the profession.  It was also common for them to have lockable enclosures such as hinged lids or roll tops to prevent opportunistic theft of valuable tools and materials.

Summary

This is by no means a comprehensive or complete review of all the tools used by these craftsmen.  In fact, I’ve barely scratched the surface.  Clearly, woodworking tools hold a broader appeal, probably because the average person can better relate to their use.  Tools of the jeweler, goldsmith, silversmith, engraver, and watchmaker tend to be viewed as a bit more exotic and intended for very specific, and often unfamiliar, uses to most people.  I suppose that’s true, but only to a limited extent.  I use many tools in woodworking that were designed for the jewelry bench, simply because they suit a particular need better than anything else available. Nevertheless, exotic or not, it’s easy to appreciate their form and function and place in the realm of fine hand craftsmanship.

28452362

***

“Excelsior” Profile Stanley Block Planes

Ever wonder about the origin of the word “Excelsior” as it refers to the body style on Stanley block planes?  Why Excelsior?  What does it mean?  Was it an official Stanley name or a term that has been applied in recent years?

Me too.

For anyone unfamiliar with the term, the “Excelsior” profile refers to the first body style used on Stanley block planes.  Dating from 1873 to 1898, the Excelsior profile differs from the later profile in that the “hump” in the cheeks is positioned more toward the rear of the plane.  After 1898 the hump was centered in the cheek profile and has the familiar milled Handi-grip indentions.  And yes, there was a very brief period of a few months in 1898 when the excelsior bodies also included the Handi-grip indentions.

Early Excelsior Profile Stanley 9-3/4 Type 1

Early Excelsior Profile Stanley 9-3/4 Type 1

The word Excelsior comes from the latin word excelsus, meaning meaning “ever upward” or “even higher.”  It is the origin for the word Excel, which obviously means to surpass in achievement.  However, more interesting and relevant for us, “Excelsior” is commonly defined as fine curled wood shavings used for packing.  Given that definition, it certainly makes sense that “Excelsior” was the name Stanley assigned to a line of block planes.

The earliest Stanley reference to Excelsior I could find is in the 1867 price list, which lists a “Patent Excelsior Tool Handle,” a wooden multi-tool handle that included 20 Bradawls and tools.  However, the multi-tool handle design more commonly referred to today as Excelsior was patented on March 19, 1867.  That patent design was awarded to Nathan S. Clement, and featured a different method of clamping the tool bits into the handle than the previous Stanley offerings.  As was often the case, the patent was eventually acquired by Stanley Rule & Level and incorporated into their product line, and was reflected in both wooden and the ornate iron handled multi-tool handles.

62938_IMPROVEMENT_IN_AWL_Clement 1867

Stanley also referred to their Bailey’s Patent Adjustable Block Planes as “Excelsior Block Planes” when they were introduced in 1873.   This term only applied to the adjustable mouth planes, such as the no. 9-1/2, no. 9-3/4, no. 15, etc.  The no. 110 and other non-adjustable planes had a different cheek profile, and were simply listed as Iron Block Planes in Stanley catalogs.

I did a little patent search sleuthing but could only find one reference that in any way tied in the term excelsior to hand or block planes.  In 1875, Albion K. Hall of Jackson, MI patented a plane specifically for making excelsior shavings.  However, I found nothing that tied him in any way to Stanley, so I assume there was no relationship between the two.

Stanley continued to use the Excelsior name for their multi-tools until 1902, and their planes until about 1898, when the profile was redesigned, moving the hump toward the center of the cheek.  Today, the Excelsior planes are attractive primarily to collectors.  While certainly usable, their castings tend to be thinner and more fragile than the later models, lending them better to display shelves than workbenches.  Either way, they remain, in my opinion, one of the more attractive plane designs ever devised.

The Excelsior line included the following planes:
no. 9-1/2
no. 9-3/4
no. 15
no. 15-1/2
no. 16
no. 17
no. 18
no. 19

***

Working Within the Limits of Tool Preservation

198 SB3 Type 9 Pre0I spent a long time researching and learning about tool preservation before I ever touched a plane. Even so, it was a couple or three years before I really settled into a comfort zone where the hands on experience I gained began to gel with the “book knowledge” I’d accumulated. For me, the greater appeal has always been geared more toward preservation than restoration (although I use the word restoration more often when casually talking about “cleaning up” a plane or tool). It’s probably a matter of semantics; I think most people equate restoration with refinishing, while preservation, by it’s very definition, speaks to preserving and sustaining. To me, that’s more accurate, and is a key part of my guiding philosophy and approach to tools.

It’s very easy for me to “go too far” when cleaning up a tool, to make it pretty vs. simply making it functional. My underlying intent is to preserve the character, finish, patina, etc. whenever possible. Dirt and rust are not sacred to me (as they are to some collectors), they are destructive elements of neglect. When I’m cleaning up a tool, I try to stay within the same boundaries that a woodworker of 100 years ago would have stayed within. He would have only been interested in preserving his tools, keeping them clean and in good working order, not making them pretty to sell on eBay. I constantly remind myself of that, not because I’m right and everyone else is wrong, but because it’s consistent and true to the values and parameters I defined when I started this venture. It’s my mission statement, if you will.

198 SB3 Type 9 Post7

***

New Old Vintage Planes for Sale

I will be listing several planes and other tools for sale over the next few months.  You can view current offerings by clicking on For Sale on the menu bar.  To view these tools in greater detail or if you are interested in purchasing, please visit the Virginia Toolworks eBay page at http://www.ebay.com/sch/virginiatoolworks/m.html.

***

Open vs. Closed? Mouth vs Throat? – The Adjustable Plane Facts

Adjustable Mouth?  Open or Closed Throat?  Say what?

What’s all the ruckus about adjustable mouth planes? What are they? Do I need one? How do I use it? What’s the difference between adjustable throat planes and adjustable mouth planes?  Good grief, it’s enough to give any new galoot a headache!

Stanley no. 60 with mouth open on left; Stanley no. 18 with mouth closed on right.

What’s the difference?  To clear up the confusion, let’s start with the nomenclature. Both ‘adjustable throat’ and ‘adjustable mouth’ actually refer to the same feature. Both terms are used interchangeably, which is confusing and in my opinion, technically incorrect. The mouth is the rectangular opening that you see when looking at the bottom of the plane. The throat is the area above the mouth on the top side of the plane. The part that is adjustable is the mouth, not the throat.  That said, even Stanley wasn’t consistent in its terminology, listing ‘adjustable throat‘ planes in their catalogs some years and ‘adjustable mouth‘ planes other years.  Far be it from me to argue the point one way or the other, but for the rest of this post, I’m sticking with adjustable mouth.

What is it?  An adjustable mouth on a plane means that the size of the mouth opening can be adjusted, i.e., opened to make it larger or closed to make it smaller. Typically, this is accomplished by sliding the toe section of the plane forward (away from the iron) to increase the size of the mouth opening, or backward toward the iron to decrease it.

Not all planes have adjustable mouths. In the world of vintage tools, adjustable mouths were most commonly featured on the various manufacturers’ premium lines of block planes and a few of their specialty planes. Modern manufacturers like Lie Nielsen and Veritas understand the value of adjustable mouths to woodworkers and feature them on many of their bench planes as well their block planes.

Why do I need it?  The value of having an adjustable mouth on a plane is the ability to increase or reduce the space between the leading edge of the mouth opening and the cutting edge of iron. If you’re making a heavy cut and taking thicker shavings, you want more open space in front of the iron for the shaving to pass. If you’re making a fine cut, taking thin shavings, you need less space in front of the iron.  In fact, you want the opening to be just marginally larger than the thickness of the shaving.

How do I use it?  In practice, the leading edge of the mouth presses down on the wood fibers as you make a cut. Having a ‘fine set’ to your plane (meaning a closed mouth and very shallow depth of cut) keeps the wood in front of the iron tightly compressed.  This enables a very thin shaving with less chance of tear out, in which the wood fibers split well ahead of and below the cut. Opening the mouth accomplishes just the opposite. With less compression, the iron is able to take a thicker cut, and the larger opening allows the shaving to pass through unobstructed up into the throat area.

Naturally, the size of the mouth opening is only half of the equation – you also need to decide how far down to extend the iron based on how deep you want to cut. If you try to take a heavy a cut with the mouth too tightly closed, the shaving will be too thick to pass through the opening and will quickly clog the mouth opening or simply come to a screeching halt.  This effect can be more or less pronounced depending on the type of wood you are working on.

The trick, of course, is finding the right balance between set of the iron and opening of the mouth, but this is truly not as difficult as it might sound. A little trial and error will quickly build experience and give you a ‘feel’ for how to set your plane for the cut you desire. Once you have it set appropriately for what you’re trying to accomplish, the results will be superior to what you would get from a plane with a fixed aperture mouth, which lacks the flexibility for making fine adjustments to the cut.

As a final thought, it is worth pointing out that many planes without adjustable mouths can still be adjusted.  Virtually all bench planes have adjustable frogs.  Moving the frog forward or backward decreases or increases the size of the mouth opening, accomplishing the same goal as an adjustable mouth, even if the process is a little more involved.  Still, that is precisely why Stanley added the frog adjustment feature to their planes in 1907.

Unlike bench planes, the frogs of block planes are fixed, so unless they have an adjustable mouth, you’re stuck with the fixed size opening.  This is why adjustable mouth block planes are more highly regarded and valued by woodworkers.

Common* Vintage Planes with Adjustable Mouths

Stanley nos. 9-1/2, 15, 16, 17, 18, 19 standard angle block planes
Stanley nos. 60, 60-1/2, 65, 65-1/2 low angle block planes
Stanley no. 62 low angle jack plane

Millers Falls nos. 16, 17, 26, 27, 36, 37 standard angle block planes
Millers Falls nos. 46, 47, 56, 57 low angle block planes

Sargent nos. 306, 307, 1306, 1307, 4306, 4307, 5306, 5307 standard angle block planes
Sargent nos. 606, 607, 1606, 1607 low angle block planes
Sargent no. 514 low angle jack plane

Modern Plane Makers

Lie-Nielsen – makes block plane models with adjustable mouths
Veritas/Lee Valley – makes both block and bench planes with adjustable mouths
Stanley – makes modern variations of their vintage counterparts
Wood River/Woodcraft – makes block plane models with adjustable mouths

* This is not a complete list, but includes the most common planes for use.

For more information on plane nomenclature, please refer to the Plane Terminology page for a full dictionary of plane parts and terms.

***

Millers Falls Plane Specifications

Specification charts for Millers Falls planes have now been added to the site under the Tools menu.  Included are charts for bench planes as well as block and specialty planes.  These charts provide Stanley equivalents where applicable.

There is also a bench plane conversion chart cross-referencing planes made by Stanley, Sargent, Millers Falls, and Record.  I plan to have additional information available in the near future, including comprehensive information on both Millers Falls and Sargent.  In the meantime, enjoy!

Millers Falls page
Bench Plane Specifications Chart
Block Plane Specifications Chart
Plane Cross Reference Chart

***