The Myth of Sole Flatness
April 18, 2020 7 Comments
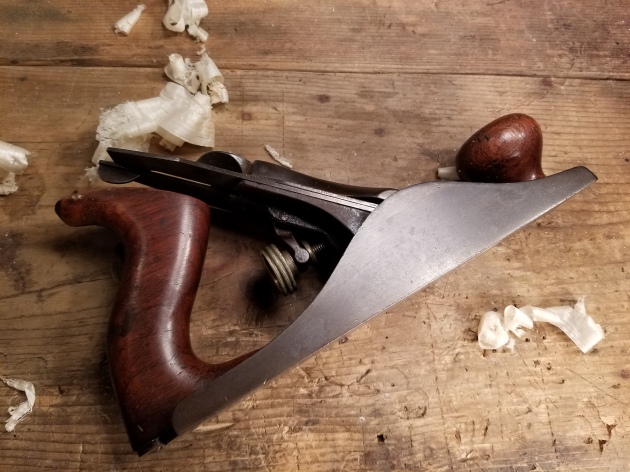
I’ve never understood the obsession some people have over sole flatness. Somewhere along the way, a lot of folks got the impression that enough of the millions of vintage planes out in the wild are warped or distorted enough to warrant suspicion when buying. Worse, some even insist that for a vintage plane to be viable for use, it’s sole must be flattened.
Lie Nielsen states that their modern manufacture plane soles are ‘ground flat and square to .0015″ or better, regardless of length.’ Veritas planes have similar tolerances. Don’t get me wrong, I have nothing against either of these two companies. Heck, I own products from both of them. Certainly, if you’re spending $325 for a LN No. 5 Jack Plane made in 2020, you expect it to be dead flat. But is this a reasonable expectation in a plane that was made in 1920, and more important, is it even necessary?
In my opinion, sole flatness is a myth driven by modern day influences and perspective. We’ve been conditioned to believe that a couple hundredths or thousandths of an inch will somehow make or break the functional viability of the tool. But it’s silly to apply expectations of tolerances we get from computer driven milling equipment to mass produced hand tools made +/- 100 years ago. This is misguided at best, and completely unnecessary.
I suspect those who obsess over sole flatness fundamentally misunderstand how hand tools were originally used and likely have some pretty big misconceptions about 18th and 19th century furniture construction and finish. Hand planes were never intended to be precision instruments, at least not in the same way we think about precision instruments today. In today’s world, we tend to rely almost solely on the tolerance of our tools to produce precise results. 100 years ago, that was simply not the case.
Craftsmen and journeymen of the 18th, 19th, and early 20th century mastered the tools they had available and learned to compensate for any imperfections and limitations. Sure, some of them produced very precise pieces of furniture and cabinetry, but it was due to their skill and mastery, not the precision of their tools. And to be honest, most of the handmade furniture made during that period was anything but precise. Look closely inside and behind and underneath period pieces. The beauty and craftsmanship doesn’t lie in precision as we think of precision today. On the contrary, it lies in the subtle imperfections that reflect the hands of the maker and mark of his tools. That, in my opinion, is what makes it beautiful.
 I’ve owned and restored many hundreds of vintage hand planes over the years dating from the 1870s to the 1980s. Some were in near mint condition, while others were closer to landfill fodder. Most fell somewhere in between, but the point is I’ve never seen one that was warped or cupped significantly enough that its usability was affected. All of them needed some degree of tuning and refining, but none required flattening. In fact, the only two planes I’ve ever “flattened” were two of my own block planes, and that wasn’t so much because they weren’t already flat, but because I wanted completely clean metal.
I’m frequently asked what kind of camera and lighting I use for my photos. I always respond that the secret to good photos doesn’t lie in better equipment or tools, but in mastering the equipment you have, learning to leverage its capabilities and overcome its limitations. Creativity isn’t stifled by constraint. On the contrary, constraints fuel creativity, innovation, and invention.
I think the same holds true for most other pursuits, as well. It’s certainly true for woodworking. Could I take even better photographs with a newer camera and broader selection of lenses? Sure. But that’s not the point. That’s not what makes me a better photographer, just as flatter plane soles won’t make me a better woodworker.


