Off Topic – Grilled Corn with Shadon Beni Butter

Grill Corn and Brats

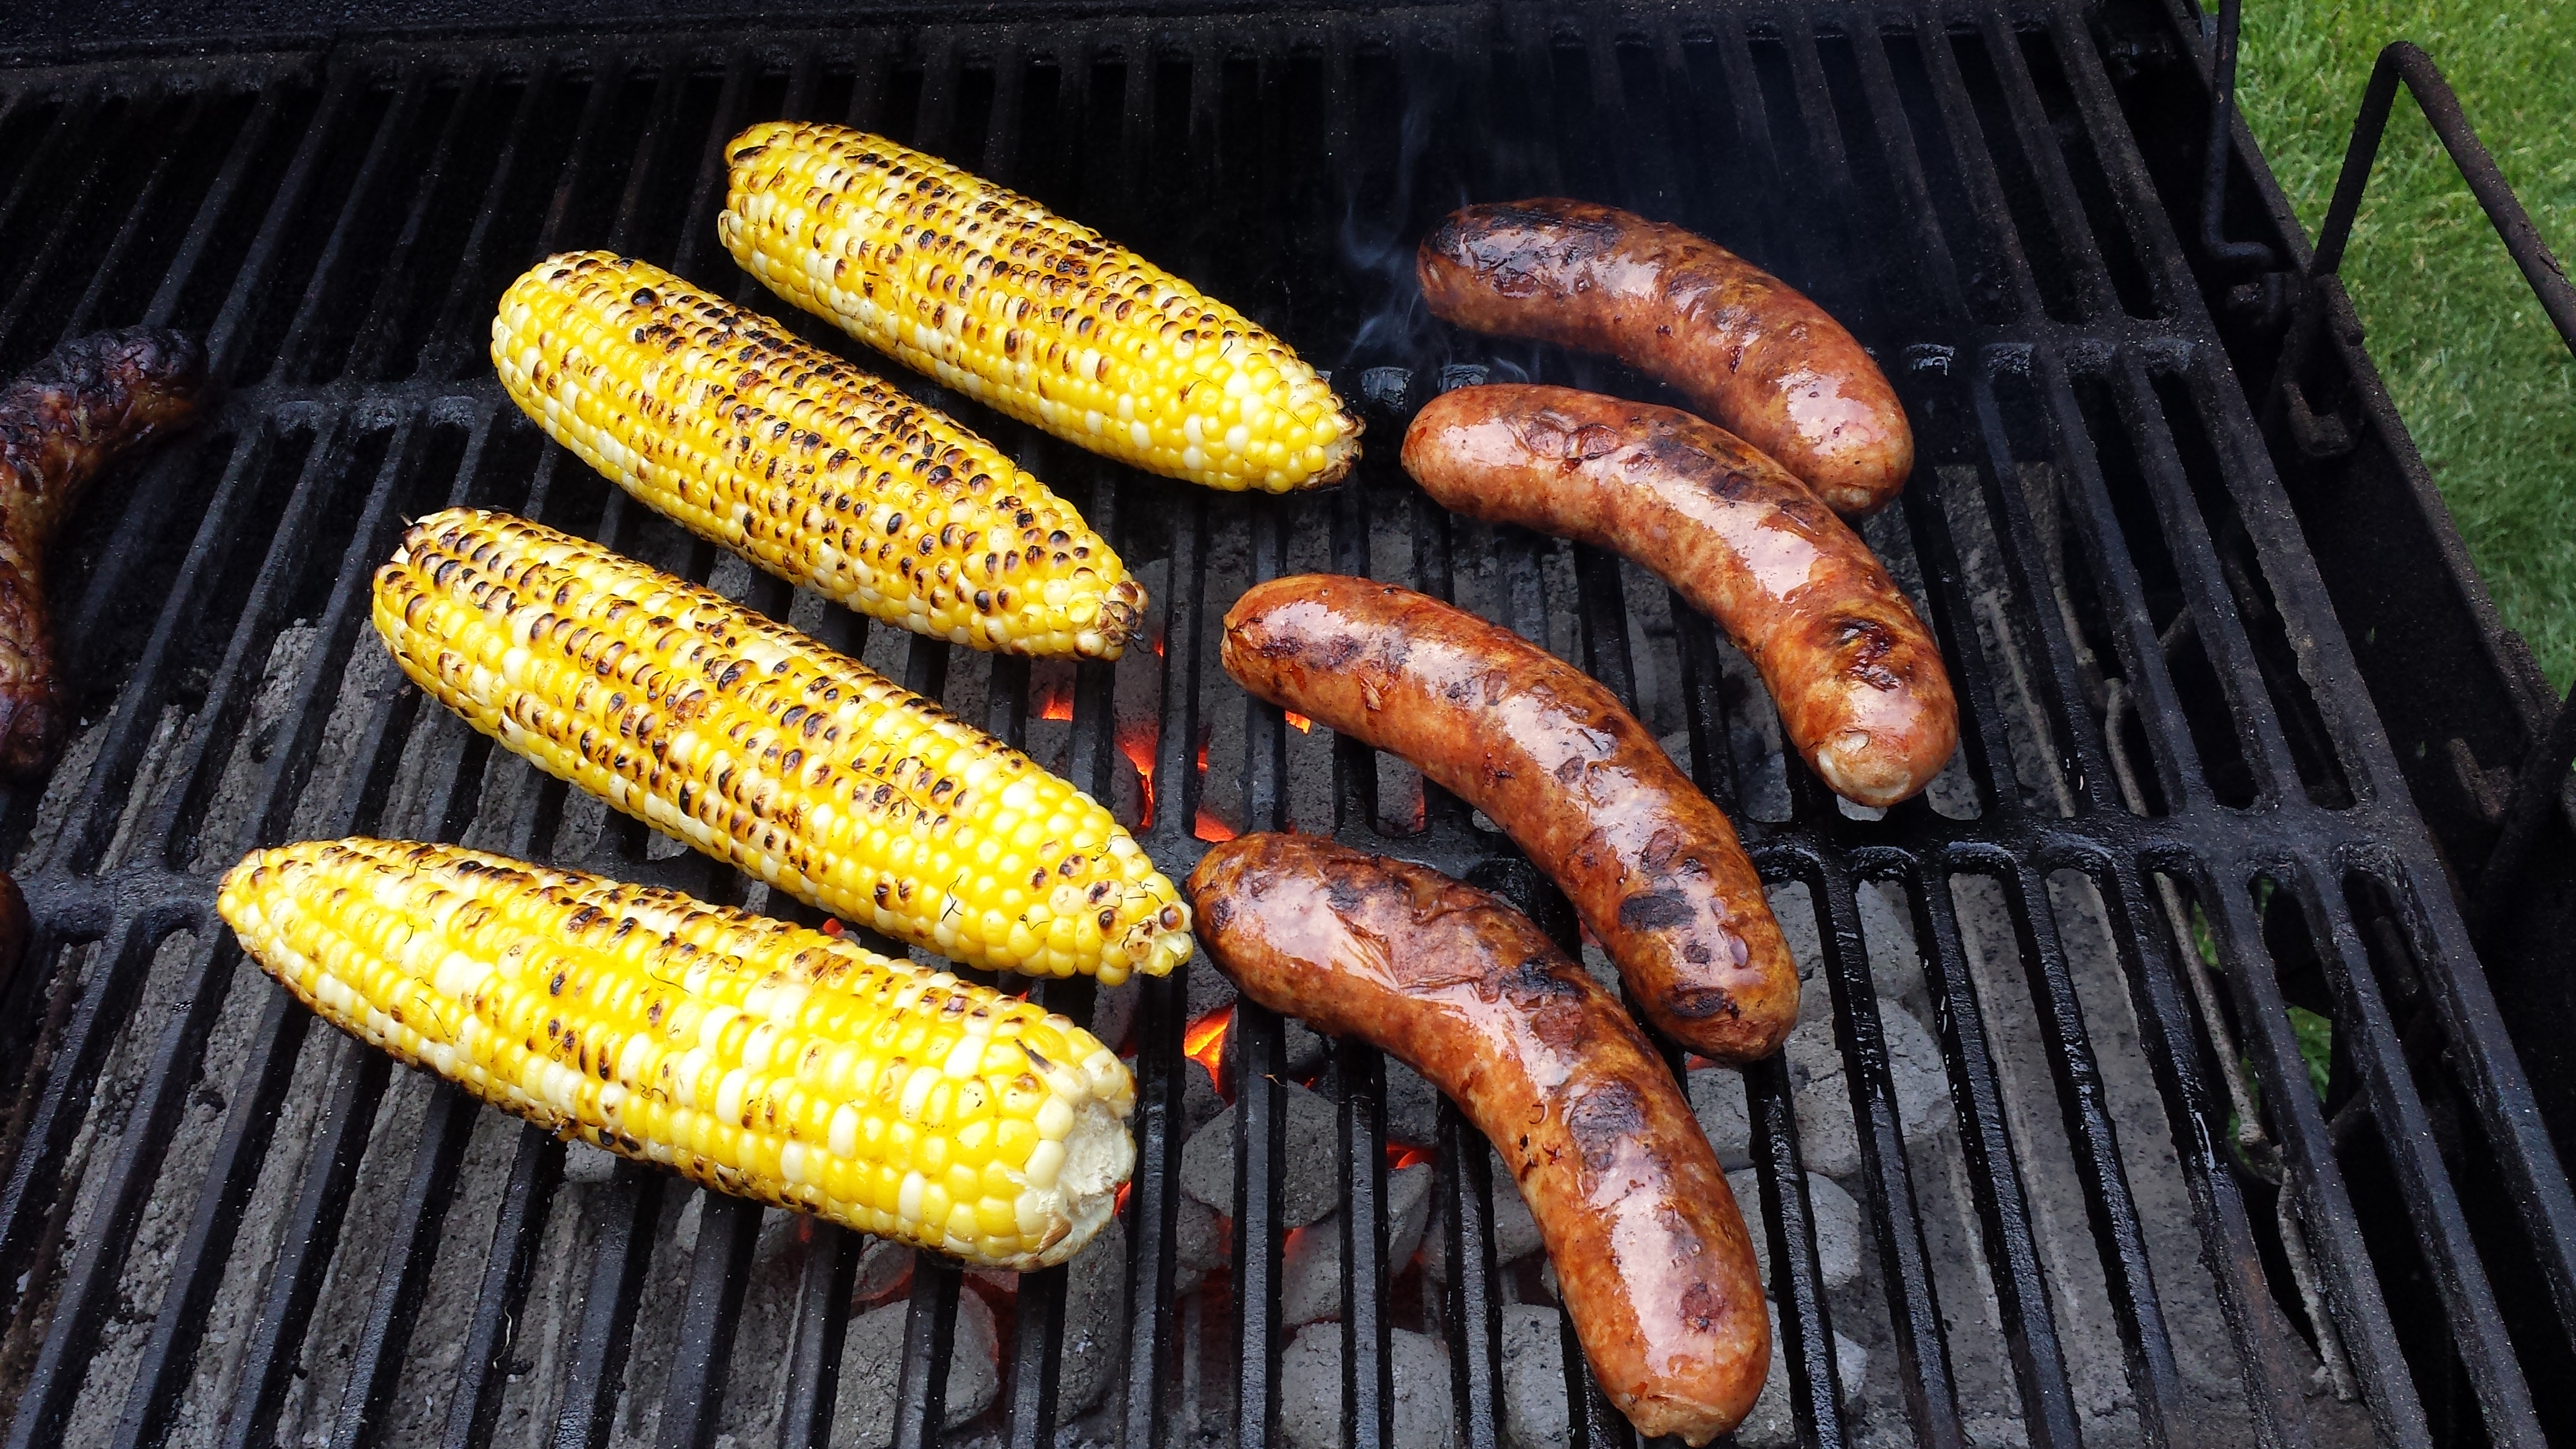
Direct Grilled Corn (with Brats)

In my humble opinion, there’s only one way to grill corn – out of the husk and directly over the coals (not gas – that ain’t even real grilling).  Now I know a lot of folks, including some very close friends, like to leave the husks on their corn when they grill it.  I don’t know, something about sealing in the juices.  But the fact is, corn has plenty of water and it’s not like direct grilling it dries it out.  Quite the contrary.

Grilling in the husks is basically just steam cooking using heat from the grill.  Direct grilling accomplishes something important that steaming doesn’t.  When you direct grill corn, the sugars in the water caramelize, resulting in an extraordinary sweetness that is accented by a touch of smoky goodness.  Trust me, nothing else compares.

Direct grilling corn is easy.  Grill it just like a hot dog, turn it frequently to make sure it cooks evenly.  You can tell when it’s ready by the color change and the light charring as shown in the photo.  You can top with butter, salt and pepper, but if you really want to impress, mix up some Shadon Beni butter (preferably in advance, it’ll keep all summer):

  • 8 tablespoons (1 stick) butter (room temperature)
  • 3 tablespoons finely chopped fresh cilantro
  • 2 scallions, both white and green parts, trimmed and minced
  • 1 clove garlic, minced
  • salt and pepper to taste.

Spread this on your grilled corn and then spritz it with some fresh lime juice, and I guarandamntee you’ll wish you had grilled more.  Please trust me on this; you’ll never want corn cooked and served any other way ever again.

***

Setting Up a Stanley Gage Plane

Stanley Gage Plane - Frog and Iron Assembly

Stanley Gage Plane – Frog and Iron Assembly

Stanley Gage planes are a little finicky to set up initially, but once you get them set accurately, they do tend to stay that way.  The main benefit of the design is such that once properly set, you can remove the lever cap, iron and cap iron, and then replace them again, returning to the exact depth adjustment at which you had it set initially.  Further, since the iron/cap iron is positioned via an indexing block, there is no slop (movement) from side to side, and therefore no need for a lateral adjustment mechanism.

Indexing Block on Gage Iron

Indexing Block on Gage Iron

Some people will tell you that in order for the design to work, the cutting edge of the iron must be perfectly perpendicular to its edges.  Ideally, that is true.  However, I don’t think it’s actually all that critical.  What does need to be perpendicular to the cutting edge is the sides of the indexing block, which can be loosened and adjusted via the screw on the top side of the iron (show here on the left).

The indexing guide itself, which is attached to the lever cap, is not laterally adjustable, so in order for the iron to extend properly through the mouth of the plane, the iron’s edge needs to be perfectly aligned.  As I said, you ideally want everything to be at perfect right angles, but that’s not always what you end up with. By adjusting the indexing block so that it’s properly aligned in conjunction with the cutting edge on the iron, even a skewed edge can be aligned properly.

I admittedly don’t have a lot of extensive personal hands-on experience with the Gage planes.  I’ve owned a couple, and right or wrong, here’s how I set them up for use:

  1. Remove the lever cap and set it aside.
  2. Loosen (slightly) the indexing block that’s attached to the iron, just enough so it moves independently against the iron.
  3. Put the iron in place (seating the indexing block to engage the depth adjustment).
  4. Align the iron with the mouth opening, and carefully tighten the screw on top of the indexing block.
  5. Put the lever cap in place and tighten it.  You should be good to go.

***