Setting Up and Tuning a Block Plane

165 SB9.5 Type 12 Post1

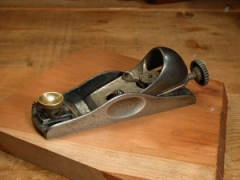
Stanley Bailey no. 9-1/2, c. 1952-55 ~ one of the most popular block planes of all time

As a follow up to an earlier post about setting up and tuning bench planes, this one will focus solely on block planes. Some of the information is taken directly from that post, so if you’ve read it, it may sound familiar.

On to Setting Up Those Block Planes…

It’s no surprise that so many ‘modern’ woodworkers, especially those used to plug-and-play electric tools, eschew anything that requires sharpening, let alone tuning and fettling to make it work properly.  But the fact is, whether 100 years old or brand spanking new, virtually all planes benefit from some degree of tuning to bring them to their full potential.  Fortunately, this is not a difficult proposition, and actually aids in better understanding how the tool functions and how to get the most out of it.

Below are the basic steps for setting up and tuning a block plane for use.  Block planes tend to be less complicated than bench planes, but there are still many variations, both new and used. I’m purposefully keeping it fairly generic, so some interpretation may be necessary when applying the concepts to the tool in front of you.  But don’t worry, there are no tool police surveilling workshops and garages.  Feel free to skip a step if you don’t think it’s relevant or needed.

Step 1 – Soles Need Saving

I’m not a stickler when it comes to flattening the sole of a plane.  After owning hundreds and using dozens of planes over the years, it’s fairly rare to come across one with a sole so warped, cupped, or bowed that it’s unusable.  If you happen upon one that is truly unusable, my advice is to return it, sell it, or throw it away.  The only possible exceptions are block planes, which are pretty easy to flatten due to their smaller size.  Bench planes are far more difficult, especially the larger ones.  You can take them to a machine shop and have them milled or lapped flat, but forget trying to flatten them yourself with sandpaper unless the problem is very minor.

165 SB9.5 Type 12 Post5

The sole of this plane was lapped by hand using a granite surface plate

If you do decide to lap your plane’s sole flat, you’ll need a dead flat substrate.  The cast iron bed of a table saw or jointer works well, or if you don’t have one of those available and want to keep it on the cheap, a piece of 12” x 12” or larger granite surface plate will work for block planes.  Just make sure you retract the blade and tension the lever cap as you would in actual use.  This puts the correct stress on the plane body.  I start with 60 grit and progress up to about 320.  Removing high spots (convexity) is more critical than low spots (concavity).  Keep in mind that you don’t even need the entire sole dead flat.  As long as you have smooth contact at the toe, around the mouth, and at the heel, the plane will work just fine.

Vintage planes often have raised dings from bouncing around in tool boxes, especially along the edges, toe or heel.  A flat mill file makes very quick work of these minor problems.  Finally, some woodworkers file a very small 45 degree chamfer along each edge of the sole.  This is completely optional, but helps prevent inadvertent gouges when using the plane should you tip it slightly.  I’ve seen some Stanley planes from the mid 20th century that appear to have been made that way at the factory.

Step 2 – Flatten ‘dem Frogs

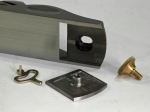
The hole in the iron straddles the lateral adjustment pivot disc and seats against the tiny frog where it engages the tiny pins on the height adjustment lever mechanism

The hole in the iron straddles the lateral adjustment pivot disc and seats against the tiny frog where it engages the tiny pins on the height adjustment lever mechanism

Block planes do not typically have removable frogs like bench planes, but there are some exceptions, mainly on some of the specialty and low angle planes where part of the frog moves with the iron when adjusting depth of cut. Either way, the function of the frog is the same on all planes. It provides a secure platform on which the iron is supported.  In order for the plane to shave wood correctly, there must not be any movement (wobble, play, rocking, etc.) to the iron.  It must be firmly seated against the frog, so the face of the frog must be as flat and secure as possible. This platform on most block planes is frequently very small, especially when compared to bench planes. Click on the photo to the right and you can see the frog is less than 1/2 square inch.

Since the frog on your block plane is typically not removable, you only need to touch up the seat with a firm sanding block to ensure it is flat.  Also, because the flat sloped area behind the mouth on the plane’s base provides much of the forward support for the iron, it needs to be flat too.  Unfortunately, it’s hard to get to, and since you don’t want to enlarge the mouth at all, just a touch using a small piece of angled wood with fine sandpaper wrapped around it is about as far as you want to take it. Thankfully, this is all that is usually needed to remove old crud. A Dremel or quality flexible shaft tool with a wire wheel brush will also work if the problem is limited to dirt and light corrosion.  Finally, as on the bench plane, clean the threads on all the hardware and add a little light oil to help retard moisture and rust.

Step 3 – Lever Caps (This is not a drinking game…)

18 cap 4

Just the leading edge to the underside of the lever cap at the bottom of the photo needs to be flattened. This photo, taken before flattening, shows the edge to be a little rough, which will compromise flush contact with the iron.

Block planes don’t have cap irons, so the lever cap plays a more important role.  Use your coarse sharpening stone or take a fine file to the back side and remove any rough spots, giving close attention to the leading contact edge.  This is most important on block planes with cast iron hooded style lever caps, such as the old Stanley 9-1/2.  The back sides of these caps are notoriously rough and unfortunately japanned. You don’t need to remove all the japanning, but you do want to get a smooth line of contact down front where it touches the iron along the front edge.  File it smooth and give it a couple of swipes across your 1000 grit stone. If your plane uses one of the nickel plated knuckle style lever caps, just flatten the bottom of the front edge in a similar fashion.

Step 4 – I Pity the Fool Who Don’t Sharpen His Tool!

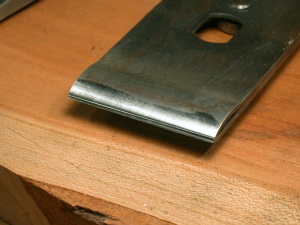
The iron has been sharpened with a small 2 to 3 degree secondary bevel added (the dark line at the very edge)

The iron has been sharpened with a small 2 to 3 degree secondary bevel added (the dark line at the very edge)

The simple fact is, even with brand new planes, the irons require final honing before use.  This is not due to some lack of attention on the part of manufacturers.  Irons are provided this way on purpose, since the manufacturer has no way of knowing what you will be using the plane for, and subsequently how the iron would need to be honed. You may want a perfectly straight edge if working on joinery, or you may want it cambered (with a slight radius) for smoothing out small surface areas. It’s up to you, but if you do nothing else in the way of tuning or preparing your plane for use, at least take the time to properly sharpen it.  Do not skip this step!  Sharpen the iron.  Again, sharpen the iron!  Sharpen it I say!

Since sharpening is such an expansive topic in and of itself, I will leave the specific details for other posts.  What you need to know in the context of tuning, however, is that any plane, new or old, requires initial sharpening and honing.  At a minimum, new plane irons need to have their un-beveled side honed flat and polished to at least 4000 grit and preferably 8000 grit.  You don’t need to fuss with the entire surface; just the first 1/8” to 1/4” along the cutting edge will do.  You also need to put a final honing on the bevel edge itself.  It may look sharp, but it needs to be honed, again, to at least 8000 grit.  The goal is to get your cutting edge to as close as possible to a zero degree radius.

Sharpening is too often the deal breaker that dissuades woodworkers from trying hand tools.  This in unfortunate, for it requires little monetary investment to get started, is not particularly difficult to learn, and can be accomplished rather quickly with surprisingly good results.  For detailed information on sharpening, I recommend investing in one of the outstanding books on the subject by Ron Hock or Leonard Lee.   Chris Schwarz has also written a number of fantastic articles on sharpening plane irons.

Step 5 – Final Adjustments

Now that you’ve finished tuning and sharpening your plane, it’s time to put it all back together and adjust it for use.  Hopefully, you have a better understanding of what each part does and how they all function together.  This will make adjusting it for use, and while in use, more intuitive and fluid.

A few points of consideration…

The adjustable mouth plate on the Stanley no. 9-1/2. The mouth opening is adjusted by loosening the knob and rotating the eccentric throat lever left or right (to open or close the mouth).

The adjustable mouth plate on the Stanley no. 9-1/2. The mouth opening is adjusted by loosening the knob and rotating the eccentric throat lever left or right (to open or close the mouth).

While the frog’s position on bench planes is adjustable, meaning you can shift if forward to decrease the size of the mouth opening or backward to increase the size of the opening, many (but not all) block planes have adjustable mouths.  Use a larger mouth opening for thicker cuts, and a smaller mouth opening for fine shavings.  For details on this please see my post on adjustable mouth planes.

Holding the plane upside down, and looking down the sole at a low angle, lower the iron until it just begins to appear through the mouth – just a whisper.  Note that it’s not unusual for there to be quite a bit of slop in the wheel that lowers and raises the iron, as much as a full turn or two.  Just turn it until you begin to feel resistance. Make any lateral adjustments necessary using the lateral adjustment lever if your plane has one (some do and some don’t). If yours doesn’t, just tap the side of the iron with a small hammer to properly align it. I use a brass hammer so as not to mushroom the iron’s edge, but what you use is up to you. Turn it upright and make a test pass on a piece of scrap wood.  If the plane digs in, back off the depth just a bit.  If it misses entirely, lower the iron a little.  You will quickly get a feel for when it’s ‘right,’ as evidenced by the rewarding ‘thwack’ sound a plane makes when it cuts a perfect curl.

Tuning a hand plane is not a difficult endeavor.  Once practiced, the whole process can be accomplished in about a half hour, even less depending on the tool. Rather than view it as an unpleasant chore, I actually enjoy it, especially later in the evening when the dust has settled and the world is quiet.  Pour yourself a measure (or two) of your favorite Kentucky brown, put on some music of choice, and saddle up to your work bench.

276 SB18 Type 15 Post 9

Stanley Bailey no. 18, c. 1936-42

 ***

Tools shown in the photos were returned to functional condition by Virginia Toolworks using museum quality archival preservation techniques.  Sharpened and tuned for use, every tool is fully tested and adjusted until perfect.

Sharpening Angles for Bench & Block Planes

Sharpening Basics

Since sharpening is such an expansive topic in and of itself, I will leave the specific how-to details for other posts.  What you need to know in the context of fine tuning, however, is that any plane, new or old, requires initial sharpening and honing.

At a minimum, new plane irons need to have their un-beveled side flattened and polished to at least 4000 grit and preferably 8000 grit.  You don’t need to fuss with the entire surface; just the first 1/8” to 1/4” along the cutting edge is all that matters.  You also need to put a final honing on the bevel edge itself.  It may look sharp, but it needs to be honed, again, ideally to 8000 grit.  The goal is to get your cutting edge to as close as possible to a zero degree radius.

Sharpening is too often the deal breaker that dissuades woodworkers from trying hand tools.  This in unfortunate, for it requires little monetary investment to get started, is not particularly difficult to learn, and can be accomplished rather quickly with surprisingly good results.  For detailed information on the how-to of sharpening, I recommend investing in one (or both) of the outstanding books on the subject by Ron Hock or Leonard Lee.   Chris Schwarz has also written a number of fantastic articles on planes and sharpening plane irons.

Getting Down to Business

If all you want to know is what bevel angle to sharpen on your plane iron, make it 25º and call it a day.  But if you want to better understand the reasoning behind the geometry and some of the variations possible, read on.  In order to master your tools, it’s helpful to understand the principles behind the geometry at play.  So, first a few concepts and then we’ll tie them all together.

Frog Assembly

The frog is screwed to the body of bench planes

First things First – Before you can determine the optimal angle at which your plan iron should be sharpened, you first need to know the angle at which it sits in the plane.  Plane irons are held in place against the frog via a clamping device called the lever cap.  The frog is attached to the base, or sole, of the plane and provides an immovable seat for the iron.   The angle of the frog face is not adjustable, so it must be considered a constant.  On standard bench planes, the angle is usually 45º while on low angle planes it is typically a very shallow 12º.  This angle is traditionally referred to as the ‘pitch’ of the plane.

Pitch / Angle of Attack – Pitch, or what Ron Hock refers to as the Angle of Attack, is the angle at which the cutting edge engages the wood. [1]   As stated above, most bench planes have  a bed angle of 45 degrees.  This is referred to as ‘common pitch,’  and has traditionally been considered the optimal pitch for bench planes.  A slightly higher 50º pitch is called ‘York Pitch.’  This higher angle pitch is used in some bench planes for working harder woods and woods with difficult grains.  ‘Middle Pitch’ of 55º and ‘Half Pitch’  (also known as ‘Cabinet Pitch’) of 60º are frequently found in molding planes for soft and hardwood respectively. Angles of less than 45º are referred to as ‘Low Angle’ or ‘Extra Pitch,’ and are used in planes for softwood and for cutting end grain. [2]

Here’s a summary table of the different pitches and their intended use.

Pitch (Angle of Attack) Name Use
60º Half Pitch / Cabinet Pitch Molding planes for hardwood
55º Middle Pitch Molding planes for softwood
50º York Pitch Harder woods with difficult grain
45º Common Pitch Optimal Pitch for most planes
<45º Low Angle Softwood and End Grain

Bevel Up vs. Bevel Down – All planes fall into one of two categories – Bevel Down and Bevel Up.  Bevel down planes have irons that are situated with the bevel angle facing down, while the irons on bevel up planes are positioned with the bevel angle facing up.  Most bench planes are bevel down while most block planes are bevel up.  Specialty planes can go either way, depending on their intended purpose.  There are some advantages to the bevel up configuration, but we’ll cover that later.

Regardless of whether the plane is bevel up or bevel down, the angle of the frog face (upon which the iron sits) is an important determining factor in determining the desired bevel angle.  As stated above, the vast majority of bench planes have frogs with a 45º bed, meaning the cutting iron sits at a 45 degree angle from the work surface.  Since these bench planes are bevel down, changing the bevel angle doesn’t change the pitch, or angle of attack – that’s essentially fixed at 45 degrees.  Changing the bevel angle does, however, change the relief angle, or clearance behind the iron.

SB605 Type 6

Bevel Down Bench Plane

Bevel Down Planes – Since the irons on most bench planes are positioned bevel down, this is the most common configuration faced when sharpening.   Because the un-beveled side of the iron is positioned up (i.e., bevel side down), the angle of attack is the same regardless of the angle at which the bevel is sharpened.  That doesn’t mean the bevel angle is completely unimportant; durability, for example, is still a consideration.  The bevel angle is, however, less critical than it is on bevel up planes.  That said, there are still a few tricks you can employ to fine tune your angle of cut, but more on that later.

The standard primary bevel angle for bevel down bench planes is 25 degrees.  This offers a good balance of shearing action and durability while providing an adequate relief angle (behind the cut).

SB65.5 Type3

Bevel Up Block Plane

Bevel Up Planes – Block planes have the iron positioned bevel up, but they’re not the only planes with this configuration.  Low angle bench planes, including the Stanley no. 62 and the Sargent no. 514 were bevel up, as are several models made today by Veritas.  There is an advantage with bevel up irons in that the angle of the bevel can be changed to affect a change in the angle of cut.  This provides a measure of flexibility that bevel down planes don’t have, at least not to the same extent.

While there is more to consider in edge geometry than just the angle of cut (i.e., durability), you could reasonably sharpen the bevel on the iron of a low angle block plane iron to 33 degrees.  Given its 12º bed angle, you would end up with an angle of cut of 45 degrees (12º+33º=45º), the same as on a standard angle plane.  By contrast, to accomplish a low angle of cut using a standard angle plane, you’d have to sharpen the bevel at a very shallow 17 degrees (20º+17º=37º).  Durability of such a thin cutting edge would be problematic with most woods.

See “Beyond the Standard” below for information on adding secondary bevels (micro-bevels) and back-bevels.

Common Sharpening Angles

The table below shows the three most common bench and block plane types and the proper angles at which to sharpen the irons.

Common Plane Types Frog Angle Angle to Sharpen Angle of Cut
Bench Plane – Standard Angle 45º 25º to 30º 45º
Block Plane – Standard Angle 20º 25º 45º
Block Plane – Low Angle 12º 25º 37º


Beyond the Standard

Secondary/Micro-Bevels – The terms secondary bevel and micro-bevel refer to the same thing.  Secondary bevels are a very shallow bevel along the cutting edge of the primary bevel.  These angles, usually 1º to 3º, serve primarily as an aid in honing.  It takes considerably less time and effort to final hone a small secondary bevel that it does the entire primary bevel.  They also make honing touch ups a snap.  As long as the edge has not been damaged, it’s quick and easy work to re-establish a keen edge on the secondary bevel with a few strokes on a sharpening stone.

On a bevel down plane, adding a secondary bevel affects no change in the angle of cut.  The only thing it changes ever so slightly is the relief angle – the angle between the back side (bevel side) of the iron and the work surface. It also slightly reduces the total bevel angle on the iron itself, but should not be enough to affect durability of the edge.  On most planes the addition or subtraction of a couple of degrees of bevel angle is not going to make any difference.

Some people will tell you you can’t (or shouldn’t) put a secondary bevel on a bevel up iron.  That’s nonsense.  If you’re that concerned with the cutting angle, sharpen your primary angle a few degrees shallower so the secondary angle brings you back to 25º.  I’ve never experienced a problem with a secondary bevel on a bevel up iron, and it’s a sharpening technique I apply consistently.

Back Bevels – Back bevels can be added for a couple of reasons.  On a bevel down plane, (unlike the secondary bevel) adding a back bevel will affect the angle of cut.  This is something you can use to your advantage.  For example, with the frog fixed at a 45º angle, adding a 5º back bevel increases the angle of cut from 45º to 50º.  This technique can be used if you’re working with harder woods or wood with difficult grain.

Back bevels are also helpful if your plane’s iron has rust damage or pitting to its un-beveled side.  By putting a back bevel of 1º to 2º on the pitted back side, you effectively cut through the pitted surface creating a clean, undamaged edge.  You end up with a cutting angle of about 46º to 47º – not a critical difference for most woodworkers.  If you’re obsessive about your edge geometry and angle of cut, this might not be a satisfactory solution.  Although if that’s the case, you probably shouldn’t be futzing with a vintage plane in the first place, let alone salvaging a pitted plane iron.  But if you’re like me, having one or two extra irons set up for different purposes is a must, and finding good use for old irons suffering from age and neglect makes me feel good.  It’s just a matter of purposing them for the right job.  And again, increasing this angle of attack is actually advantageous when planning wood with difficult grain. [3]

Back bevels on bevel up irons won’t change the angle of cut, but they do change very slightly the relief angle and the bevel angle of the iron itself.  Again, a couple of degrees difference should not adversely effect the  durability of the edge.

Summary

Wrapping up, the vast majority of both bench and block planes can be sharpened with a 25º bevel angle.  However, with a little experimentation, you may find that making some adjustments to the geometry helps overcome challenges presented by both difficult wood and less than perfect plane irons.  Don’t be afraid to experiment.  That’s the best way to learn.

____________________________________

[1] Hock, Ron, Back Bevels and Plane Geometry, 2010.
[2] Whelan, John, The Cutting Action of Plane Blades, 1993.
[3] Hock, Ron, Back Bevels and Plane Geometry, 2010.

***

Tune Your Block Plane Tonight

Following the popularity of the recent post, Tune Your Hand Plane Tonight, let’s now talk about block planes.  Much of the information will be the same, but block planes are different enough to warrant a dedicated set of instructions.  Besides, since there are probably more block planes owned today and sitting unused in garages and workshops than there are bench planes, they deserve a little love of their own.

As I’ve written before, I have a particularly strong affinity for block planes.  They are  the sexy two seater sports cars of the hand plane world – quick, nimble, and fun to handle.  But more than that, they are extraordinarily versatile and practical for many handy-man chores around the house, as well as indispensable tools in the wood shop.  Even the most ardent power tool user, and certainly the average homeowner, should have at least one or two block planes in his or her arsenal.

Keeping a block plane in good working order is quite easy.  Tuning one for optimal performance is a simple proposition that can be accomplished in an hour or so, if not less.  As I did with the bench plane instructions, I’m going to assume that your block plane is already in a mechanically functional condition and doesn’t require a full blown restoration.  For that level of detail, I recommend reading the posts under Preservation on the menu bar at the top of the page.  Since there are multiple mechanical styles and configurations of block planes, I’m going to try to keep it fairly generic, so you may need to interpolate for your specific plane.

Step 1 – Pour Drink of Preference

High-West-WhiskeyFor working on block planes, let’s go with something a little more exotic than the bourbon we enjoy with our bench planes.  I recommend Rendezvous Rye from the High West distillery.  It is… complex and superb.  Of course, what you drink is up to you, but moderation is certainly recommended, for while you won’t be working with electrically powered tools, you will be handling very sharp objects.  (5 minutes)


Step 2 – Disassembly & Cleaning

064 SB9.5 -Type 18 Post8The second step is to completely disassemble your plane and clean all the parts.  Using screwdrivers of the appropriate size, remove all the parts – lever cap, cap bolt, lateral lever, eccentric lever, adjustment screws, knobs, etc.  If you’re not completely familiar with what and where everything goes or are worried you might have trouble putting it all back together, take before pictures or notes.

Once disassembled, brush off all the sawdust and dirt.  If the filth is excessive, use a toothbrush and orange degreaser (available at the hardware or grocery store).  Also take a few minutes to clean the threads and slots on all the screws and bolts.  I use a small wire bristle brush with a little turpentine or light penetrating oil like WD-40. Once cleaned, wipe them down and set them out of the way so they don’t attract grit.  (10 minutes)

Step 3 – Hello Froggy

160 SAR5306 Post7Unlike frogs on bench planes, the frogs on block planes are usually fixed platforms cast into the body of the plane.  The top of the frog provides a small platform for the iron to sit, while the flat area behind the mouth offers support near the cutting edge.  Both surface areas should be clean of dirt and debris.  A toothbrush or brass bristle brush with degreaser works well, although you can also use WD-40 or turpentine.  The face of the frog is one of the more critical surfaces of the plane.  Once clean, fit the iron against the frog and verify that it sits flat and securely with no wobble.   You don’t want any wiggle or movement, so any high spots or irregularities in the casting need to be carefully filed or sanded flat.   (5-15 minutes)

Step 4 – Adjustimability of the Mouth

165 SB9.5 Type 12 Post7Many “premium” models of block planes feature an adjustable mouth opening.  This typically means the front section of plane’s sole is a separate piece than can be positioned toward the toe (thus opening the size of the mouth) or closer to the iron (closing the size of the mouth opening).   It is necessary to periodically remove this piece to clean out sawdust that has accumulated, and to clean and lubricate the tracks upon which the plate rides.  If it doesn’t adjust easily forward and back, it needs attention.

Since you’ve already disassembled the plane, make sure both the plate itself and the receiver in which it sits are both clean of debris.  Brush the edges of the plate and tracks of the receiver with a brass or wire bristle brush lubricated with light oil or turpentine.  Fit the plate in place and verify that it moves fairly freely.  It is not normally necessary (nor desirable) to sand the edges of the plate to make it move more easily, although this is sometimes necessary if the plane is vintage and the plate a replacement.  If you decide metal removal  is absolutely necessary, be careful and go very slow.  You can’t un-sand.  (5-15 minutes)

Step 5 – Inspect the Sole

165 SB9.5 Type 12 Post5Take a look at the sole (bottom) of the plane.  Inspect for dents or dings with raised points around the edges that might dig into your wood surface when planing.  If you find any, carefully file them flat with a mill file, followed by a little 220 grit sandpaper.  Unlike bench planes, which have a lot more surface area, flattening the sole of a block plane is a relatively painless process.  Although not usually a critical requirement, flattening the bottom will often provide superior results in use.

First, temporarily re-install the iron and lever cap and tighten to normal pressure.  This ensures the body will be under the same stress (and any possible distortion) as when in actual use.  Working against a dead flat substrate such as a granite sharpening block or the iron bed of a table saw,  start with 60 grit and go through progressively finer grits until you are satisfied that the toe, heel, and areas just in front of and behind the mouth are all completely flat and smooth.  I usually stop with 320 grit.  Aluminum Oxide sandpaper is my preference. If you don’t want to invest in a granite sharpening block, granite floor tiles from your local home center are just the right size and cost around $5 each.  (30-45 minutes depending)

Step 6 – Time to Sharpen

Sharpening SetupYes, sharpening is the step everyone loves to hate, the step that prevents so many people from ever trying a hand plane.  The trick is not to wait until you need to use the tool.  Make time for sharpening in advance, and make a party out of it!  Okay , so maybe not a party, but there is something truly rewarding about getting an edge you can shave with.  It’s relaxing and I really do enjoy it.  Since this is not a sharpening tutorial, I’ll leave the particulars on methodology to another post or reference.  But if you do nothing else, take the time to put a keen edge on your plane’s iron.  A 25 degree bevel works perfectly on most block planes – both low angle and standard angle models.  The angle of the plane’s bed varies on these models, usually either 12 degrees for low angle planes or 20 degrees for standard angle planes.  Add the 25 degree bevel and you end up with a 37 degree low angle of cut, or a 45 degree standard angle of cut (same as bench planes).  Add a micro bevel if you want, and don’t forget to polish the unbeveled back edge. (30 minutes)

Step 7 – Lubrication

Pure Oil 1Lubrication is a good idea, but should be done sparingly since oil attracts dirt and grit.  I add just a drop of light oil to the threads of all the bolts and screws before re-installing them.  I also add a drop to all the moving/adjustment parts, but wipe them with a rag afterward so that only a light film is left.  They certainly don’t need to be dripping.

Some guys believe in waxing the sole.  Nothing wrong with that as long as you don’t use a silicone based wax.  However, I just wipe down all exterior surfaces with a little Jojoba oil for storage.  (5 minutes)

Step 8 – Assemble, Adjust, Cut

187 SB18 Type 14 Post1Time to put it all back together.  Re-attach the eccentric lever and front plate (if it has one), adjustment wheel, lateral lever, knobs, etc. and all related hardware.  Carefully put the iron and cap iron assembly in place being careful not to fould the newly sharpened edge, and install the lever cap.  It should lock down securely, but not so tight as to inhibit raising and lowering the iron.  Adjust the front plate (if it has one) forward or backward as needed for the type of planing you intend to do (again, see open vs closed mouth).  Once set, lower the iron into the mouth to take your first test cut.   All of your hardware and adjustment mechanisms should move freely and smoothly. (10-15 minutes)

Unless you run into an unexpected problem, the entire tuning and sharpening process can be completed in about 1 to 2-1/2 hours, and even quicker if you’re tuning a new plane or re-tuning a plane that has already been tuned or well cared for.  It’s easy, rewarding, and builds both knowledge and confidence in your ability to master hand and block planes.

***

Tune Your Hand Plane Tonight

Among the most frequent web searches that lead people to this site come from those looking for information on tuning a hand plane.  Admittedly, for those new to the craft, or at least new to using hand tools, the prospect of setting up and fine tuning a hand plane is daunting.  After all, the nomenclature of parts is bewildering, the functional mechanics are an exercise in geometry and physics, and then there’s that whole issue with sharpening.  It’s no wonder so many people would rather spend an evening prepping for a colonoscopy.

But yea I say unto you, fear not!  Tending to a neglected (or new) hand plane is both relaxing and rewarding, and in most cases takes just an hour or two.  Best of all, the gratification is instant, the rewards immediate.

Now in the interest of keeping things simple, I’m going to assume that your plane is already in a mechanically functional condition and doesn’t require a full blown restoration.  For that level of detail, I recommend reading the posts under Preservation on the menu bar at the top of the page.  I’m also going to focus solely on bench planes.  I’ll cover black planes in a later post.  For simple tuning in one evening, read on…

Step 1 – Pour Drink of Preference

PVW-trio-4What you drink is up to you, and moderation is certainly recommended, for while you won’t be working with powered tools, you will be handling very sharp objects.  I personally prefer a finer bourbon, perhaps Maker’s 46 or Elijiah Craig 18 year, or if I’m in a particularly festive mood, a little Jefferson Presidential Select 17 year or Pappy Van Winkle.  Either way, begin by putting on some relaxing music and have a drink.  (5 minutes)


Step 2 – Disassembly & Cleaning

Disassembled Plane, Ready for TuningThe second step is to completely disassemble your plane and clean all the parts.  Using screwdrivers of the appropriate size, remove all the parts, screw, bolts, washers, etc.  If you’re not completely familiar with what and where everything goes or are worried you might have trouble putting it all back together, take pictures or notes.  Or just pay attention; it’s not that complicated for heaven’s sake.

Once disassembled, brush off all the sawdust and dirt.  If the filth is excessive, use a toothbrush and orange degreaser (available at the hardware or grocery store).  Also take a few minutes to clean the threads and slots on all the screws and bolts.  I use a small wire bristle brush with a little turpentine or light penetrating oil like WD-40. Once cleaned, wipe them down and set them out of the way so they don’t attract grit.  (10 minutes)

Step 3 – Inspect the Sole

Stanley No. 7 Jointer PlaneTake a look at the sole (bottom) of the plane.  Put a straight edge against it if it makes you feel better.  Once you’ve convinced yourself that it’s flat enough (which it undoubtedly is), set it aside and have another drink.  Seriously, after owning hundreds and using dozens of planes over the years, I’m convinced it’s rare to come across one with a sole so warped, cupped, or bowed that it’s unusable.  If there are any dents or dings with raised points around the edges that risk digging into your wood surface, carefully file them flat with a mill file, followed by a little 220 grit sandpaper.  You can also use the sandpaper or steel wool to remove any heavy crud – I suggest lubricating it generously with WD-40, Mineral Spirits, or Turpentine.  Working against a dead flat substrate such as a granite or the iron bed of a table saw is recommended.  Go easy.  No need to overdo it; you just want it to be clean and smooth.  (5-30 minutes depending)

Step 4 – Address the Frog

Lap frog face on edge of stone to protect yokeFirst inspect the seat for the frog on the top side of the plane’s base.  This is the area of contact where the frog attaches to the body of the plane.  The mating surfaces must be clean and flat.   Use a toothbrush with the degreaser.  If there is stubborn crud to be removed, use a brass bristle brush.  If the crud is really bad, you can use a small steel brush, but be very careful to to damage the surrounding finish.  Mating surfaces on the frog itself should also be cleaned in the manner described above.

The face of the frog is one of the more critical surfaces of the plane.  It needs to be as flat as you can get it so the iron sits completely flush against.  You don’t want any wiggle or movement, so any high spots or irregularities in the casting need to be filed or sanded flat.  I go back to my granite surface and sandpaper for this.  Taking care not to damage the tip of the yoke that engages the iron and cap/iron, carefully sand the face surface of the frog until it is as flat as possible.  Change directions periodically to keep it even.  You only need to do enough to ensure the iron sits flat against it.  (15-30 minutes)

Step 5 – Polish the Cap Iron

Cap IronThe leading edge of your cap iron (also called the chip breaker) will need a little attention.  Flatten the leading edge of the cap iron where it contacts the iron so that it seats completely flush against it.  You don’t want any gaps that shavings can slip through.  While you’re at it, polish the top side of that leading edge as well (the hump) to make it nice and smooth.  Less friction makes the shavings pass over it more easily, helping to prevent clogs.   The smoother the better, but don’t obsess over this step.  (10 minutes)   

Step 6 – Sharpen the Iron

Sharpening SetupYes, I know, the step everyone loves to hate.  Even for me, it’s often a task that I procrastinate over, but once I get going, I actually enjoy it.  Since this is not a sharpening tutorial, I’ll leave the particulars on methodology to another post or reference.  But if you do nothing else, take the time to put a keen edge on your plane’s iron.  A 25 degree bevel works perfectly on bench planes; add a micro bevel if you’re into that, and don’t forget to polish the unbeveled back edge. (30 minutes)

Step 7 – Lubrication

Pure Oil 1Lubrication is a good idea, but should be done sparingly since oil attracts dirt and grit.  I add just a drop of light oil to the threads of all the bolts and screws before re-installing them.  I also add a drop to all the moving/adjustment parts, but wipe them with a rag afterward so that only a light film is left.  They certainly don’t need to be dripping.

Some guys believe in waxing the sole.  Nothing wrong with that as long as you don’t use a silicone based wax.  However, I just wipe down all exterior surfaces with a little Jojoba oil for storage.  (5 minutes)

Step 8 – Assemble, Adjust, Cut

Stanley Bailey no. 5, Type 17 - WWII VintageTime to put it all back together.  Re-attach the frog and all its related hardware first, but don’t tighten just yet.   Put the knob and tote back on if you took it off.  Carefully put the iron and cap iron assembly in place and install the lever cap.  It should lock down securely, but not so tight as to inhibit raising and lowering the iron.  Adjust the frog forward or backward as needed until the iron’s cutting edge is positioned appropriately for the type of planing you intend to do (see open vs closed mouth).  Once set, tighten down the frog and lower the iron into the mouth to take your first test cut.   All of your hardware and adjustment mechanisms should move freely and smoothly. (10-15 minutes)

Unless you run into an unexpected problem, the entire tuning and sharpening process can be completed in about 1-1/2 to 2-1/2 hours, and even quicker if you’re tuning a new plane or re-tuning a plane that has already been tuned or well cared for.  It’s easy, rewarding, and builds both knowledge and confidence in your ability to master hand planes.

***

Wait!  What about the tote and knob, you ask?  You can read all about their care and repair right here.

Setting Up and Tuning a Hand Plane

In today’s culture of instant gratification and disposable everything, most of us are conditioned to expect the stuff we buy to just work right out of the box.  Even the caveat “some assembly required” is printed on the packaging of many items, just to make sure there is no misunderstanding.  Published reviews of shop tools invariably dedicate an entire section to the experience of unpacking, cleaning, and setting up the tool for use, before the subject of functionality is even broached.  Whether a realistic expectation or not, once a tool is put together, most people want no further inconvenience beyond plugging it in and turning it on.

It’s no surprise that so many ‘modern’ woodworkers, especially those used to plug-and-play electric tools, eschew anything that requires sharpening, let alone tuning and fettling to make it work properly.  But the fact is, whether 100 years old or brand spanking new, virtually all hand planes benefit from some degree of tuning to bring them to their full potential.  Fortunately, this is not a difficult proposition, and actually aids in better understanding how the tool functions and how to get the most out of it.

Below are the basic steps for setting up and tuning a hand plane for use.  Since there are so many variations of planes, both new and used, I’m purposefully keeping it fairly generic, so some interpretation may be necessary when applying the concepts to the tool in front of you.  But don’t worry, there are no tool police surveilling workshops and garages.  Feel free to skip a step if you don’t think it’s relevant or needed.

Step 1 – One Righteous Sole
I’m not a stickler when it comes to flattening the sole of a plane.  After owning hundreds and using dozens over the years, it’s fairly rare to come across a plane with a sole so warped, cupped, or bowed that it’s unusable.  If you happen upon one that is unusable, my advice is to return it, sell it, or throw it away.  The only possible exceptions are block planes, which are pretty easy to flatten due to their smaller size.  Bench planes are far more difficult, especially the larger ones.  You can take them to a machine shop and have them milled or lapped flat, but forget trying to flatten them yourself with sandpaper unless the problem is very minor.

Good luck trying to lap this 22″ bad boy!

If you do decide to lap your plane’s sole flat, you’ll need a dead flat substrate.  The cast iron bed of a table saw or jointer works well, or if you don’t have one of those available and want to keep it on the cheap, a piece of 12” x 12” or larger granite surface plate or a marble tile from your home center will work for block planes, and typically costs less than $5.00.  Just make sure you retract the blade and tension the lever cap as you would in actual use.  This puts the correct stress on the plane body.  I start with 60 grit and progress up to about 320.  Removing high spots (convexity) is more critical than low spots (concavity).  Keep in mind that you don’t even need the entire sole dead flat.  As long as you have smooth contact at the toe, around the mouth, and at the heel, the plane will work just fine.

Vintage planes often have raised dings, especially along the edges, toe or heel.  A flat mill file makes very quick work of these minor problems.  Finally, some woodworkers file a very small 45 degree chamfer along each edge of the sole.  This is completely optional, but helps prevent inadvertent gouges when using the plane should you tip it slightly.  I’ve seen some Stanley planes from the mid 20th century that appear to have been made that way at the factory.

Step 2 – Flat Frogs Make Better Mates
Bench planes have removable frogs.  Block planes do not.  However, the function of the frog is the same – it provides a secure base to support the iron.  In order for the plane to shave wood correctly, there must not be any movement (wobble, play, rocking, etc.) to the iron.  It must be firmly seated against the frog, so the face of the frog must be as flat as possible.

On your bench plane, unscrew and remove the frog and all of its hardware, including the lever cap bolt on the front and the adjustment plate and screw on the rear.  Taking care not to damage the tip of the yoke that engages the iron and cap/iron, carefully sand the face surface of the frog until it is as flat as possible. I use the edge of my granite block for this, and change direction often to ensure I get a surface as flat as possible.  No need to obsess over it, you just need the iron to seat firmly against it.  While your at it, touch up the mating surfaces on the bottom of the frog where it attaches to the plane base.  Also take a moment to touch up the mating surfaces on the plane body too.  You want the frog to seat as firmly as possible to the body.

Lap frog face on edge of stone to protect yoke

On vintage planes, thoroughly clean all the threads of the screws and bolts to remove any crud or rust, and apply a little light oil before reassembly.  This is particularly important for the large brass adjustment knob, which needs to turn freely along the full length of its bolt.

On your block plane, the frog is not removable, so you only need to touch up the seat with a firm sanding block to ensure it is flat.  Since the flat sloped area behind the mouth on the plane’s base provides much of the forward support for the iron, it needs to be flat too.  Unfortunately, it’s hard to get to, and since you don’t want to enlarge the mouth at all, just a touch using a small piece of angled wood with fine sandpaper wrapped around it is about as far as you want to take it.  Thankfully, this is all that is usually needed to remove old crud. A Dremel or quality flexible shaft tool with a wire wheel brush will also work if the problem is limited to dirt and light corrosion.  Finally, as on the bench plane, clean the threads on all the hardware and add a little light oil to help retard moisture and rust.

Step 3 – Chip Breakers, not Deal Breakers
On bench planes, the chip breaker, more accurately referred to as the Cap Iron, serves three important purposes.  1. It adds rigidity to the iron (blade). 2. It provides a small opening through which the depth adjustment mechanism engages the iron.  3. It helps ‘break’ the shavings as they rise off the cutting edge of the iron, thus preventing them from jamming up the throat of the plane.

Most cap irons, even on new planes, benefit from a little tuning to make them more efficient.  The leading contact edge, where it rests upon the edge of the iron, needs to be completely flat so that no light (or shavings) can pass between the two.  This is a simple matter of a couple of passes on a sharpening stone.  I use my 1000 grit stone as anything higher is overkill.  If you don’t have one, use whatever comparable sharpening media you have available.  Ideally, you should undercut it slightly, so just the front edge makes initial contact.  As you tighten the cap iron against the iron, it will flatten out some.  The idea is to make it completely flush so that fine shavings do not slip in between the cap iron and iron.

Cap iron with polished arch

The other tuning point on the cap iron is its forward arch.  For lowered resistance and smooth chip passage, this arch should be polished.  You can do this by hand using your sharpening stone or sandpaper.  Again, 1000 grit or thereabouts is enough.  Smoother is better, and there’s no downside to over-polishing other than the time it takes.  Once complete, you may need to remove any burr that has formed along the front edge.  I run mine edgewise (like cutting with a knife) down a piece of scrap wood.

Note that block planes do not have cap irons.

Step 4 – Pop a Lever Cap on that Sucka
While appearances and designs vary greatly, all planes have some sort of lever cap.  The lever cap provides the tension that holds the iron in place.  There’s not really a whole lot that needs to be done to the lever cap.  Just ensure that the contact edge on its back side is reasonably flat, so it makes flush contact with the cap iron on which it sits.  Wood shavings will find their way through the tiniest of gaps.  If you’re obsessive, you can polish the forward arch a little just as you did with the cap iron.  You might also add a drop of oil to the working joints to ensure smooth operation.

Bench plane and block plane lever caps

On block planes, since there is no cap iron, the lever cap plays a more important role.  Take a fine file to the back side and remove any rough spots, giving close attention to the leading contact edge.  This is most important on block planes with cast iron hooded style lever caps, such as the old Stanley 9-1/2.  The back sides of these caps are notoriously rough and unfortunately japanned. You don’t need to remove all the japanning, but you do want to get a smooth line of contact down front where it touches the iron.  File it smooth and give it a couple of swipes across your 1000 grit stone.  I like to touch up the top front edge as well, but this isn’t critical.

Step 5 – I Pity the Fool Who Don’t Sharpen His Tool!
The simply fact is, even with brand new planes, the irons require final honing before use.  This is not due to some lack of attention on the part of manufacturers.  Irons are provided this way on purpose, since the manufacturer has no way of knowing what you will be using the plane for, and subsequently how the iron would need to be honed.  If you do nothing else in the way of tuning your plane, at least take the time to properly sharpen it.  Do not skip this step!  Sharpen the iron.  Again, sharpen the iron!  Sharpen it!

Basic sharpening setup using a waterstone

Since sharpening is such an expansive topic in and of itself, I will leave the specific details for other posts.  What you need to know in the context of tuning, however, is that any plane, new or old, requires initial sharpening and honing.  At a minimum, new plane irons need to have their un-beveled side honed flat and polished to at least 4000 grit and preferably 8000 grit.  You don’t need to fuss with the entire surface; just the first 1/8” to 1/4” along the cutting edge will do.  You also need to put a final honing on the bevel edge itself.  It may look sharp, but it needs to be honed, again, to at least 8000 grit.  The goal is to get your cutting edge to as close as possible to a zero degree radius.

Sharpening is too often the deal breaker that dissuades woodworkers from trying hand tools.  This in unfortunate, for it requires little monetary investment to get started, is not particularly difficult to learn, and can be accomplished rather quickly with surprisingly good results.  For detailed information on sharpening, I recommend investing in one of the outstanding books on the subject by Ron Hock or Leonard Lee.   Chris Schwarz has also written a number of fantastic articles on sharpening plane irons. Sharpen the iron.  Again, sharpen the iron!  Sharpen it!

Step 6 – Final Adjustments
Now that you’ve finished tuning and sharpening your plane, it’s time to put it all back together and adjust it for use.  Hopefully, you have a better understanding of what each part does and how they all function together.  This will make adjusting it for use, and while in use, more intuitive and fluid.

A few points of consideration…

While the frog’s position on bench planes is adjustable, meaning you can shift if forward to decrease the size of the mouth opening or backward to increase the size of the opening, it needs to be firmly attached in whatever position you decide so that it doesn’t move when in use.  In other words, to adjust its position, you will have to loosen the screws that attach it to the base.  Without getting into detail, use a larger mouth opening for thicker cuts, and a smaller mouth opening for fine shavings.  Set the position of the frog where you want it and screw it down tight, understanding you may need to do this a couple of times before you get to just the right position.

The cap iron should be firmly screwed to the iron, leaving just a tiny edge of the iron protruding forward.  This should generally be as small as possible – 1/64” for fine shavings to 1/16” or more for heavier cuts, depending on the amount of camber on the iron. The iron/cap iron in place, the lever cap bolt should be tightened just enough to hold the iron firmly so it doesn’t slip in use, but not so tight that you can’t adjust it’s depth of cut using the large brass or steel wheel at the rear of the frog.  If that knob won’t turn, the bolt holding the lever cap is too tight.  This too, may take a couple of tries before you get the feel of it.

Holding the plane upside down, and looking down the sole at a low angle, lower the iron until it just begins to appear through the mouth – just a whisper.  Note that it’s not unusual for there to be quite a bit of slop in the wheel that lowers and raises the iron, as much as ½ to ¾ of a turn.  Just turn it until you begin to feel resistance.  Make any lateral adjustments necessary using the lateral adjustment lever that extends from the top of the frog.  Turn it upright and make a test pass on a piece of scrap wood.  If the plane digs in, back off the depth just a bit.  If it misses entirely, lower the iron a little.  You will quickly get a feel for when it’s ‘right,’ as evidenced by the rewarding ‘thwack’ sound a plane makes when it cuts a perfect curl.

On block planes, adjustments for use are a simple matter of properly tensioning the lever cap and setting the throat opening via the front adjustment plate (if the plane has one).  The same principles apply that you use in adjusting your bench planes.

Tuning a hand plane is not a difficult endeavor.  Once practiced, the whole process can be accomplished in about a half hour, even less depending on the tool.  Rather than view it as an unpleasant chore, I actually enjoy it, especially later in the evening when the dust has settled and the world is quiet.  Pour yourself a measure of Kentucky’s best brown, put on your music of choice, and saddle up to your work bench.

Stanley no. 5 Jack Plane, c. 1940s

***

Tools shown in the photos were returned to functional condition by Virginia Toolworks using museum quality archival preservation techniques.  Sharpened and tuned for use, every tool is fully tested and adjusted until perfect.

Two Block Planes Everyone Should Own

I have a weakness for block planes.  They are the two seater sports cars of the hand plane world – quick, nimble, and fun to handle.  Heck, from the classic lines of Stanley Excelsiors 130 years ago to the high performance Veritas planes of today, they even look fast.  (Both shown below)

I have a sizeable collection of block planes that includes some of the rarest and most beautiful ever made.  Those, of course, are now relegated to display, as their value precludes risking damage in use.  But the vast majority in my collection are sharp and ready to use, and I do exercise each of them periodically when I’m working on a project.  This helps keep them in working order, and it just makes me feel good.

Still, over time I’ve found myself unconsciously reaching for the same couple of planes whenever the need arises.  If I were forced to reduce my toolbox to just two block planes, these are the two I would keep:

The Stanley No. 18 Standard Angle
The Stanley No. 60 Low Angle

Stanley no. 18, c. 1913-19

The Stanley No. 18 Standard Angle
This is my go-to block plane for everyday use, the one I always seem to grab first.  Mine is a very pristine WWI era model that I’m pretty sure I’ve used more than anyone else in its history.  Although it’s almost 100 years old, it looks like it could have been manufactured last year.  Both the japanning and nickel plating are pushing 100%, and so I baby it.

The Stanley no. 18 is a standard angle plane, meaning the iron is seated on a 20 degree bed.  With a bevel angle sharpened at the standard 25 degrees, you have a cutting angle of 45 degrees, same as a bench plane.  It also has an adjustable throat plate, an essential feature in a block plane.  The no. 18 is 6 inches long and fits my hand better than its longer, otherwise identical 7 inch brother, the no. 19.  And unlike the more popular Stanley no. 9-1/2, it feels more like an extension of my hand.

The no. 9-1/2 plane predates the no. 18 by about 15 years, was in production longer, and was the best selling block plane Stanley ever made.  It’s still made today, in fact, although the current design features a completely different mechanism from the original.  Admittedly, the no. 9-1/2 was the more popular of the two.  I truly don’t know why, though, since the design of the no. 18’s knuckle cap was far superior to the hooded lever cap on the no. 9-1/2, and it’s also more comfortable to hold in the hand.  I also find that the hooded cap on the no. 9-1/2 is more prone to slip around a little in use.  Not so with the no. 18.

Ironically they are both basically the same plane with two different styles of lever caps.  Other than the lever cap and its mounting bolt, all the other parts are interchangeable. Stanley charged a little more for the no. 18 and marketed it as virtually indestructible.  This of course was not true, for while the steel cap is arguably more durable, the bodies of both were cast iron and therefore susceptible to breaking if dropped.

I have several vintages of both models in my collection, but find the no. 18 with the knuckle cap superior in both function and comfort.  I use this more often than any other block plane I own.

Stanley no. 60, c. 1910

The Stanley No. 60 Low Angle
The Stanley no. 60 (and the identical japanned version 60-1/2) is a low angle plane, meaning the iron is seated on a 12 degree bed.  Sharpened at 25 degrees, you have a cutting angle of 37 degrees.  The primary advantage of the lower angle of attack is that it excels at shaving end grain.

Like the no. 18, the 60 series of planes are approximately 6 inches long.  However, the 60 series are narrower with an iron width of 1-3/8 inches, vs the 1-5/8 inch irons on the standard angle planes, and the 60 series featured a narrower version of the hooded lever cap used on the no. 9-1/2.  The 60 series planes also have adjustable throat plates.

As with the standard angle planes, Stanley made another low angle plane that was more popular than the No. 60.  The no. 65, which was wider and longer, is even today considered by many to be the ‘Cadillac’ of Stanley block planes.  I have a couple of no. 65s, which I use occasionally, but I prefer the no. 60 for its smaller size.  The size of the no. 65 makes it feel a little awkward to me for most projects, although it excels on wider boards and edges where the no. 60 is too small.

Most people are familiar with the knuckle jointed lever cap on the no. 65, the very same cap used on the nos. 18 and 19 standard angle planes.  It’s interesting to note that the no. 65 was originally made with the hooded style cap until about 1917 when Stanley switched to the knuckle jointed steel cap.  I’ve never quite understood why the no. 65 is so highly regarded.  Being 7 inches long, I find it a little too big in the hand.  The no. 60 series planes are smaller and much easier to handle, and ironically, I never found their hooded cap to be problematic as I do with the no. 9-1/2.  So, maybe it’s just me.

Ultimately, that’s the point.  I had to try all of the various models and sizes until I found what I liked best.  On all of these block planes, the iron is seated bevel up, whereas on bench planes the bevel is usually down.  There is a tremendous advantage with bevel up irons in that the angle of the bevel can be changed to affect a change in the angle of cut.  While there is more to consider in edge geometry than just the angle of cut (ex. durability), you could reasonably sharpen the bevel on a low angle plane iron to 33 degrees and end up with an angle of cut of 45 degrees (12+33=45), the same as on a standard angle plane.  However, to accomplish a low angle of cut using a standard angle plane, you’d have to sharpen the bevel at a very shallow 17 degrees (20+17=37).  Durability of such a thin cutting edge would be problematic with most woods.

For this reason, along with a few others, many people consider the low angle plane to be the more versatile of the two.  I tend to agree.  While I use my standard angle plane more often, if I could only have one block plane, it would have to be a low angle.  Fortunately, despite what my wife says, that’s not the case.

The no. 18 and no. 60 are my two primary go-to block planes when I’m working on a project.  I have most of the other Stanley sizes in my collection, and like I said, I’ll pick them up to use sometimes just for nostalgia, but the nos. 18 and 60 are my favorites. These are the two that I think everyone should own, but ultimately, you won’t know which you prefer until you try a few for yourself.

***

Vintage tools shown in the photos were returned to functional condition by Virginia Toolworks using museum quality archival preservation techniques.  Sharpened and tuned for use, every tool is fully tested and adjusted until perfect.

Salvaging Pitted Plane Irons

There’s no question that modern irons are far superior to the vintage irons that you find in virtually all old planes.  Unless you’re a casual   woodworker who only uses your plane(s) a few times a year, the investment in a new A2 or O1 steel iron (from companies like Hock, Veritas, or Lie Nielsen) will provide far superior performance.  These irons are thicker, flatter, and hold an edge better than the old tool steel irons.  That said, woodworkers 100 years ago did just fine with what they had, and many woodworkers today are also collectors and prefer to use their vintage tools in the same manner and with the same limitations as their ancestors.  Regardless of what camp you fall into, at some point, you’re going to come across a plane iron that is pitted.  It is inevitable and unavoidable.

Conventional wisdom and learned advice tells you to pass on irons that are pitted from rust damage.  True, there are plenty of vintage irons out in the market that are undamaged or in at least serviceable condition.  Many people, in fact, throw away or sell for scrap old damaged irons in lots on Ebay, and with good reason.

The problem is, of course, that pitting on the non-beveled (flat) side of the iron often prevents you from polishing it flat and smooth.  Pits that reach the cutting edge create tiny irregularities that subsequently reveal themselves in the shaved surface of your wood.  By contrast, pitting on the beveled side of the iron is of little consequence since it never actually touches the wood.  It might look bad, but it doesn’t affect the iron’s performance.  The only part of the iron that matters is the cutting edge, and both the bevel and flat side of that edge must be properly dressed – sharpened and honed to cut clean.

So what to do with irons that are badly pitted?  If the pitting is limited to the un-beveled side, all you might need do is flip it over, reversing the bevel direction.  Note that you’ll lose about a quarter inch of iron length making this reversal.  And if both sides of the iron are pitted, there is little point.  A better, and simpler solution, is to adjust your cutting angles slightly, adding a slight back bevel to the polished (un-beveled) side – enough to remove the pits and reach clean metal.

Using a standard bench plane as an example, the iron is seated on the frog at a 45 degree angle.  Most woodworkers sharpen the iron with an angle somewhere in the 25 to 35 degree range.  By putting a back bevel of a couple of degrees on the pitted back side, you effectively cut through the pitted surface creating a clean, undamaged edge.  Adjusting your primary bevel angle to compensate (if desired), you end up with a cutting angle of about 46 to 50 degrees – not a critical difference for many woodworkers.  In fact, increasing this angle of attack is advantageous when planning wood with difficult grain. [1]

Now, if you’re obsessive about your edge geometry and angle of cut, this might not be a satisfactory solution.  Although if that’s the case, you probably shouldn’t be futzing with a vintage plane in the first place, let alone salvaging a pitted plane iron.  But if you’re like me, having one or two extra irons set up for different purposes is a must, and finding good use for old irons suffering from age and neglect makes me feel good.  It’s just a matter of purposing them for the right job.

____________________________________

[1] Hock, Ron, Back Bevels and Plane Geometry, 2010.