Don’t Strip or Dip! Scrape That Rust Away!

I read so many posts and articles online from guys doing absolutely heinous things to old tools. From chemical strippers to electrolysis, sanding to anti-rust dips, everyone has their own ideas about how best to remove rust. While any or all of these methods work, they’re all destructive on some level. I suppose that’s fine if your objective is to refinish the tool for use, but in my opinion it strips away all the character and beauty of the tool. Certainly some tools are so far gone there’s no other viable choice, but in many cases, there is a better way.

When I started collecting and restoring tools, I spent almost a year researching everything I could find on archival restoration and preservation, the techniques museums use. I didn’t want to simply refinish tools to make them appear new, I wanted to restore them to functional use while maintaining the aesthetic character that only decades of use and age can impart. My goal was (and remains) to bring them back to a point where they look and function as if they had been properly cared for over the years.

Like anyone else, my learning process came through trial and error. I quickly discovered that the anti-rust dips, while working well, left the metal with a dull and lifeless grey phosphate coating that I found unnatural and unappealing. Likewise, vinegar, citric acid, electrolysis, wire brushing, and sanding all do the job, but at the cost of all the color, character, and charm that makes old tools so appealing. What I really wanted to accomplish was to remove the rust while leaving (at least most of) the patina intact – that lovely brownish gray darkening of the metal that only comes from age and use.

Stanley no. 4C base, as found with considerable surface rust

I found that on many tools, specifically those that haven’t been exposed to overtly wet conditions, the rust is really only on the surface and in many cases hasn’t yet eaten into the metal, causing the cancerous pitting that we all despise. It has been my experience that often times a really gnarly looking rusty crust will come right off, leaving relatively undamaged metal that still retains that desirable patina below.

By using a 3 or 4 inch glass scraper with a very sharp blade, held at a fairly high angle, I slowly and carefully begin scraping the rust off the surface of the plane body. This does require a sharp undamaged blade. Once it gets knicks in the edge, it will start leaving light scratches in the underlying patina, which you don’t want.

It’s a slow and methodical process, but the payoff is worth the effort. As you can hopefully see in the photos above, there’s a distinct line where the rust is removed. You can also begin to see the underlying patina on the metal surface, and thankfully in this case, no pitting.

Scraping using the glass scraper

Once all the rust is removed, the metal surface will be dusty and dirty, and you may well see some micro-scratches from the scraper. I’ll take care of those in the next step.

Using a cleaner/degreaser, gently buff the surface with very fine steel wool (000 or 0000). You want to clean the metal, smoothing out and blending in any scratches in the patina without removing it. Careful here, as that patina is fragile. Go slow. Follow up with the cleaner/degreaser on a paper towel or rag until it’s completely clean.

Once clean and dry, I usually wipe it down with something to help protect and preserve it with Kramer’s Best Antique Improver. Howard’s Feed-n-Wax, Camellia oil, or Renaissance Wax, etc. will also work. Camellia oil, by the way, is really good stuff for protecting tools and knives, and is food safe. What you should be left with now is a clean surface free of rust, but retaining that beautiful patina.

The stanley plane body after cleaning, degreasing, and a wipe down with Kramer’s Best

With all the rust removed from the surface, you can see the underlying patina is still very much intact. Once the rest of the parts are cleaned and the plane reassembled, its beauty really shines through. I find this method of restoration produces superior results to any other I’ve found thus far. Mind you, it’s a workout! But that’s okay, too.

(Disclosure: This article contains paid links that help support the site)

Working Within the Limits of Tool Preservation

198 SB3 Type 9 Pre0I spent a long time researching and learning about tool preservation before I ever touched a plane. Even so, it was a couple or three years before I really settled into a comfort zone where the hands on experience I gained began to gel with the “book knowledge” I’d accumulated. For me, the greater appeal has always been geared more toward preservation than restoration (although I use the word restoration more often when casually talking about “cleaning up” a plane or tool). It’s probably a matter of semantics; I think most people equate restoration with refinishing, while preservation, by it’s very definition, speaks to preserving and sustaining. To me, that’s more accurate, and is a key part of my guiding philosophy and approach to tools.

It’s very easy for me to “go too far” when cleaning up a tool, to make it pretty vs. simply making it functional. My underlying intent is to preserve the character, finish, patina, etc. whenever possible. Dirt and rust are not sacred to me (as they are to some collectors), they are destructive elements of neglect. When I’m cleaning up a tool, I try to stay within the same boundaries that a woodworker of 100 years ago would have stayed within. He would have only been interested in preserving his tools, keeping them clean and in good working order, not making them pretty to sell on eBay. I constantly remind myself of that, not because I’m right and everyone else is wrong, but because it’s consistent and true to the values and parameters I defined when I started this venture. It’s my mission statement, if you will.

198 SB3 Type 9 Post7

***

Tune Your Block Plane Tonight

Following the popularity of the recent post, Tune Your Hand Plane Tonight, let’s now talk about block planes.  Much of the information will be the same, but block planes are different enough to warrant a dedicated set of instructions.  Besides, since there are probably more block planes owned today and sitting unused in garages and workshops than there are bench planes, they deserve a little love of their own.

As I’ve written before, I have a particularly strong affinity for block planes.  They are  the sexy two seater sports cars of the hand plane world – quick, nimble, and fun to handle.  But more than that, they are extraordinarily versatile and practical for many handy-man chores around the house, as well as indispensable tools in the wood shop.  Even the most ardent power tool user, and certainly the average homeowner, should have at least one or two block planes in his or her arsenal.

Keeping a block plane in good working order is quite easy.  Tuning one for optimal performance is a simple proposition that can be accomplished in an hour or so, if not less.  As I did with the bench plane instructions, I’m going to assume that your block plane is already in a mechanically functional condition and doesn’t require a full blown restoration.  For that level of detail, I recommend reading the posts under Preservation on the menu bar at the top of the page.  Since there are multiple mechanical styles and configurations of block planes, I’m going to try to keep it fairly generic, so you may need to interpolate for your specific plane.

Step 1 – Pour Drink of Preference

High-West-WhiskeyFor working on block planes, let’s go with something a little more exotic than the bourbon we enjoy with our bench planes.  I recommend Rendezvous Rye from the High West distillery.  It is… complex and superb.  Of course, what you drink is up to you, but moderation is certainly recommended, for while you won’t be working with electrically powered tools, you will be handling very sharp objects.  (5 minutes)


Step 2 – Disassembly & Cleaning

064 SB9.5 -Type 18 Post8The second step is to completely disassemble your plane and clean all the parts.  Using screwdrivers of the appropriate size, remove all the parts – lever cap, cap bolt, lateral lever, eccentric lever, adjustment screws, knobs, etc.  If you’re not completely familiar with what and where everything goes or are worried you might have trouble putting it all back together, take before pictures or notes.

Once disassembled, brush off all the sawdust and dirt.  If the filth is excessive, use a toothbrush and orange degreaser (available at the hardware or grocery store).  Also take a few minutes to clean the threads and slots on all the screws and bolts.  I use a small wire bristle brush with a little turpentine or light penetrating oil like WD-40. Once cleaned, wipe them down and set them out of the way so they don’t attract grit.  (10 minutes)

Step 3 – Hello Froggy

160 SAR5306 Post7Unlike frogs on bench planes, the frogs on block planes are usually fixed platforms cast into the body of the plane.  The top of the frog provides a small platform for the iron to sit, while the flat area behind the mouth offers support near the cutting edge.  Both surface areas should be clean of dirt and debris.  A toothbrush or brass bristle brush with degreaser works well, although you can also use WD-40 or turpentine.  The face of the frog is one of the more critical surfaces of the plane.  Once clean, fit the iron against the frog and verify that it sits flat and securely with no wobble.   You don’t want any wiggle or movement, so any high spots or irregularities in the casting need to be carefully filed or sanded flat.   (5-15 minutes)

Step 4 – Adjustimability of the Mouth

165 SB9.5 Type 12 Post7Many “premium” models of block planes feature an adjustable mouth opening.  This typically means the front section of plane’s sole is a separate piece than can be positioned toward the toe (thus opening the size of the mouth) or closer to the iron (closing the size of the mouth opening).   It is necessary to periodically remove this piece to clean out sawdust that has accumulated, and to clean and lubricate the tracks upon which the plate rides.  If it doesn’t adjust easily forward and back, it needs attention.

Since you’ve already disassembled the plane, make sure both the plate itself and the receiver in which it sits are both clean of debris.  Brush the edges of the plate and tracks of the receiver with a brass or wire bristle brush lubricated with light oil or turpentine.  Fit the plate in place and verify that it moves fairly freely.  It is not normally necessary (nor desirable) to sand the edges of the plate to make it move more easily, although this is sometimes necessary if the plane is vintage and the plate a replacement.  If you decide metal removal  is absolutely necessary, be careful and go very slow.  You can’t un-sand.  (5-15 minutes)

Step 5 – Inspect the Sole

165 SB9.5 Type 12 Post5Take a look at the sole (bottom) of the plane.  Inspect for dents or dings with raised points around the edges that might dig into your wood surface when planing.  If you find any, carefully file them flat with a mill file, followed by a little 220 grit sandpaper.  Unlike bench planes, which have a lot more surface area, flattening the sole of a block plane is a relatively painless process.  Although not usually a critical requirement, flattening the bottom will often provide superior results in use.

First, temporarily re-install the iron and lever cap and tighten to normal pressure.  This ensures the body will be under the same stress (and any possible distortion) as when in actual use.  Working against a dead flat substrate such as a granite sharpening block or the iron bed of a table saw,  start with 60 grit and go through progressively finer grits until you are satisfied that the toe, heel, and areas just in front of and behind the mouth are all completely flat and smooth.  I usually stop with 320 grit.  Aluminum Oxide sandpaper is my preference. If you don’t want to invest in a granite sharpening block, granite floor tiles from your local home center are just the right size and cost around $5 each.  (30-45 minutes depending)

Step 6 – Time to Sharpen

Sharpening SetupYes, sharpening is the step everyone loves to hate, the step that prevents so many people from ever trying a hand plane.  The trick is not to wait until you need to use the tool.  Make time for sharpening in advance, and make a party out of it!  Okay , so maybe not a party, but there is something truly rewarding about getting an edge you can shave with.  It’s relaxing and I really do enjoy it.  Since this is not a sharpening tutorial, I’ll leave the particulars on methodology to another post or reference.  But if you do nothing else, take the time to put a keen edge on your plane’s iron.  A 25 degree bevel works perfectly on most block planes – both low angle and standard angle models.  The angle of the plane’s bed varies on these models, usually either 12 degrees for low angle planes or 20 degrees for standard angle planes.  Add the 25 degree bevel and you end up with a 37 degree low angle of cut, or a 45 degree standard angle of cut (same as bench planes).  Add a micro bevel if you want, and don’t forget to polish the unbeveled back edge. (30 minutes)

Step 7 – Lubrication

Pure Oil 1Lubrication is a good idea, but should be done sparingly since oil attracts dirt and grit.  I add just a drop of light oil to the threads of all the bolts and screws before re-installing them.  I also add a drop to all the moving/adjustment parts, but wipe them with a rag afterward so that only a light film is left.  They certainly don’t need to be dripping.

Some guys believe in waxing the sole.  Nothing wrong with that as long as you don’t use a silicone based wax.  However, I just wipe down all exterior surfaces with a little Jojoba oil for storage.  (5 minutes)

Step 8 – Assemble, Adjust, Cut

187 SB18 Type 14 Post1Time to put it all back together.  Re-attach the eccentric lever and front plate (if it has one), adjustment wheel, lateral lever, knobs, etc. and all related hardware.  Carefully put the iron and cap iron assembly in place being careful not to fould the newly sharpened edge, and install the lever cap.  It should lock down securely, but not so tight as to inhibit raising and lowering the iron.  Adjust the front plate (if it has one) forward or backward as needed for the type of planing you intend to do (again, see open vs closed mouth).  Once set, lower the iron into the mouth to take your first test cut.   All of your hardware and adjustment mechanisms should move freely and smoothly. (10-15 minutes)

Unless you run into an unexpected problem, the entire tuning and sharpening process can be completed in about 1 to 2-1/2 hours, and even quicker if you’re tuning a new plane or re-tuning a plane that has already been tuned or well cared for.  It’s easy, rewarding, and builds both knowledge and confidence in your ability to master hand and block planes.

***

Tune Your Hand Plane Tonight

Among the most frequent web searches that lead people to this site come from those looking for information on tuning a hand plane.  Admittedly, for those new to the craft, or at least new to using hand tools, the prospect of setting up and fine tuning a hand plane is daunting.  After all, the nomenclature of parts is bewildering, the functional mechanics are an exercise in geometry and physics, and then there’s that whole issue with sharpening.  It’s no wonder so many people would rather spend an evening prepping for a colonoscopy.

But yea I say unto you, fear not!  Tending to a neglected (or new) hand plane is both relaxing and rewarding, and in most cases takes just an hour or two.  Best of all, the gratification is instant, the rewards immediate.

Now in the interest of keeping things simple, I’m going to assume that your plane is already in a mechanically functional condition and doesn’t require a full blown restoration.  For that level of detail, I recommend reading the posts under Preservation on the menu bar at the top of the page.  I’m also going to focus solely on bench planes.  I’ll cover black planes in a later post.  For simple tuning in one evening, read on…

Step 1 – Pour Drink of Preference

PVW-trio-4What you drink is up to you, and moderation is certainly recommended, for while you won’t be working with powered tools, you will be handling very sharp objects.  I personally prefer a finer bourbon, perhaps Maker’s 46 or Elijiah Craig 18 year, or if I’m in a particularly festive mood, a little Jefferson Presidential Select 17 year or Pappy Van Winkle.  Either way, begin by putting on some relaxing music and have a drink.  (5 minutes)


Step 2 – Disassembly & Cleaning

Disassembled Plane, Ready for TuningThe second step is to completely disassemble your plane and clean all the parts.  Using screwdrivers of the appropriate size, remove all the parts, screw, bolts, washers, etc.  If you’re not completely familiar with what and where everything goes or are worried you might have trouble putting it all back together, take pictures or notes.  Or just pay attention; it’s not that complicated for heaven’s sake.

Once disassembled, brush off all the sawdust and dirt.  If the filth is excessive, use a toothbrush and orange degreaser (available at the hardware or grocery store).  Also take a few minutes to clean the threads and slots on all the screws and bolts.  I use a small wire bristle brush with a little turpentine or light penetrating oil like WD-40. Once cleaned, wipe them down and set them out of the way so they don’t attract grit.  (10 minutes)

Step 3 – Inspect the Sole

Stanley No. 7 Jointer PlaneTake a look at the sole (bottom) of the plane.  Put a straight edge against it if it makes you feel better.  Once you’ve convinced yourself that it’s flat enough (which it undoubtedly is), set it aside and have another drink.  Seriously, after owning hundreds and using dozens of planes over the years, I’m convinced it’s rare to come across one with a sole so warped, cupped, or bowed that it’s unusable.  If there are any dents or dings with raised points around the edges that risk digging into your wood surface, carefully file them flat with a mill file, followed by a little 220 grit sandpaper.  You can also use the sandpaper or steel wool to remove any heavy crud – I suggest lubricating it generously with WD-40, Mineral Spirits, or Turpentine.  Working against a dead flat substrate such as a granite or the iron bed of a table saw is recommended.  Go easy.  No need to overdo it; you just want it to be clean and smooth.  (5-30 minutes depending)

Step 4 – Address the Frog

Lap frog face on edge of stone to protect yokeFirst inspect the seat for the frog on the top side of the plane’s base.  This is the area of contact where the frog attaches to the body of the plane.  The mating surfaces must be clean and flat.   Use a toothbrush with the degreaser.  If there is stubborn crud to be removed, use a brass bristle brush.  If the crud is really bad, you can use a small steel brush, but be very careful to to damage the surrounding finish.  Mating surfaces on the frog itself should also be cleaned in the manner described above.

The face of the frog is one of the more critical surfaces of the plane.  It needs to be as flat as you can get it so the iron sits completely flush against.  You don’t want any wiggle or movement, so any high spots or irregularities in the casting need to be filed or sanded flat.  I go back to my granite surface and sandpaper for this.  Taking care not to damage the tip of the yoke that engages the iron and cap/iron, carefully sand the face surface of the frog until it is as flat as possible.  Change directions periodically to keep it even.  You only need to do enough to ensure the iron sits flat against it.  (15-30 minutes)

Step 5 – Polish the Cap Iron

Cap IronThe leading edge of your cap iron (also called the chip breaker) will need a little attention.  Flatten the leading edge of the cap iron where it contacts the iron so that it seats completely flush against it.  You don’t want any gaps that shavings can slip through.  While you’re at it, polish the top side of that leading edge as well (the hump) to make it nice and smooth.  Less friction makes the shavings pass over it more easily, helping to prevent clogs.   The smoother the better, but don’t obsess over this step.  (10 minutes)   

Step 6 – Sharpen the Iron

Sharpening SetupYes, I know, the step everyone loves to hate.  Even for me, it’s often a task that I procrastinate over, but once I get going, I actually enjoy it.  Since this is not a sharpening tutorial, I’ll leave the particulars on methodology to another post or reference.  But if you do nothing else, take the time to put a keen edge on your plane’s iron.  A 25 degree bevel works perfectly on bench planes; add a micro bevel if you’re into that, and don’t forget to polish the unbeveled back edge. (30 minutes)

Step 7 – Lubrication

Pure Oil 1Lubrication is a good idea, but should be done sparingly since oil attracts dirt and grit.  I add just a drop of light oil to the threads of all the bolts and screws before re-installing them.  I also add a drop to all the moving/adjustment parts, but wipe them with a rag afterward so that only a light film is left.  They certainly don’t need to be dripping.

Some guys believe in waxing the sole.  Nothing wrong with that as long as you don’t use a silicone based wax.  However, I just wipe down all exterior surfaces with a little Jojoba oil for storage.  (5 minutes)

Step 8 – Assemble, Adjust, Cut

Stanley Bailey no. 5, Type 17 - WWII VintageTime to put it all back together.  Re-attach the frog and all its related hardware first, but don’t tighten just yet.   Put the knob and tote back on if you took it off.  Carefully put the iron and cap iron assembly in place and install the lever cap.  It should lock down securely, but not so tight as to inhibit raising and lowering the iron.  Adjust the frog forward or backward as needed until the iron’s cutting edge is positioned appropriately for the type of planing you intend to do (see open vs closed mouth).  Once set, tighten down the frog and lower the iron into the mouth to take your first test cut.   All of your hardware and adjustment mechanisms should move freely and smoothly. (10-15 minutes)

Unless you run into an unexpected problem, the entire tuning and sharpening process can be completed in about 1-1/2 to 2-1/2 hours, and even quicker if you’re tuning a new plane or re-tuning a plane that has already been tuned or well cared for.  It’s easy, rewarding, and builds both knowledge and confidence in your ability to master hand planes.

***

Wait!  What about the tote and knob, you ask?  You can read all about their care and repair right here.

Condition – The Eye of the Seller

026 SB4-T19 ebay
When it comes to vintage tools, condition, like beauty, is in the eye of the beholder… or more specifically, the eye of the seller. So many online tool sellers throw around vague, undefined terms like ‘great condition’, ‘mint condition’ etc., it’s hard to get a good sense of exactly what you’re buying, especially on Ebay. I use such terms sparingly, and only as a complement to a much more specific description of condition and features. That’s why I write my listings using specific descriptives, not subjective adjectives.

Unless they were hermetically sealed soon after they were made, all vintage tools show some degree of age, whether through loss of finish, dents, dings, and scratches from use, transport, and storage, rust damage, or simply darkening from age and environment. It’s also healthy to keep in mind that relatively speaking, these were not precision made tools in the way we think of precision made tools today. Quality control was more subjective, and let’s face it, these were tools of tradesmen who carried them around in wooden boxes on horse drawn carriages. It’s a wonder any of them even survived! Customers of the day were not likely too concerned with cosmetics. They were not the disposable, ‘throw it away and buy a new one’ culture we are today. They used things until they were worn out, then they fixed them up as best they could, and used them some more.

For me, mint condition means brand new, unused, just as it was when it was sold. Anything less is near mint, very fine, fine, good, or user grade. For tools that are 50 to 150 years old to be in mint condition, they would have to not only have never been used, but kept in climate controlled storage so as not to sustain permanent rust or corrosion damage. I’ve seen very few tools that meet this criteria. Near mint to me means the tools was never used or used very lightly. It may well show some evidence of age, but overall looks like something akin to a floor sample. I think far less than 5% of vintage tools fall into this range. The vast majority of tools fall somewhere between Very Fine (maybe 5-10%), Fine (10%), Good and User (45%), and Poor (30%). All of these are, of course, very rough estimates based on my own observations and experience.

I guess the takeaway is, when you’re shopping for vintage tools, whether to use or display, ignore the subjective descriptors and adjectives such as ‘Good’ or ‘Mint’ or ‘Perfect.’ Don’t make assumptions about features, condition, or whether the tool is in working condition. Don’t be afraid to ask questions or request additional photos (if the tool is being sold online). And always be wary of tools that have been over-cleaned or ‘restored.’ To some, restored simply means sharpened. To others, it means completely refinished.

Salvaging Pitted Plane Irons

There’s no question that modern irons are far superior to the vintage irons that you find in virtually all old planes.  Unless you’re a casual   woodworker who only uses your plane(s) a few times a year, the investment in a new A2 or O1 steel iron (from companies like Hock, Veritas, or Lie Nielsen) will provide far superior performance.  These irons are thicker, flatter, and hold an edge better than the old tool steel irons.  That said, woodworkers 100 years ago did just fine with what they had, and many woodworkers today are also collectors and prefer to use their vintage tools in the same manner and with the same limitations as their ancestors.  Regardless of what camp you fall into, at some point, you’re going to come across a plane iron that is pitted.  It is inevitable and unavoidable.

Conventional wisdom and learned advice tells you to pass on irons that are pitted from rust damage.  True, there are plenty of vintage irons out in the market that are undamaged or in at least serviceable condition.  Many people, in fact, throw away or sell for scrap old damaged irons in lots on Ebay, and with good reason.

The problem is, of course, that pitting on the non-beveled (flat) side of the iron often prevents you from polishing it flat and smooth.  Pits that reach the cutting edge create tiny irregularities that subsequently reveal themselves in the shaved surface of your wood.  By contrast, pitting on the beveled side of the iron is of little consequence since it never actually touches the wood.  It might look bad, but it doesn’t affect the iron’s performance.  The only part of the iron that matters is the cutting edge, and both the bevel and flat side of that edge must be properly dressed – sharpened and honed to cut clean.

So what to do with irons that are badly pitted?  If the pitting is limited to the un-beveled side, all you might need do is flip it over, reversing the bevel direction.  Note that you’ll lose about a quarter inch of iron length making this reversal.  And if both sides of the iron are pitted, there is little point.  A better, and simpler solution, is to adjust your cutting angles slightly, adding a slight back bevel to the polished (un-beveled) side – enough to remove the pits and reach clean metal.

Using a standard bench plane as an example, the iron is seated on the frog at a 45 degree angle.  Most woodworkers sharpen the iron with an angle somewhere in the 25 to 35 degree range.  By putting a back bevel of a couple of degrees on the pitted back side, you effectively cut through the pitted surface creating a clean, undamaged edge.  Adjusting your primary bevel angle to compensate (if desired), you end up with a cutting angle of about 46 to 50 degrees – not a critical difference for many woodworkers.  In fact, increasing this angle of attack is advantageous when planning wood with difficult grain. [1]

Now, if you’re obsessive about your edge geometry and angle of cut, this might not be a satisfactory solution.  Although if that’s the case, you probably shouldn’t be futzing with a vintage plane in the first place, let alone salvaging a pitted plane iron.  But if you’re like me, having one or two extra irons set up for different purposes is a must, and finding good use for old irons suffering from age and neglect makes me feel good.  It’s just a matter of purposing them for the right job.

____________________________________

[1] Hock, Ron, Back Bevels and Plane Geometry, 2010.

Restoration & Preservation of Hand Plane Totes & Knobs

Knob Before & After
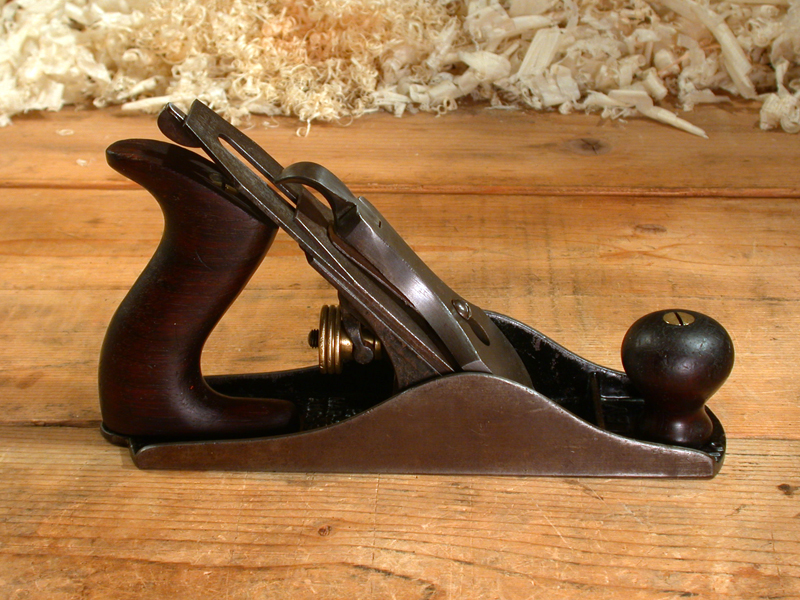
Vintage hand planes are commonly found in the wild with filthy, crud encrusted, cracked, or broken totes and knobs.  While I periodically come across a plane with a knob or tote that has an old repair (usually poorly done), most have been left neglected and broken.  Correct vintage replacements, especially for Stanley planes, are readily available on Ebay, but they are expensive, often costing as much or more than an entire tool.  In my experience, however, most damaged wood components can be restored for use, if not display, with just a little effort and patience.

In keeping with my overarching philosophy that less is more when it comes to vintage tool preservation, I strive to retain as much of the original finish and character of the wooden components as possible.  To that end, I don’t advocate refinishing per se, unless of course the original finish has been destroyed through exposure to the elements, heavy use, or in the course of completing the repair.  The very nature of extensive damage (multiple breaks, chips, missing pieces, etc.) will frequently necessitate at least some degree of restoration to the finish itself.  However, when the only other alternative is to discard and replace the damaged part, more radical restoration techniques are easily justified.

In the following sections I will take you through the steps and materials required to complete many of the most common repairs to totes and knobs.  While there are numerous solutions to any one problem, these are the techniques I have found to produce the most favorable results.

General Cleaning and Preservation
The totes and knobs on many vintage hand planes are perfectly fine just as they are.  Unless the tool was never used, virtually all will have some degree of dents, dings and abrasions from time spent in a toolbox.  There may also be a few minor chips along edges, specks of paint, and perhaps the initials of the original owner stamped into the surface.  The varnish might be crazed and there may be some checks in the grain from age and dryness.  And, of course, there may well be layers of dirt, dried oil and grime hiding an otherwise beautiful piece of rosewood.  All of this is to be expected.

I don’t need (or necessarily want) my totes and knobs to look pristine, and most of the time the only treatment I give them is a little wax, or if the wood appears dry, a thorough rub down with a hydrating concoction of linseed oil, turpentine, and vinegar (LTV).  You can make your own or purchase Kramer’s Best Antique Improver, which I’m pretty sure Mr. Kramer makes at home in his kitchen.  Applied with a cotton rag, this all natural solution cleans and nourishes the wood, bringing back is lustrous beauty without petrochemicals, and most importantly, does not alter the finish or surface features at all.

Dirt, Crud, and Paint
For totes and knobs that are structurally sound, but have layers of crud stuck to them (where basic cleaning isn’t enough), I use a very fine synthetic pad or steel wool soaked in the same LTV solution as a lubricant to the abrasive pad.  Using very light pressure, I scrub away whatever crud I can.  This requires a cautious touch, however, as too much scrubbing can easily damage or remove the original finish.  Go slow and repeat if necessary.  Don’t try to remove every speck and spot or the piece will start to look refinished.  Wipe off the slurry of muck this creates and finish up with a generous application of LTV, polished with a clean cotton cloth.

I like to leave paint specks intact since they are a colorful part of the tool’s history and character, but if you’re determined to remove them, use the same technique described above, but with a little more vigor.  This will usually remove most of the tiniest specks.  For larger spots, lubricate the wood with turpentine, and very carefully scrape the paint spot off using a card scraper or any tool with a fairly sharp angle.  I use a three sided hollow scraper that can be found in most art supply stores.  The turpentine provides light lubrication for the scraper, which helps protect the surrounding and underlying finish.  This will leave visible scratched spots, so go over the entire piece again with the fine synthetic pad or steel wool lubricated with turpentine or LTV to blend in any marks you made.  Finish up with an application of LTV, polished with a clean cloth.

Keep in mind that by doing this you are altering the original finish of the piece, not to mention erasing part of its history.  This is a destructive technique, however mild.  Once done, it cannot be reversed, so go slow.

Cracks and Breaks
Like everything else, damage is part of the tool’s history.  Wooden parts are comparatively fragile, and when tools are used improperly or carelessly, they suffer chips, cracks, and breaks.  Age and environment also takes a toll.  Once damage occurs (or is found), there are three options available to the owner – leave it as is, repair the damage, or replace the part.  If you decide to repair the damage, there are two further considerations – functional stability and visual aesthetic.

Cracks and clean breaks are easy to repair, especially if done right away.  Older breaks tend to be literally rougher around the edges, but are still no lost cause.  Even the nastiest shattered breaks with multiple shards, splinters, and open gaps can be repaired with surprisingly appealing cosmetic results.

When performing a repair, function trumps form.  Making it pretty isn’t of much value if the repair breaks the first time you use the tool.  Repairing cracks and breaks necessitates the adherence of two separated pieces of wood, and the obvious solution to that is some sort of adhesive.  Anyone making anything out of wood will likely have one of the commercial polyvinyl acetate (yellow wood) glues close by.  This is probably the most common type of glue used in woodworking.  If you’re a purist you might favor hide glue.  The newer polyurethane glues (ex. Gorilla brand) are popular and very strong, but messy.  These are just a few of the options available.

I’ve tried just about every type of glue, and have found that 2 part epoxy provides the best results for this particular application.  It is quite strong, does not require pressure while curing, cures under a wide range of temperatures, has good gap filling properties, can be filed and sanded, is easily tinted, and accepts a finish.

2 Part epoxy consists of a resin and a hardener.  Simply squeeze out an equal measure of both, mix thoroughly, and apply.  I tint the epoxy with just a pinch of dry pigment (available at art supply stores) before mixing.  I typically use black or raw umber if working on rosewood.  It doesn’t take much to tint the epoxy, just a tiny amount.  I should note that you can also use very fine rosewood sawdust to tint the epoxy, which works exceptionally well and is naturally a perfect color match.

Mix the epoxy thoroughly and apply liberally to both mating surfaces.  Use a razor blade or thin knife to work it into cracks.  Clamp tight as best you can remembering it’s actually more important that the pieces stay properly aligned than under a lot of pressure.  With this method, you actually want a little squeeze out consistently along the seam to fill any gaps that might remain, so don’t wipe it off.  Epoxy starts to set in about 5 minutes, but takes a good 24 hours to cure.  Let it fully harden before proceeding.

Once cured, use the scraper or a file to remove the excess epoxy.  I use old steel files for this purpose.  File sharpness for this sort of woodwork is not as much of concern as it is for metalwork, and old files are plentiful and cheap.  You’re going to damage the surrounding finish doing this, but don’t worry, you’ll touch it up later.  Nasty breaks or poor alignment during curing may leave some rough spots.  Go ahead and reshape these areas using the files or a rasp.  Remember to use progressively finer teeth.  Once shaped, finish up with 200 to 320 grit sandpaper to remove file marks and help refine shape and edges.  At this point there should be no open gaps or holes.

Now you’ll need to repair the finish.  Stanley and most competitors used a varnish on their totes and knobs, and fortunately for us, they weren’t too concerned with leaving a furniture grade finish.  The finish they imparted was utilitarian and that works in our favor.  There are lots of finish options to choose from, but I prefer a penetrating oil and varnish blend, such as Watco Danish Oil Finish.  It comes in both tinted and natural versions, which you can tint yourself if desired.  Tinting helps hide the epoxy seams and blends well with the existing finish. Follow the directions on the can closely.  I apply it to the repaired portions only, slightly overlapping the original finish on adjacent areas.  The finish builds up slowly and will require multiple applications.  This takes patience and time, but the results are worth it.  Once you feel you’re getting close, dry buff the new finish using the fine synthetic pad, blending it with the areas of old finish.  Repeat steps with more Watco if necessary.   Once the new finish matches the old in overall luster and is completely cured, top it off with a good rub of LTV or wax.  Buff to a shine with a cotton cloth.  If the new finished area looks dull compared to the original finish, you need to go back and add more coats.

When well executed, breaks and cracks repaired in this manner are not only extremely strong and stable, they are nearly invisible.

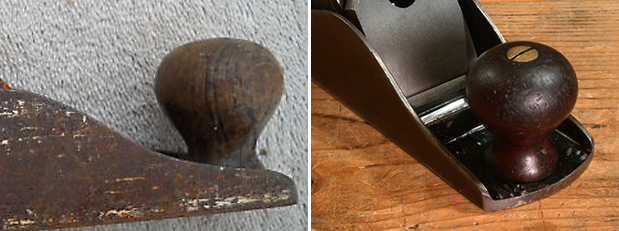
Chips and Missing Chunks
Knobs with minor chips around the base and totes with missing or chipped tips are common.  Many chips are simply not practical to replace – those along the top edge of the tote’s tip, for example.  Others, such as an entire missing horn or a chunk missing from a knob base provide an interesting challenge.  The solution is no mystery, however.  It’s a matter of filing or sanding a perfectly flat mating surface, attaching a section of replacement wood, reshaping the new piece, and applying a finish.

Often the most frustrating part of the process is finding pieces of matching rosewood to use for the repair.  For this I save all the broken totes and knobs I can find to use as scrap.  It’s just a matter of cutting a new piece to the approximate size needed for the repair.  The most difficult part of the process is creating perfectly flat mating surfaces.  As discussed above, the epoxy is somewhat forgiving in its ability to fill gaps, but better mating makes for a stronger joint.  The easiest way to accomplish this is by using a motorized disk sander with an adjustable table.  If you don’t have one, you can do it by hand using sandpaper adhered to a flat substrate.  ¼” or thicker plate glass is best, although I’ve achieved great results using a four dollar 12” x 12” granite surface plate.  It just takes a very steady hand.

The glue up process is the same as previously described.  Once attached, shape the new section using rasps and files, followed by sandpaper.  Apply the finish and you’re done.

Fixing Old Repairs
Fixing poorly executed old repairs frequently present the biggest restoration challenge.  It’s easier to do it right the first time than to undo and fix a mistake that was already made.  The variety of old repairs you might come across are infinite, so I will speak in general terms.

Begin by removing any nails, screws, or bolts present.  Old glue joints can often be softened by gently heating the piece.  Just be careful not to get too hot or you’ll ruin the finish, if not set the whole thing on fire!  If the old repair joint is bad enough, you might have to cut through it with a band saw to give yourself nice new mating halves, although you do lose a little of the dimension.  Some joints are brittle enough to break apart by hand.  Others are poorly aligned but extremely strong; you may not be able to get these apart at all.  The important thing is to assess and decide up front just how you plan to proceed, then go at it.

If nothing else, a poorly aligned or ugly break repair (that is otherwise stable) can be cosmetically improved by filling the gaps and holes with tinted epoxy.  This includes nail and screw holes.  Once cured, file and sand it smooth and touch it up with the Watco finish.  Where alignment is poor, this may require some fairly aggressive reshaping of surrounding wood, but the results are usually much improved.

Damaged Finishes
On some planes the wood finish is damaged or worn so extensively that the wood appears bare.  On others, the finish might be intact but is very faded.  Others still, especially those from the 1940s and 50s might have a finish that is heavily crazed and flaking off.  It’s very important to determine just what the problem is before attempting a repair.  I’ve seen planes on which the wood at first glance looked like a completely lost cause, only to find that a simple cleaning and conditioning brought them back to life.  Proceed conservatively until you know what you’re dealing with.

Wood that has lost it finish for whatever reason can be restored following the steps above.  If the damage is weather or water related, you may need to sand down the surface before proceeding.  If the wood has a lot of open pores, you may get better results by wet sanding with the Watco, especially through the first two or three coats.  This creates a slurry that helps fill the pores and seal the wood.

For finishes that are flaking off, the best you can do is remove all the loose finish using the scraper or fine steel wool and turpentine.  I’m usually pretty aggressive with this because the flaking reflects something wrong with the original finish itself.  A healthy, properly applied finish will not flake off, even after decades.  Better to remove all of it and start over.

I don’t mind scars, scratches, and initials, etc.  I like the character they provide.  If rough, a single application of Watco will help seal the wood, preserving and protecting these features.

Painted and Varnished Hardwood
Stanley used painted hardwood totes and knobs in its planes for a brief period during the 1940s.  These are almost always found in terrible cosmetic condition, with chips and areas of loss to the painted finish.  After briefly returning to rosewood in the late 1940s and early 1950s, the company switched to heavily varnished hardwood, and then finally to a lighter varnished hardwood in the 1960s.

In my experience, these finishes are virtually impossible to restore in any conservative manner.  Short of simply cleaning them, leaving them otherwise as is, the only other thing you can do is to completely refinish them.  Unfortunately, refinished wood looks… refinished.  If you like your tools to look like new, have at it.  I just clean them up as best I can and call it a day.

Loose Totes
Pick up 5 planes and at least one of them will have a loose tote.  Have you ever tightened that tote bolt as far as you dare only to find the tote still slips when you go to use it?  It seems to be more common in the shorter smoothing planes that don’t have a toe screw in their totes.  Perhaps it’s due to wood shrinkage… who knows?  Regardless, it’s easy to resolve.  Remove the bolt and grind off a millimeter or so to shorten it.  Replace the bolt and tighten it down.  The tote should now be secure. You might have to do this a couple of times depending on how loose it is.

Suggested Resources
• Turpentine
• Kramer’s Best Antique Improver
• Fine Synthetic Wool Pads
• Fine Steel Wool
• 2 Part Epoxy (5 Min)
• Artists Pigments (Black, Raw Umber, Burnt Sienna)
• 3 Sided Hollow Scraper
• Old Metal Files (Mill, Half Round, Round, etc.)
• Wet/Dry Sandpaper (60 to 320 grits)
• Cotton Rags
• Rosewood scraps