Photographing Tools for eBay

Good photos make all the difference

Good photos make all the difference

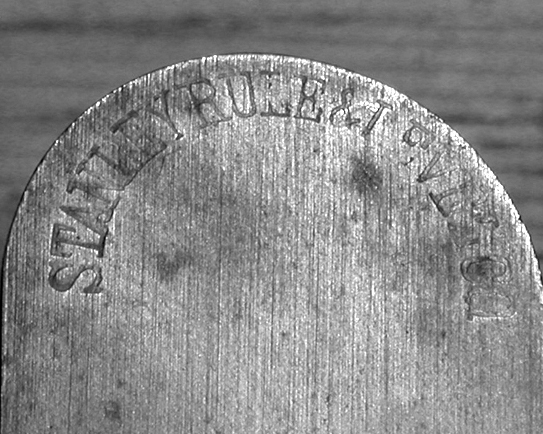
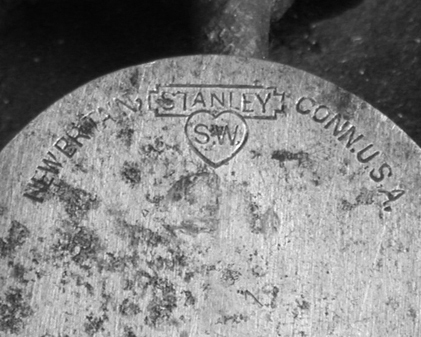
Good photos and a clear, detailed description make all the difference when you’re buying and selling on eBay. The eBay seller I bought this Stanley Bailey No. 3, Type 14 from provided the photo shown at the top. I have no idea what they were doing to have the photo come out purple, but it sure didn’t make for a very compelling presentation. Looks like some bizarre combination of lighting sources, probably a mix of flash and fluorescent, or perhaps their camera was inadvertently set to some creative “mode.” Additionally, the description was virtually non-existent.  Something like “Old Stanley plane in good condition.” Didn’t really tell me much. Not surprising, the bidding activity was low and I got it for a bargain.

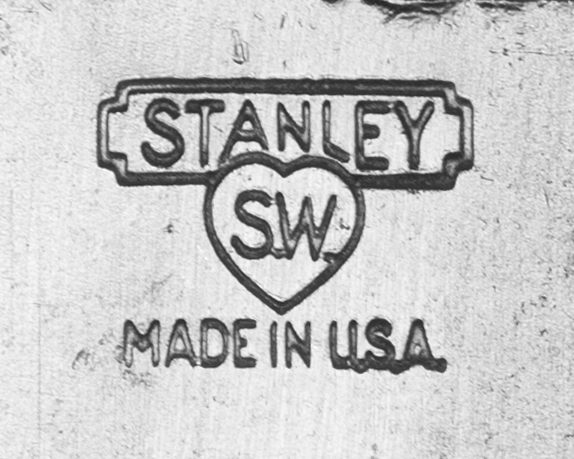
After doing a light restoration on the plane, primarily just cleaning the crud off of it, I took the photo at the bottom using a 12 year old digital camera, cheap tripod, natural daylight, with the plane sitting on my kitchen table. You don’t have to be a professional photographer or have expensive equipment to get good results. You just have to make an effort and think about what you’re doing.

Photography Guidelines

While better equipment can certainly produce superior photographs in the hands of a skilled photographer, even a cell phone or tablet can provide surprisingly good results if you follow a few simple guidelines:

  1. Use Natural Light – Whenever possible, use natural light (daylight) for your light source. Avoid direct sunlight, stay in the shade or better yet, wait for an overcast day. Incandescent and fluorescent lights each produce a very different color balance, resulting in a yellowish cast or bluish cast respectively. While modern cameras usually do a fair job of compensating for this, the photos still look unnatural. If you must use artificial light, stick to either incandescent or fluorescent (don’t mix them) and try to set your camera for that corresponding light. Finally, make sure you turn off any sort of creative effects mode.
  2. Turn off the Flash – Flash photography, especially of stationary objects, is a tricky thing to get right. Flash tends to blast everything in light, flattening details and causing unnatural highlights and shadows. It’s not a good look. Find a place where there is plenty of natural ambient light as described above.
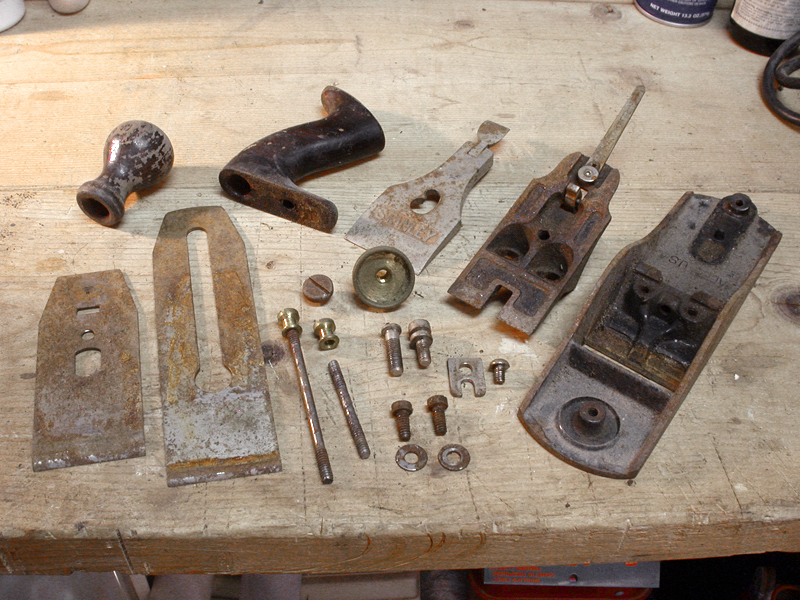
  3. Compose Your Shot – Fill the frame with your subject and think about your platform and background, everything that will be in the photo. Avoid patterned fabrics and anything that might be a distraction. Try to find a spot that is visually appealing, and ideally shows your item in its natural environment. If you’ve ever looked at my auctions, I photograph my tools right on my workbench, because ultimately that’s where they belong. (See photo below) Even then, I remove as much of the clutter as possible so the tool will be the focal point.
  4. Image Size – All modern cameras, even the cameras on phones, produce relatively high resolution images. Make sure that your photos are at least 1600 pixels on one axis (either horizontal or vertical). Square format photos make the most of eBay’s available real estate, but are not always practical for your subject. Again, make sure you fill your frame like I did in the photo below.
  5. Other Equipment – A tripod is nice, but you really only need one if you’re using manual exposure controls with a slow shutter speed (slower than 1/60 sec) , where if the camera were hand held, the photo would be fuzzy from camera shake. A tripod, however, can be advantageous if you need to photograph in low light. You can take very long exposures without camera movement causing a fuzzy photo mess.
  6. Software – This is also optional, but a good photo editor like Photoshop can make a mediocre photo really pop. With a little practice, you can learn to correct color balance and fix minor exposure problems. If nothing else, you will likely need to crop the photo that comes straight from the camera.
275 SB4C Type 10 Post 1

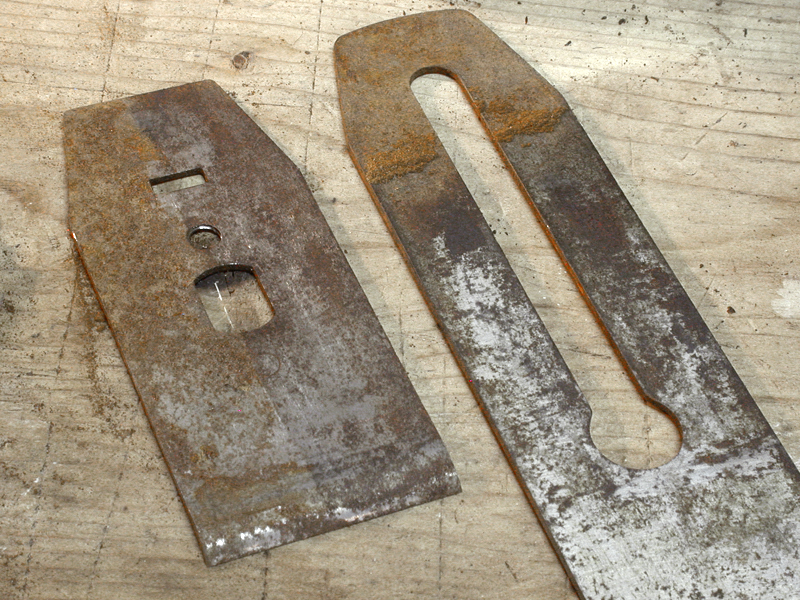
Stanley Bailey No. 4C, Type 10 photographed on my workbench immediately after a few test cuts.

***

Stanley Trademark Stamps

The following reference guide provides examples of Stanley’s trademark stamps from 1872 to the present. It is by no means comprehensive or complete, but this covers the main trademarks. There were often variations used on block planes and other tools. Some of the photos are pretty poor. I will try to photograph better examples as time goes by.

A.1 Trademark (1872-1874)

A.1 Trademark (1872-1874)

A.4 Trademark (1879-1885)

A.4 Trademark (1879-1885)

A.5 Trademark (1886-1890)

A.5 Trademark (1886-1890)

J Trademark (1874-1884) *Longer on Block Planes

J Trademark (1874-1884*) *~1909 on Block Planes

JJ Trademark (1890-1910) Used on Block Planes

JJ Trademark (1890-1910)
Used on Block Planes

P Trademark (1886-1890)

P Trademark (1886-1890)

Q Trademark (181-1904)

Q Trademark (1891-1904)

S Trademark (1907-1909)

S Trademark (1907-1909)

T Trademark (1909-1912)

T Trademark (1909-1912)

V ("Victory") Trademark (1912-1918)

V Trademark (1912-1918) Also called “Victory”

X Trademark (1919-1920) 1st "Sweetheart"

X Trademark (1919-1920)
1st “Sweetheart”

X Trademark (1919-1920) Block Plane Variation

X Trademark (1919-1920)
Block Plane Variation

X Trademark (1919-1920) Block Plane Variation

X Trademark (1919-1920)
Block Plane Variation

X Trademark (1919-1920) Block Plane Variation

X Trademark (1919-1920)
Block Plane Variation

Y Trademark (1920-1921) 2nd "Sweetheart"

Y Trademark (1920-1921)
2nd “Sweetheart”

Y Trademark (1920-1921) Block Plane Variation

Y Trademark (1920-1921)
Block Plane Variation

Y Trademark (1922) Canadian Variation

Y Trademark (1922)
Canadian Variation

AA Trademark (1922-1935) 3rd "Sweetheart"

AA Trademark (1922-1935)
3rd “Sweetheart”

AA Trademark (1923-35) Canadian Variation

AA Trademark (1923-35)
Canadian Variation

BB Trademark (1935-Present)

BB Trademark (1935-Present)


New Planes vs. Vintage Planes

Stanley-Bailey-5.5C-Type-14One of the first questions many people contemplating their first  plane purchase ask is “Should I buy a new plane or vintage plane?” Indeed, this was the first question I asked before my first purchase many years ago. There is no simple single right or wrong answer. It depends on a few different factors:

  • What is your budget?
  • What is the plane’s intended use?
  • Are you willing to invest a little time setting it up and tuning it for use?

Virtually any plane you buy, new or vintage, is going to need some degree tuning and sharpening. The modern hardware store planes will require virtually the same tuning process as a 100 year old Stanley or competitor. Even a brand new Lie Nielsen or Veritas (both of which I am a huge fan) will need a final honing, if nothing else. The quality of hand tools today is generally abysmal. The demand and quality for hand tools fell sharply after WWII as electrically powered tools took off and the era of self-sufficiency evolved into one where paid tradesmen were hired for jobs around the home.  It’s only in the last decade or two that niche companies like Lie Nielsen and Veritas have again produced hand planes that are of acceptable quality for fine woodworking. These, however, come at a cost.

Lie Nielsen Smoothing Plane

Lie Nielsen Smoothing Plane

If you’re a professional or serious woodworker, investing $200 to $400 in a precision plane is arguably justifiable. Both companies mentioned above manufacture extremely high quality tools. On the other hand, the planes found at local hardware stores, big box retailers, and even some specialty shops – those generally under $150 – are simply not in the same class.  Quality of materials, manufacture, fit and finish are often quite poor. And it’s important to note that these brand new sub-$150 planes will undoubtedly require at least a couple hours worth of tuning and sharpening to make them function correctly.

By contrast, the vintage planes made by companies like Stanley, Sargent, Union, and others, especially from about 1910 to 1940, were of excellent quality, and are generally superior to most of the planes made today, especially those under the $100 to $150 price point.  These planes can be found in antique shops, yard sales, tool swaps, and eBay, often for as little as $10 and rarely (depending on the model and rarity) over $100. The caveat with vintage tools is that they will almost always need some degree of restoration and tuning.  Like the cheaper new store bought planes, the sole may need lapping, the frog face flattened, rough surfaces smoothed, and the iron sharpened and honed. However, for the same investment in time and effort, you will likely end up with a far superior plane for less money than you would have spent at your local big box hardware store.

Stanley Bailey no. 2, Type 8

Stanley Bailey no. 2, Type 8

If you have a couple hundred dollars to spend and want the best CNC machined plane money can buy, a Lie Nielsen is a good investment. However, if you’re like most people just starting out, pick up one (or even two) vintage Stanley planes and give them a try. The knowledge gained by disassembling, tuning, and sharpening it will actually aid in your understanding of its mechanics and function. Here are a few resources from the Virginia Toolworks site that might help:

***

Plane Restoration for Use – Extreme Salvage Edition

Let’s face it, not all planes and tools are salvageable.  Sometimes, the neglect and decay is so extreme that the best you can do is pilfer them for parts. Other times, the tool can be saved, but nothing short of a full refinishing effort is in order. As anyone who reads this blog will know, my principled philosophical approach is one of preservation, to retain as much of the original finish and character of the tool as possible. I focus the majority of my time and effort on tools that are good candidates for that sort of conservative preservation methodology. However, there are tools that occasionally cross my path that require a heavier hand.

In this post, I will detail one of the many methods you might employ to restore a heavily rusted plane for use. I found this Stanley no. 4 on eBay for around $10 plus shipping. It’s a Type 19, dating from the 1950s, and as you can see from this eBay auction photo, was in horrible condition.

SB4-T19 ebay

Stanley No. 4 – eBay Auction Photo

And here’s a shot I tool myself before beginning the restoration. As you can see, it actually looked a little better that the eBay photo indicated. Just a little…

SB4-T19 Rest1

Photo taken just before restoration

As with any restoration, the first step is complete disassembly.

SB4-T19 Rest2

Plane completely disassembled

With heavy rust like this, I used a razor blade scraper to remove as much of the surface crud as possible. I started with the iron and cap iron, then continued with the plane body and frog face.  With a little care, this can be accomplished without scratching or gouging the surface of the metal, and it’s amazing how much of the rust you can remove. You can see in the photo below the effect of having scraped the right half of the cap iron, and the lower three quarters of the iron.

SB4-T19 Rest3

Note the contrast of scraped vs. unscraped metal

Here’s a close up. Note the difference. The nice thing about this is virtually all of the patina remains on the surface of the metal. You can leave it this way if you prefer, or continue on as I will show in the next step.

SB4-T19 Rest4

Close-up showing the scraped and unscraped iron and cap iron

Since this was a later model Stanley (less valuable) and destined for shop use, I decided to scrub it down to a clean surface, removing all traces of rust, corrosion, and subsequently age and patina. There are several ways to go about it at this point (chemical anti-rust agents and electrolysis for example), but I decided to stick with doing it the old fashioned way – elbow grease. Using 220 grit sandpaper lubricated with WD40, I scrubbed down all the exposed surfaces. The light oil really softens the effect of the sandpaper, greatly reducing any visible scratches.

SB4-T19 Rest9

Oil sanding using 220 grit wrapped around a wood block

The screws, nuts and hardware were brushed using a soft steel 6″ brush on my bench grinder. Finally, everything was scrubbed using a general purpose cleaner. Low and behold, the japanning on the bed was actually quite good under all that crud.  I finished up by using an citrus degreaser (not shown in the photos). As you can see, the difference from where I started is pretty striking.

SB4-T19 Rest10

Big difference, huh? This is starting to look like a plane again.

I don’t like my brass components highly polished. I used oil lubricated steel wool and a small steel brush to clean them up for this plane. The lighting in the “after” photo makes the brass look a bit brighter than it actually was.

SB4-T19 Rest12

Brass before cleaning

SB4-T19 Rest13

Brass after cleaning

The final consideration is the hardwood tote and knob. Much of the original finish was gone and what remained was in bad shape. I lightly sanded the entire surface, applied a gel stain, and when dry, topped it with a couple of coats of varnish.  Once completely dry and cured, I polished it up using paste wax.

SB4-T19 Rest14

Tote and knob in original condition

After refinishing

After refinishing

With all the parts refinished and restored, the iron was sharpened and the plane reassembled and tuned for use. Naturally it doesn’t have the charm of a Sweetheart era, or even the character of a fine condition 1950s vintage, but this plane was saved from the landfill and with proper care, can easily shave wood another 70+ years.

SB4-T19 Rest16

SB4-T19 Rest17

***

Merry Christmas from Virginia Toolworks!

May you all be blessed with the warmth of family and friends, and the spirit and peace of Christmas!

Christmas Church


Extreme Restoration – Coleman 10 Gauge Shotgun

10-Gauge-breech-open

Coleman 10 Gauge Shotgun Before Restoration


This old Coleman 10 gauge shotgun has been in my family for over 100 years, originally belonging to my great-grandfather. When I was growing up, I remember seeing it in the “meat house” on my grandmother’s farm. The meat house was really nothing more than a shed, a precarious structure that had a dirt floor and a pretty serious lean to one side. Even then, the gun was little more than rust and bleached wood.  In the late 1970s, out of safety concerns, the meat house was emptied and demolished (actually, a couple of us just gave it a good push and it collapsed). The shotgun was one of the many items removed and it found a new home in my parent’s attic. There it stayed for another 30 years until my mom finally sold her house and moved into a senior home. The gun was passed around a little over the last 8 years until finally finding its way back to me earlier this year.

10-Gauge-3-quarter-right

Coleman Side View

I wasn’t able to find out anything about the Coleman brand, and assume it was one of the many mail order or hardware store branded guns available back around the turn of the 20th century. Many of these were inexpensive imports, usually from Belgium. As you can see in the photos, the gun was in pretty bad shape, with decades of exposure and rust damage. It was also missing both hammers. I’m not a gunsmith, but it was clear that this gun would never shoot again. Still, being a family piece I figured it might be restorable as a wall hanger. With little to lose, I dove in.

20140428_172515

Extremely Worn Lever Mechanism

The first order of business was disassembly. This proved more difficult than I had hoped. I was able to remove the side panels but a couple of key screws were completely frozen, making the rest of the action inaccessible. Believe me, I tried every trick in the book. There was just too much rust and some parts were simply fused together. Someone long ago tried to take the lever lock assembly apart to fix it and really buggered the whole thing up, even bending the lever. The wear on the lever’s locking mechanism was severe, and the lever is so loose it just flops around.

10-Gauge-muzzle

The Business End with Small Dent on the Left Edge

Cleaning up the barrels was relatively straightforward. I removed the rust using a soft steel wheel brush on a large powered grinder, finishing up with more brushing by hand. You see in the photo below the pitting from years of rust and neglect. I applied a little cold blue to darken the metal to approximate a pretty nice looking aged patina. Although the photo flattens it out, there’s actually a pretty nice luster to the metal. There was one small dent at the very end of one barrel that was easy to hammer out using a wooden dowel and a nylon hammer. I ran a brush and then a rag through both barrels to clean out the loose rust.

barrel post rest

The Barrels After Restoration – You Can See the Pitting from Years of Rust


Since I couldn’t separate the stock from the receiver thanks to one extraordinarily frozen bolt, I just had to do the best I could with it all in one piece. I managed to remove the action on both sides, despite one screw with a broken head. The actions were in surprisingly good condition compared to the rest of the gun. I cleaned up the rest of the receiver and trigger guard as much as possible. The damage to the metal was fairly severe so there were limits as to just how much I could do.

10-Gauge-stock-&-receiver-left

The Stock and Action Before Restoration

The stock had just a few trace spots of the original finish, and suffered from prior water and insect damage as well as some chipping around the receiver. I gave it a good scrubbing with mineral spirits and then applied several coats of Watco oil finish. I used a combination of both walnut and mahogany tints to get the color I wanted. The reddish mahogany adds a little warmth that I like.

With the action cleaned and oiled, I reassembled everything, made a screw to replace the one that was broken. And when I say make, I mean I took a screw of comparable size, shaped and finished it to match the original as close as possible.

10-Gauge-stock-&-receiver-right Post 1

The Stock and Action After Restoration, Awaiting Hammers


Since the gun was missing both its hammers, I had to source replacements. This would have been a more critical endeavor if this were a shootable gun, but being a wall hanger, I only needed hammers for cosmetic reasons. I searched for vintage hammers, but finding a matched pair that were the right size was difficult and I didn’t want to spend a lot. I ended up ordering a new pair from Dixie Gunworks. Being new castings, they required a considerable amount of work filing, drilling, sanding and polishing. Given the condition of the rest of the gun, I didn’t go overboard making them look perfect. I debated whether or not to blue them and in the end went ahead. I like the contrast with the rest of the receiver. Attachment to the gun appeared to be friction fit. I have no idea if this was how the originals were attached, but the posts (or whatever you call them) were solid. So friction fit them I did. I filed them for a tight fit and pounded them on using a wooden dowel to protect the finish.

All in all, considering the condition when I started, I think it turned out pretty well. It’s still a rough looking piece, but it looks a darn sight better than when I started, and at least now is presentable enough to hang somewhere.

10 Gauge Complete DSC_1562

***

Craftsmanship is Often a Simple Proposition


Paper Ring

I had a customer one time who wanted to propose, but his girlfriend was ultra-practical and didn’t want him to spend money on a diamond ring. She told him that any ring would do, as it was what it represented that was most important. She told him it could be made of paper for all she cared.

Inspired by the gum wrapper chains we made as kids, this is the ring I made for him, scaled to be the correct finger size for her, and crafted from acid free cotton paper, to keep it from turning yellow and getting brittle over time.

***

Professional Services Now Offered by Virginia Toolworks!

VA Toolworks Condensed Logo - LetterheadI am pleased to announce that Virginia Toolworks is now offering professional restoration, identification, and valuation services at very competitive prices!  While the primary focus is, and has always been, on vintage hand tools, I also offer restoration of faded and damaged photographs, as well as cosmetic restoration of firearms.

Restoration

Tools – Adhering to the archival principles of restoration that have always been the foundation of Virginia Toolworks, we now offer archival cleaning and rust removal, and tuning and sharpening (if desired), with starting prices as low as $25.  For more information please see the Services Page.

Photographs – With 35 years of experience as a photography enthusiast, including considerable darkroom exposure (see what I did there?) before transitioning exclusively to digital approximately 16 years ago, I offer digital restoration of old damaged and faded photographs with prices starting at $50.  Examples of my work can be viewed on the Photo Restoration page.

Firearms – As most followers of this blog have seen, I occasionally do restoration work on firearms.  This work is primarily cosmetic – I am not a gunsmith. I offer cleaning of the action, restoration of wood, and light (cold blue) refresh of metal surfaces.  I can also help with missing parts.  However, to verify or ensure safe functionality before firing, you should see a qualified gunsmith for a safety inspection.

Identification

Virginia Toolworks now provides simple assistance identifying tools for a nominal charge of $10 per tool.  For more information please see the Identification Page

Valuations (Appraisals) & Research

Virginia Toolworks now provides written valuations (retail value) and historical research at a rate of $50 per hour with a one hour minimum.  For more information on Valuations, please see the Valuations/Appraisals page.

For more detailed information on these and other services provided by Virginia Toolworks, please see the Services Offered page.

***


When a 2×4 is No Longer a 2×4 – Living Life by the Lowest Common Denominator

Lowes-Home-Improvement-Store

There was a small news story recently that went largely unnoticed across the country.  Home improvement retailer Lowes lost a $1.6 million lawsuit in Kalifornia (see what I did there?) for its the labeling of building products, specifically, dimensional lumber.

A Superior Court judge laid out terms by which the retailer must advertise its 2x4s and other dimensional materials in response to a civil “consumer protection” action. Judge Paul M. Haakenson, handed down the order in response to a case involving claims by the Marin County, Calif., district attorney’s office that the retailer “unlawfully advertised structural dimensional building products for sale.” His finding lists three main rules for the retailer to follow going forward:

  • “Common descriptions” must be followed by actual dimensions and labeled as such. For instance, a 2×4 must be followed with a disclaimer that the wood is actually 1.5-inches by 3.5-inches and include a phrase equal or similar to “actual dimensions.”
  • “Popular or common product description,” like the word 2×4, must be “clearly described as ‘popular name,’ ‘popular description,’ or ‘commonly called.’”
  • Dimension descriptions are required to use the “inch-pound unit,” meaning they must include abbreviations such as “in., ft., or yd.,” and can’t use symbols like ‘ or ” to denote measurements.

According to a 1964 publication by the U. S. Department of Agriculture titled History of Yard Lumber Size Standards, the national standard for lumber dimensions was established in 1924, with several revisions made over the years since. How is it, then, after 90 years of national, government affirmed standardization, the “consumers” of Kalifornia are so bewildered that one company can be singled out and levied such an exorbitant fine for “unlawfully” labeling it’s product?

Surprised?

The real underlying issue, the greater concern if you will, has nothing to do with lumber dimensions.  This case is a mere symptom of a much deeper problem. There’s an increasing ideological divide in this country in which the courts and our government continually impose laws and rules that pander to the lowest common denominator. I believe the birth of this mindset originated with the McDonalds hot coffee lawsuit in 1992, which paved the way for these frivolous progressive “consumer protection” actions.  Common sense and personal responsibility have long since given way to this “nanny state” mentality, through which we all must be protected from our own stupidity and negligence.  After all, anything that threatens (reveals) our intelligence, or lack thereof, must be dangerous and offensive, yes?

Clearly not everyone thinks this way, hence the ideological divide. And make no mistake, the divide is real and gets wider every day as a result of the cultural and social dependencies nurtured by actions such as this lawsuit. I have no doubt that a significant proportion of the population is cheering this as a legal and moral victory. For every one of us who is outraged at the frivolous absurdity of this Lowes finding, there’s no doubt at least one counterpart in America who celebrates this as a victory against capitalistic dominance and discriminatory business practices.

We are a nation completely obsessed with taking offense. It dominates our news, our daily conversations, our social media, and shapes our political alignment.  Somebody please tell me, where is it written that anyone anywhere has a “right” to live without offense? Just because you’re offended, uninformed, underprivileged, or blatantly stupid, doesn’t mean you’re being discriminated against. And just because you’re inconvenienced certainly doesn’t mean you’re entitled to compensation.  Or at least it didn’t used to.

Everyone and his brother is fixated on one label or another, and any word, term, phrase, color, pattern, sign, or whatever that might cause someone hurt feelings is suddenly deemed insensitive if not discriminatory. Even our own US flag is under attack by those who worry it might be viewed as offensive. Imagine that!  Offensive!? Offensive to whom? And who cares?  This is America, and this is our flag, is it not?  But I digress.

We are becoming a nation of helpless entitled pathetic crybabies, more interested in reality television, selfies, and a government provided free ride than in learning and earning our way in this world. And God forbid, anything that offends any one of us, the lowest common denominator, might be socially and politically unacceptable. Perhaps all adjectives should be banned and we should all wear homogenous pattern-less uniforms of beige or some other benign color. While we’re at it, we can do away with nouns and names and just assign everyone a serial number. Equal income, equal distribution of wealth, equal opportunity regardless of effort or intelligence.  Socialism, Marxism, Communism…?  Where does it end?

You know what’s really scary?  There are plenty of “Americans” who think that’s a great idea.  How’s that for offensive?

I’ll tell you one thing, bub… if you don’t know that a 2×4 isn’t actually 2 inches thick and 4 inches wide, do us all a favor – instead of getting sawdust in your mangingo and lawyering up, put down the hammer, go buy yourself a box of tampons and a Midol, wash it down with that skinny soy milk double latte frappawhatever, and hire someone who knows what the hell he or she is doing.

***

Off Topic – Kestrel Holster Review

DSC_1207

Kestrel IWB Belt Clip Holster

I’ve been looking all summer for an easy on and off IWB holster for my 1911. My criteria was pretty simple – a kydex holster with a 1-1/2″ belt clip, full body shield, and adjustable retention (most of the holsters I found used non-adjustable rivets). I looked at Blade Tech and some others, but their prices were much higher than I wanted to spend for a plain kydex holster. After considerable research and due diligence, I found a seller on eBay who offered what I was looking for – Kestrel Holsters. Kestrel also has a website at kestrelholsters.com with the full selection of colors and models, including both IWB and OWB.  If you don’t see your gun listed, contact them for availability.

Kestrel sells two flavors of IWB holsters, both for $30, shipping included. One has the standard thumb belt clip at a 10 degree cant, the other comes with a tuckable strut belt clip. They offer a variety of colors, and I went with the Olive Drab and thumb clip. Kestrel appears to make their holsters to order, but the lead time was less than 2 weeks. I received an email with the tracking number when it shipped, a nice touch. The holster showed up a couple of days later. 

DSC_1208

Replaced holster with safety on

I was immediately impressed with the workmanship of the holster, but soon realized the mold was made with the safety in the off position instead of on. In my experience, 1911s are designed to be carried with the hammer cocked with the safety on. There was no provision on the order form one way or the other, and it never occurred to me to ask or specify. I contacted Sean at Kestrel with the problem, and he responded within an hour with instructions to return the holster in exchange for a new one. He also paid my return shipping. The shipping was refunded immediately, I returned the first holster, and the replacement arrived 4 days later. 

The solution is always more memorable than the problem. Score one for service excellence!

DSC_1209

Super slim profile for minimal bulge

Had I ordered one of these holsters for a specific manufacturer and model, I would have expected it to be a perfect fit right out of the package. But ordering a holster for a 1911 in the generic sense necessitates a little flexibility in the expectations. I expected to have to do a little fine tuning for my specific gun, so was neither surprised nor disappointed when the holster didn’t “fit like a glove.” For one thing, the front slide serrations and sharp edges on my Colt are problematic with every holster I’ve tried. So, I did a little filing and smoothing here and there, and after 15 minutes or so, my gun was in and out without a dusting of olive drab shavings coming with it. Retention is extremely good – the gun is held very securely yet draws without hanging. Because it provides such a thin profile, it’s also surprisingly comfortable! I can easily wear this all day.

Overall, I am very impressed with this holster and even more so with the service I received from this small company. For $30, you’re not going to find a better kydex solution. Is it a perfect fit for my particular 1911? No, but it’s close enough. Would a $75 dollar holster from Blade Tech fit better?  Perhaps, I don’t know.  The 1911 platform has so many different variations, a one-size-fits-all holster is going to come with some small compromises. I honestly don’t think this would even be a thought with most other handguns. Nevertheless, at $30 each I will have no hesitation ordering more holsters from Kestrel for a couple of my other pistols. Sean confirmed they have holsters for more models coming.

To sum it up, if you’re looking for a simple kydex IWB belt clip holster, give Kestrel a close look. It might just be the best $30 holster you’ll ever buy!

DSC_1211

Shown with t-shirt tucked in. Easily conceals with shirt out.